Getting Started
New to Omniscient? You’re in the right place. This quick start takes you from setup to your first shot in minutes.
1. Get Omniscient
On your iOS or iPadOS device, download Omniscient.
2. Open Omniscient
Open Omniscient and follow the onboarding. You’ll arrive at this screen:
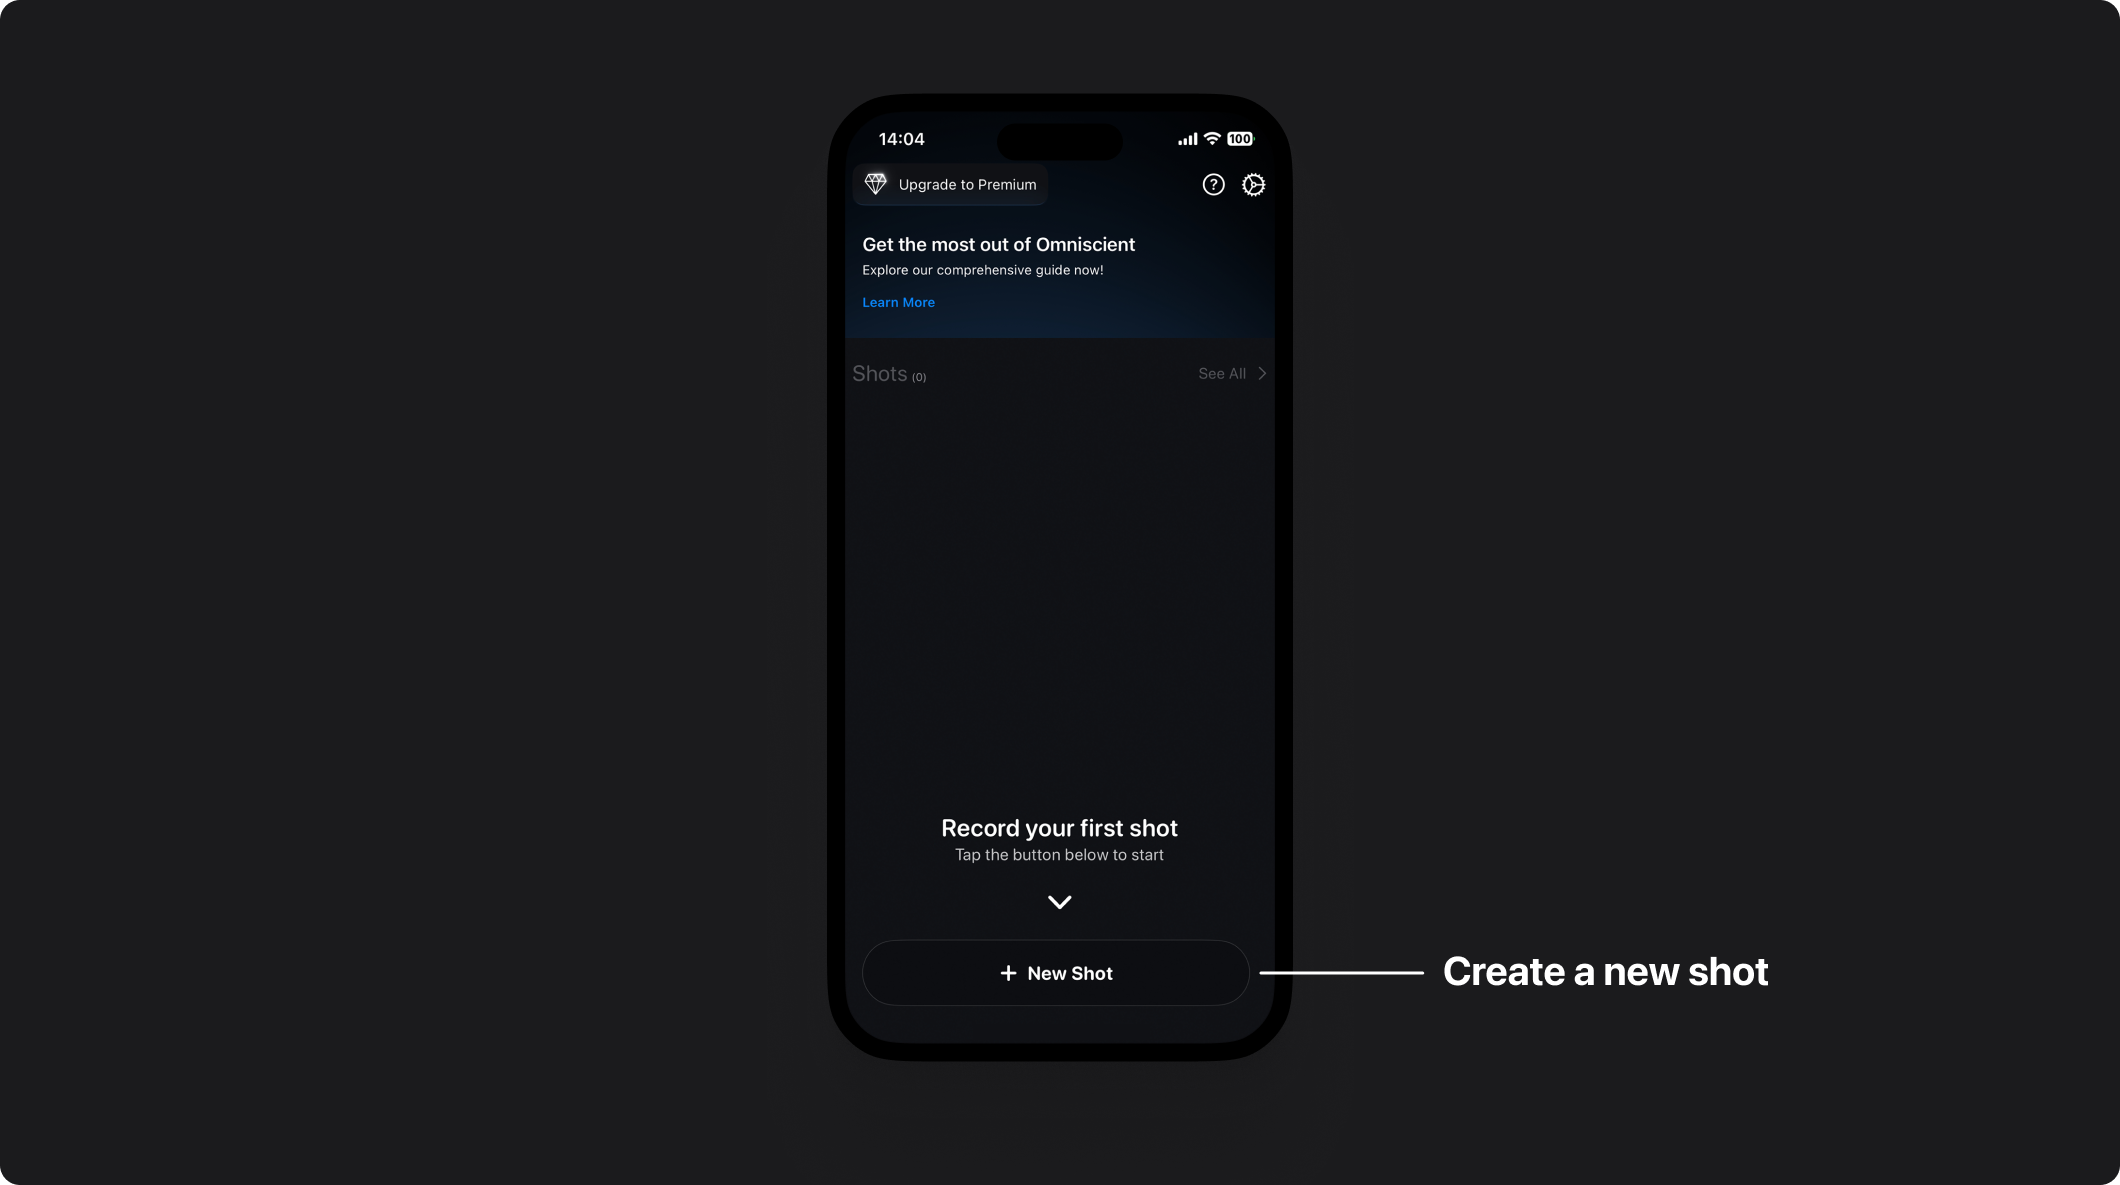
Tap New Shot.
3. Make a Scan
You’re now on the recording page, where you can scan and then record.
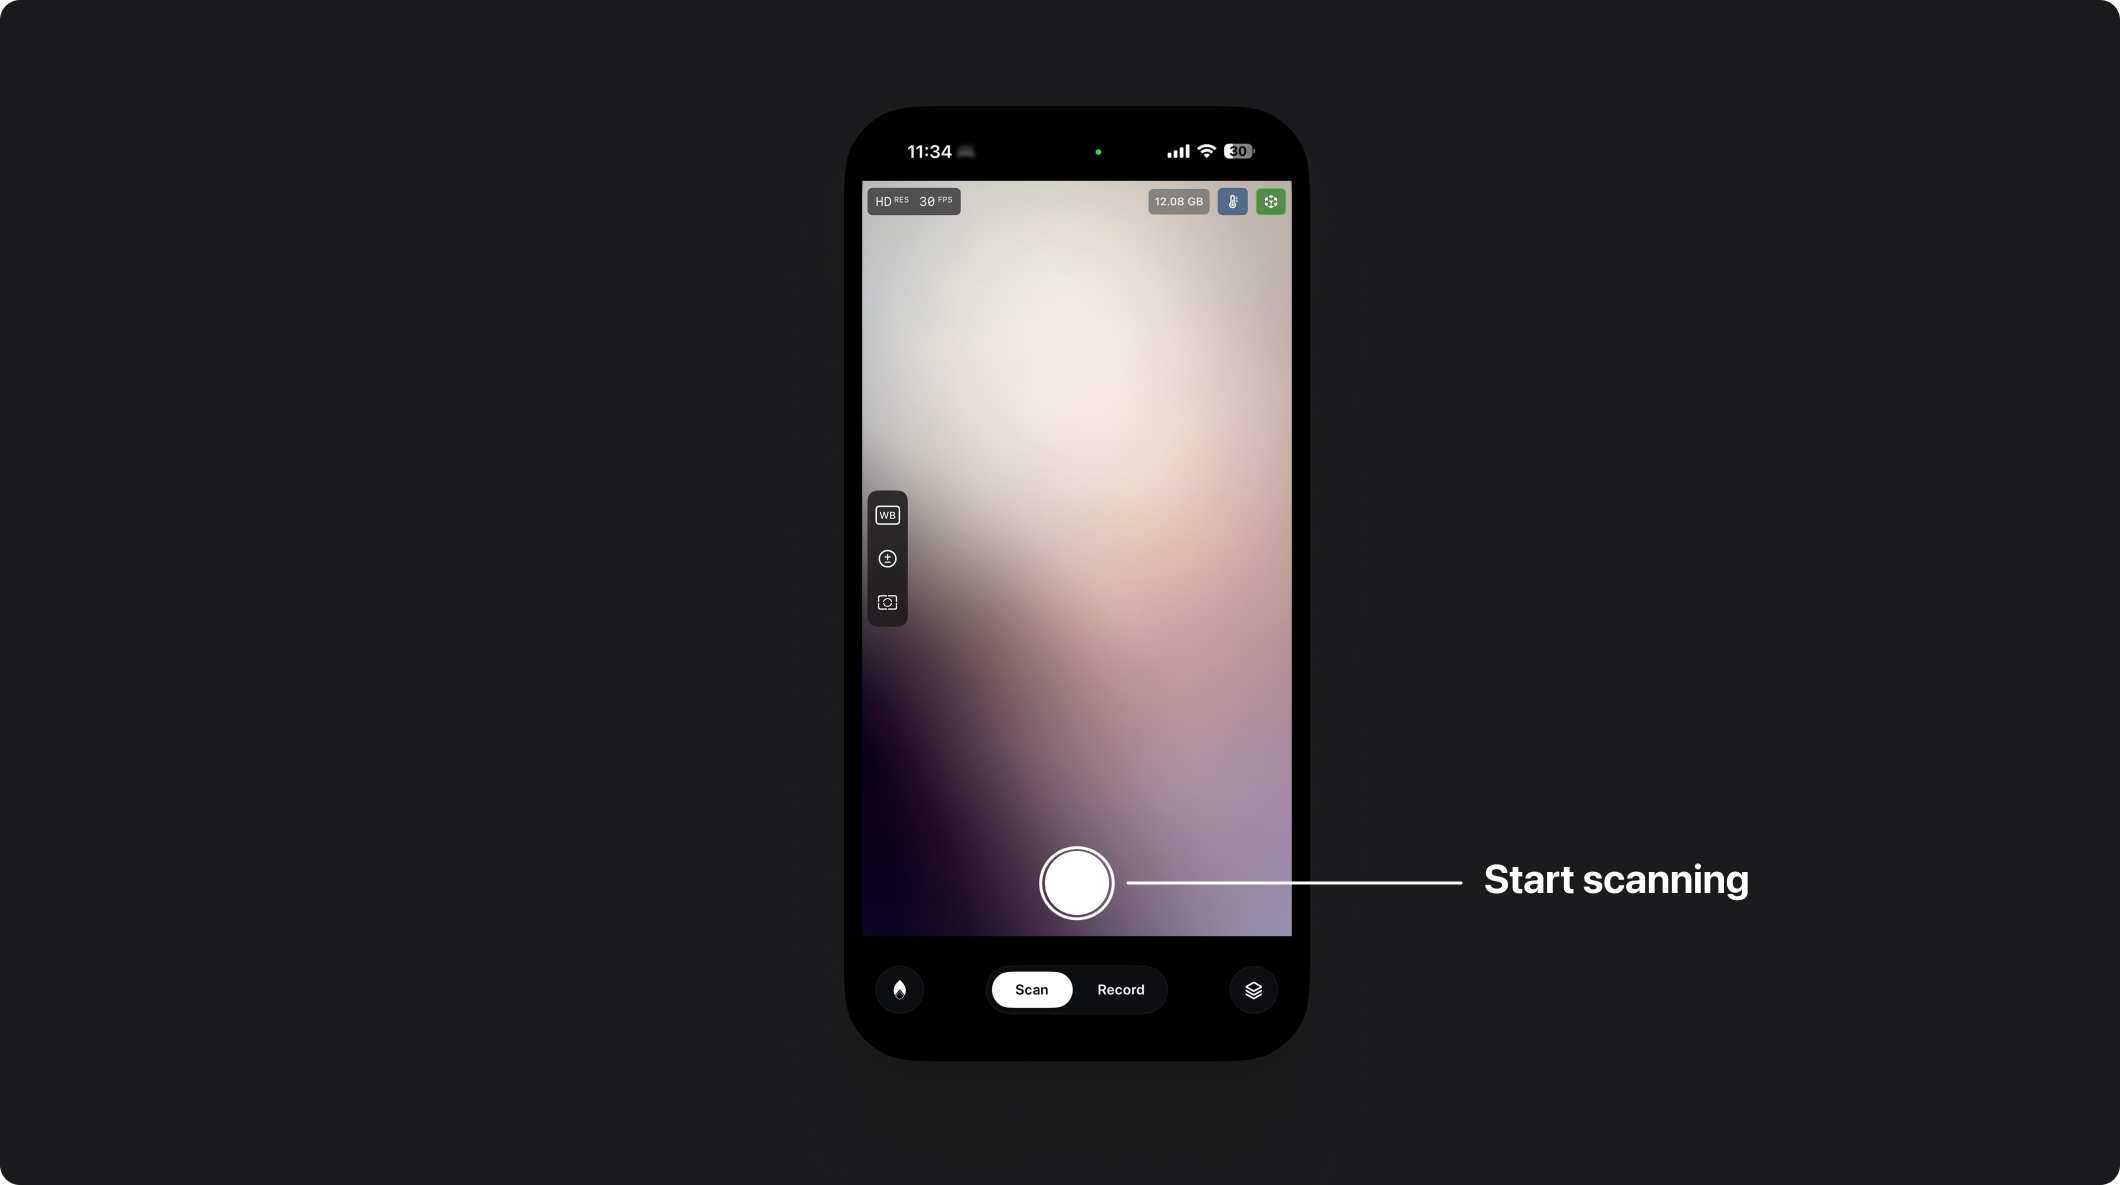
Tap the white button, move your device to capture the environment, then tap the white button again to finish. For best results, move slowly.
4. Record your Shot
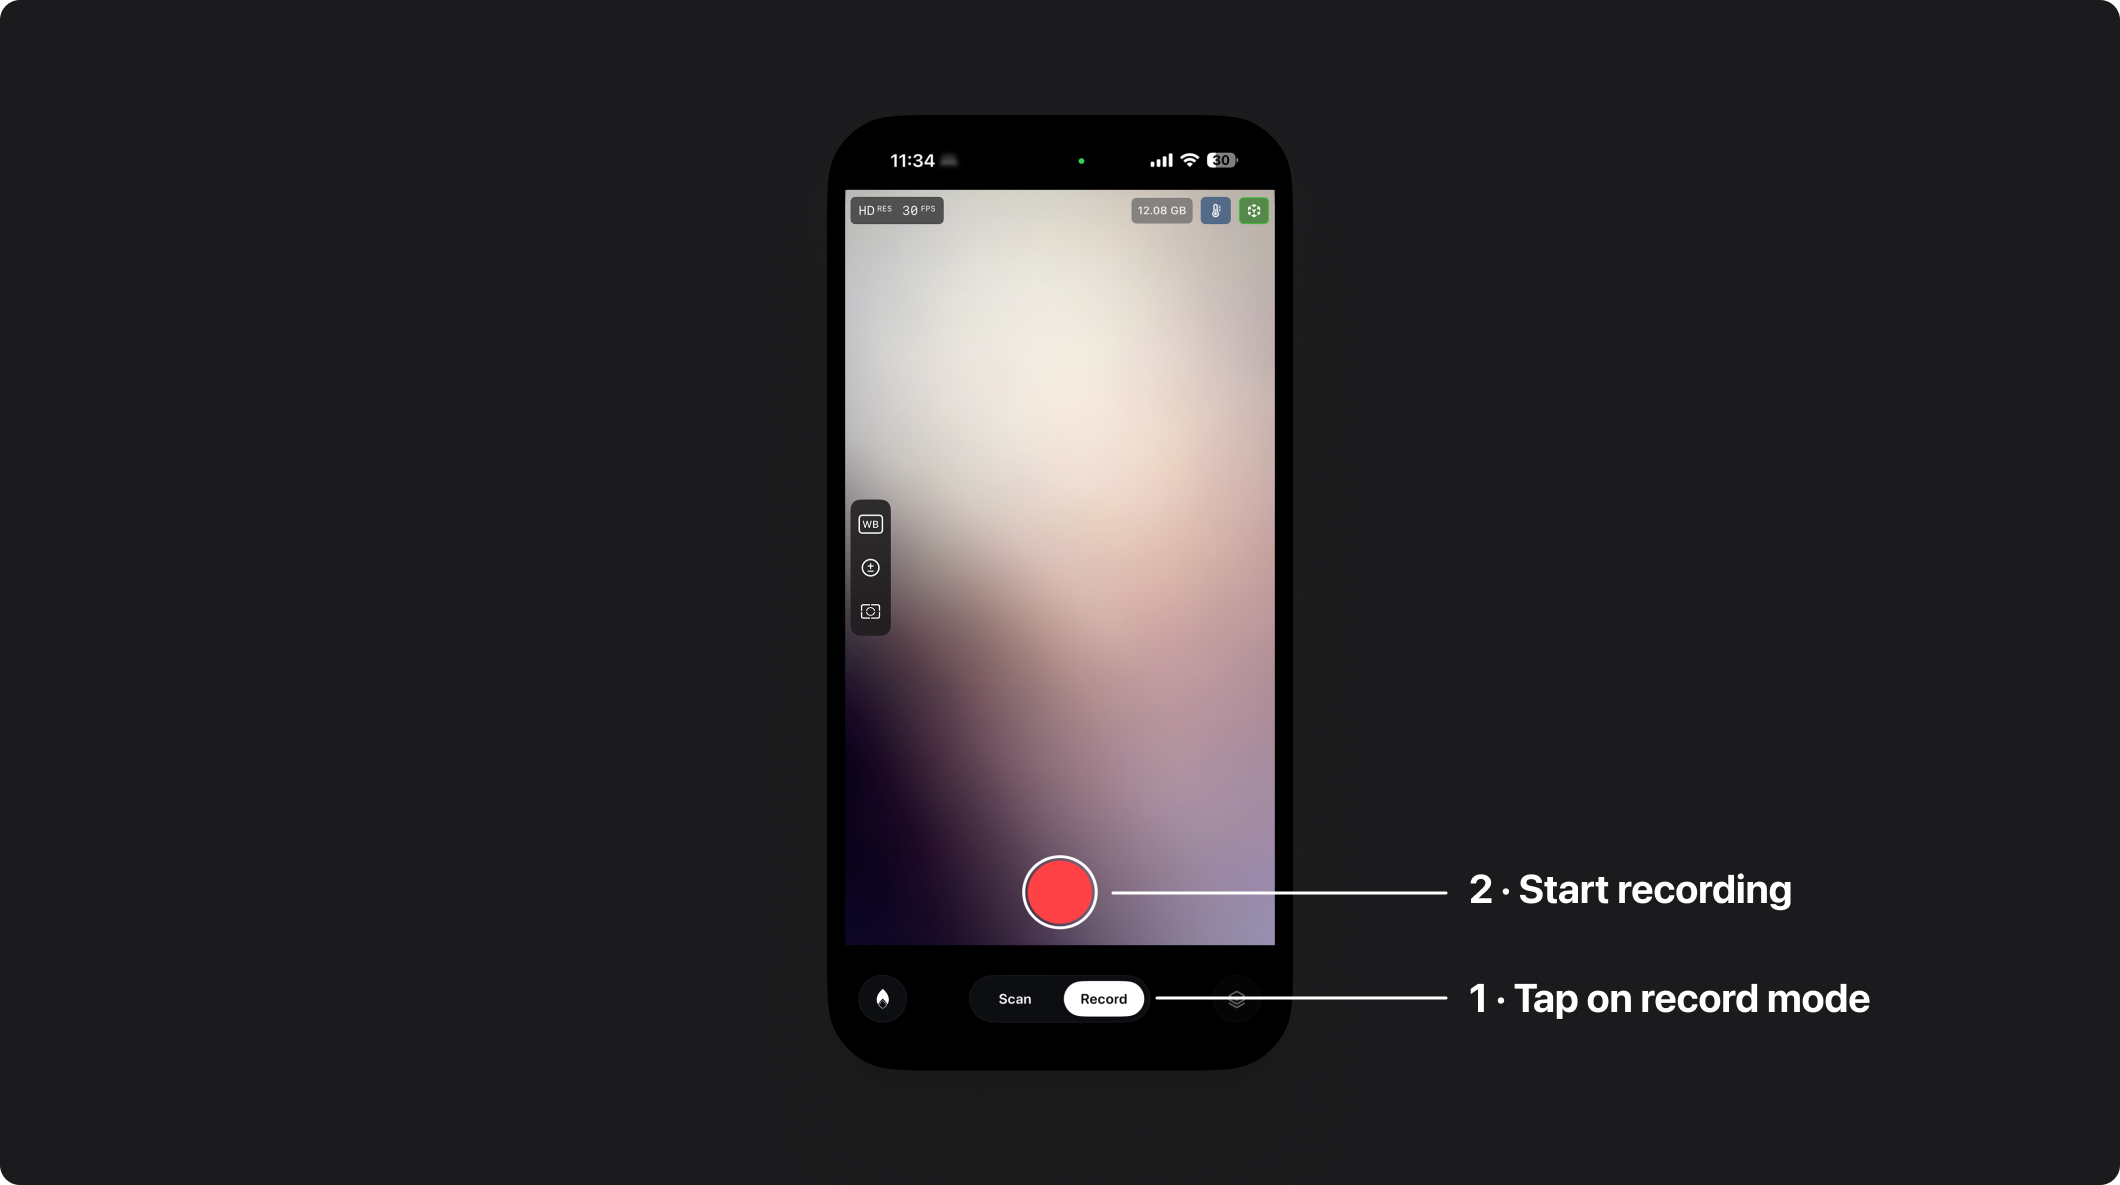
Tap Record ① to go to record mode. Tap the red button ② to start. Tap the red button ② again to stop.
🎉 Your first shot is complete - let’s preview it!
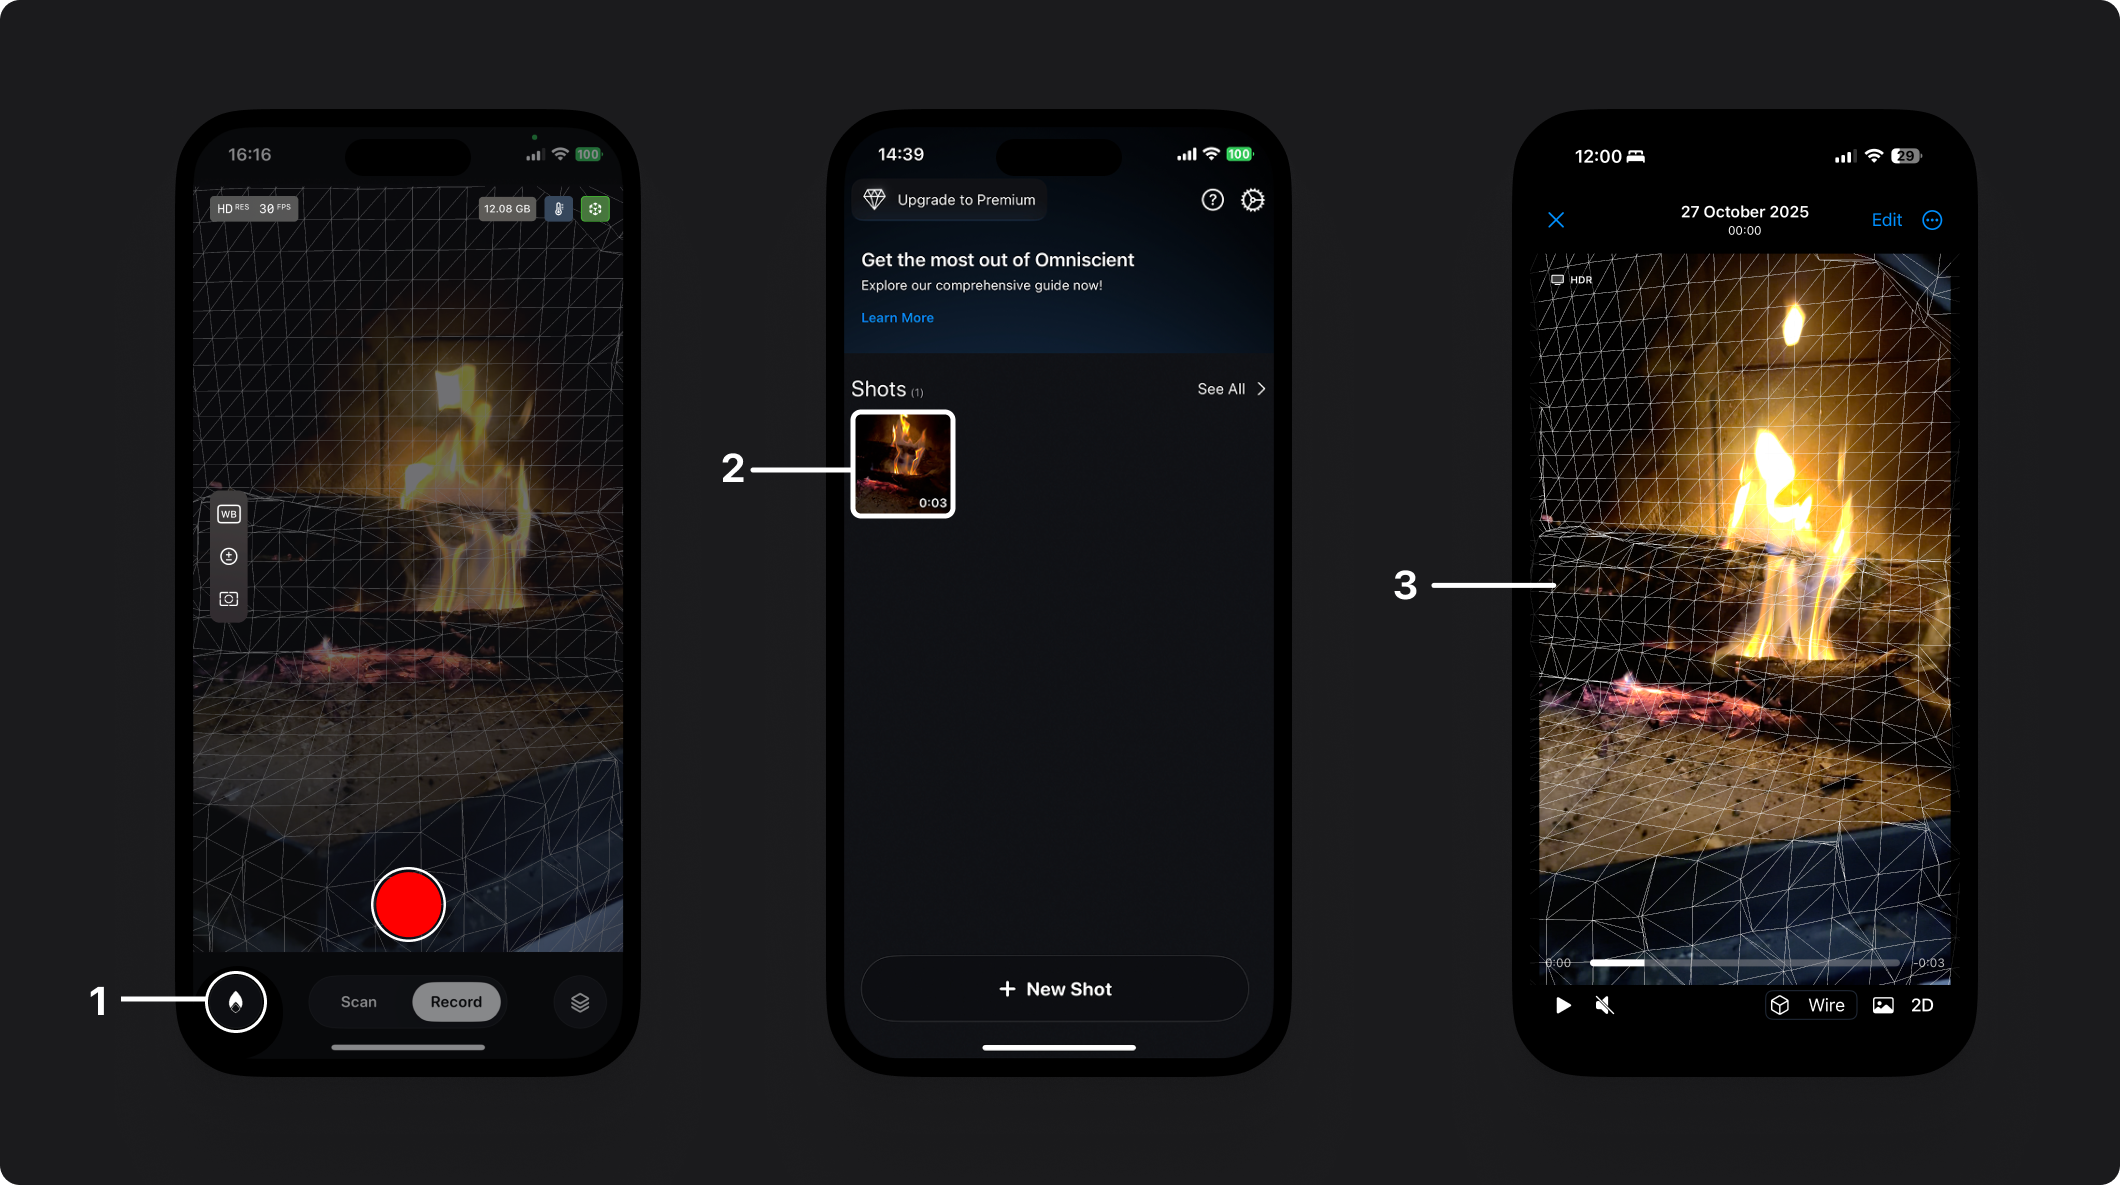
5. Preview your Shot
From the home page ①, tap your shot ② to preview it ③.
If something looks off, check the best practices.
6. Export your Shot
Tap the three dots ①, then press Export ② to open export options. Want to export multiple shots? See the multiple export guide.
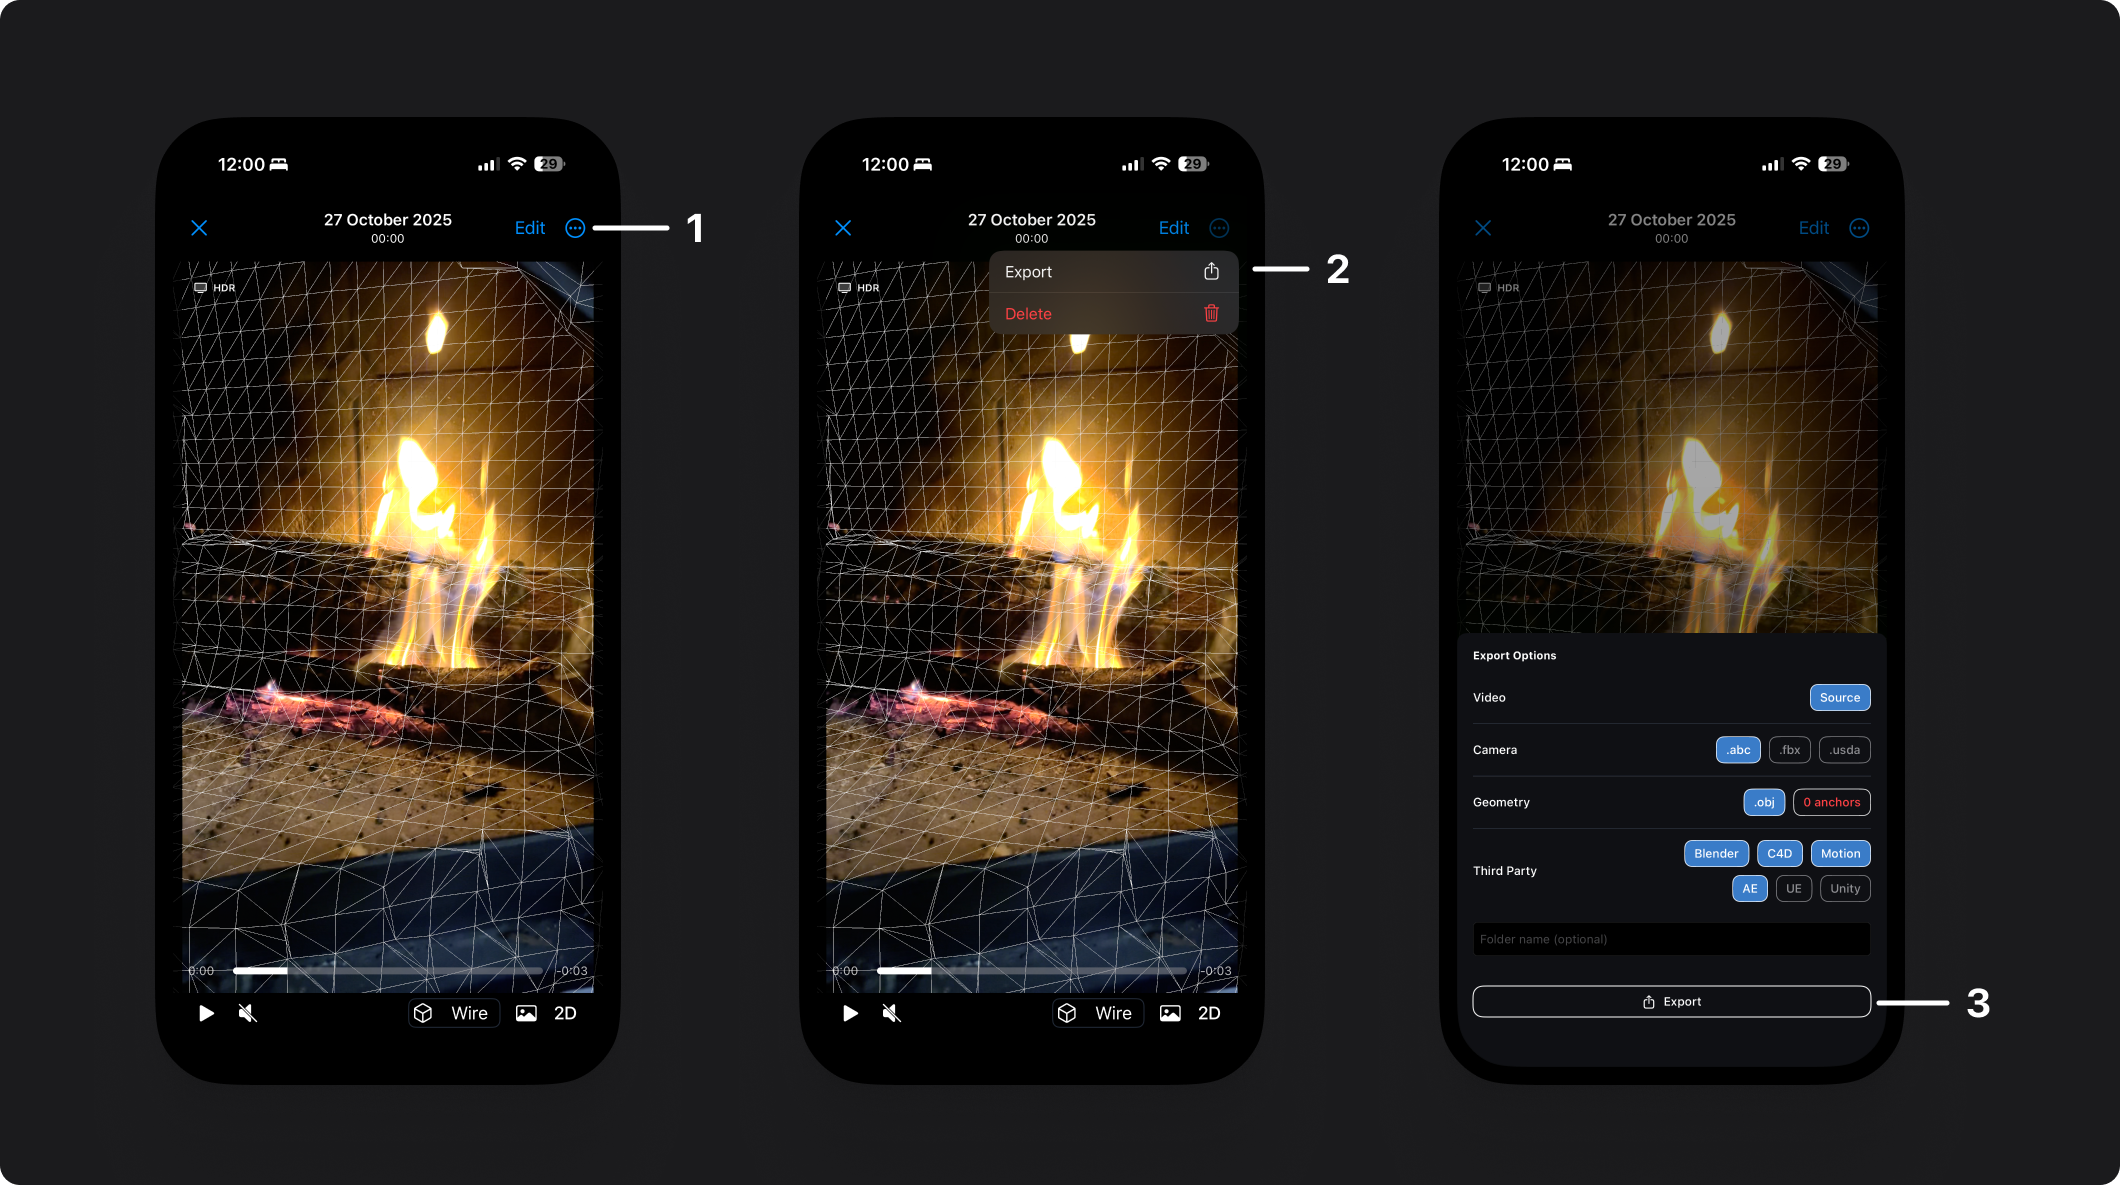
If the defaults don’t fit, check the export options to fine-tune settings.
When you’re ready, tap Export ③ and choose where to save your files. The process differs depending on your computer:
macOS
Use AirDrop for the fastest transfer.
Windows
Windows doesn’t support AirDrop. Try one of these:
- Cloud: Save to Google Drive or Dropbox.
- Local: On the home page, go to Settings → Export and turn on Export in Files, then export again. Files will appear in the Omniscient folder in the Files app. Connect your device to your computer and copy the files with the Apple Devices app (Windows 10/11) or iTunes (older Windows setups).
7. Import into your VFX Software
Great, your shot’s ready to use! Import it into your favorite VFX or 3D tool to start working with the camera track.
Follow the integration guides to see how to bring your tracking data into Blender, Unreal Engine, After Effects, and more.
Open Integration Guides →