Blender
Download the add-on
The Omniscient file (.omni) allows you to quickly import the video/camera/geometry into Blender. To use it, you'll need to install the Omniscient add-on first.
...or download and Install from Disk
Version 3.0.10 for Blender 4.2+
Usage
There are two ways to import shots from Omniscient:
-
Using the Top Menu:
- Go to File → Import → Omniscient (.omni).
-
Using the Omniscient Panel:
- Access the Omniscient panel on the right side of the interface.
- Click the Import button to import Omniscient (.omni) files.
Omniscient Panel
Import Preferences
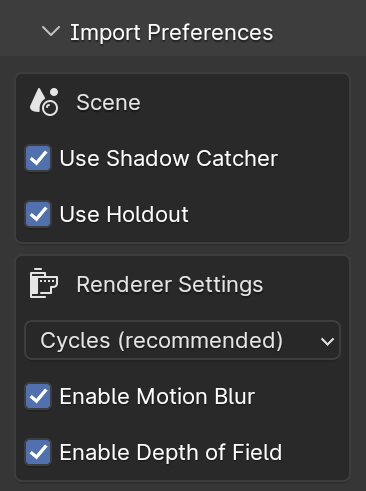
- Scene:
- Use Shadow Catcher: Toggles the shadow catcher property on the mesh.
- Use Holdout: Toggles the holdout property on the mesh.
- Renderer Settings:
- Render Engine: Sets the preferred rendering engine.
- Enable Motion Blur: Toggles motion blur in the render settings.
- Enable Depth of Field: Toggles depth of field in the camera properties.
The import settings only affect the import process and will not impact shots that are already imported.
Shots
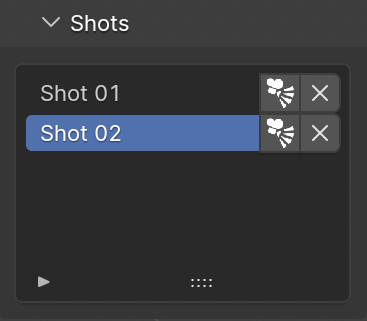
- Shot Selector: When selecting a shot, all the necessary settings specific to that shot are adjusted.
- Camera Projection: Toggles the camera projection for the selected shot. To preview the projection, set your viewport shading to "Material Preview".
The Omniscient Add-on automatically creates a camera projection shader to project the video onto the mesh, enhancing bounces, reflections, and refractions.
Multiple shots can project onto the mesh if they were done using the same scan.
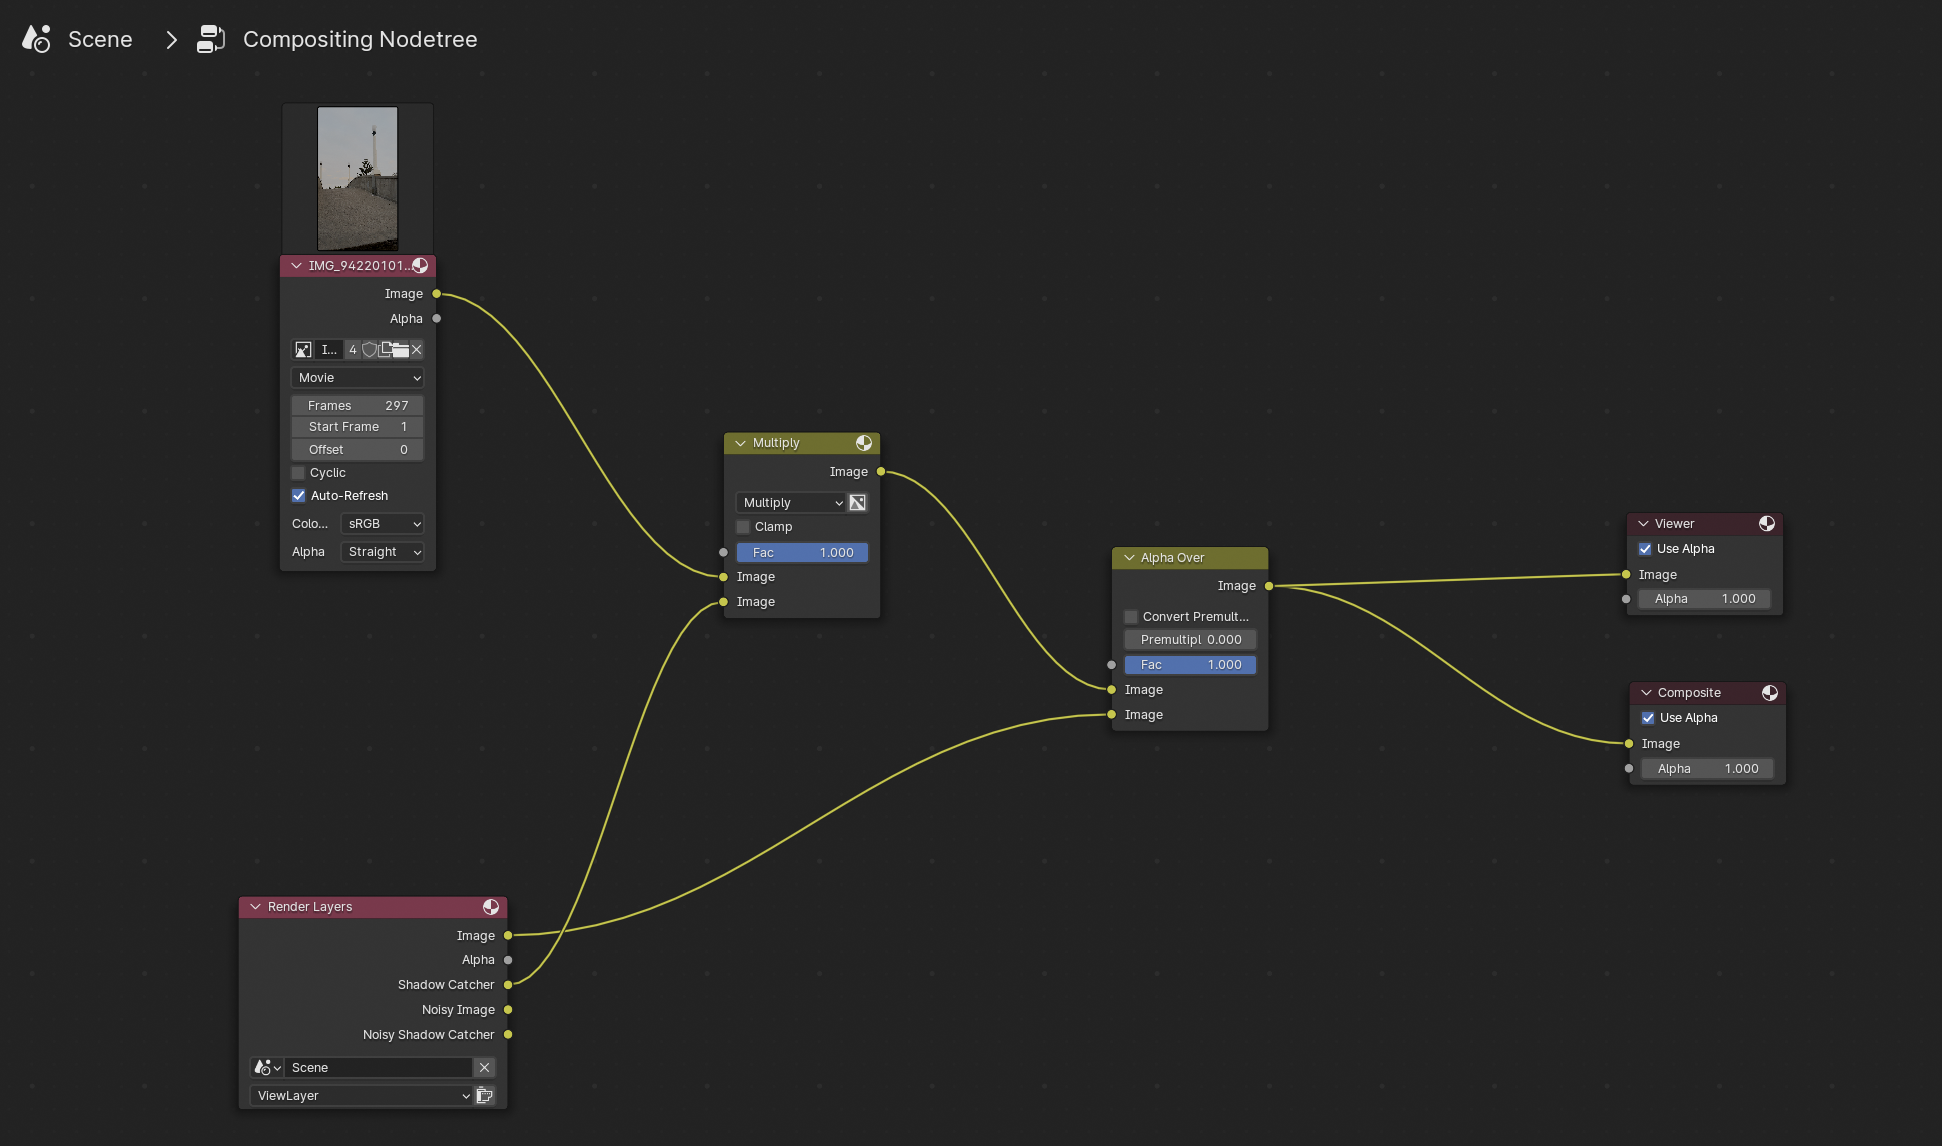
Compositing
When a shot is imported using the Add-on, a compositing graph is automatically set up.
It merges your 3D models over the original video and, if enabled, applies the shadow catcher.
GitHub Repository
Our Add-on is open source, and we welcome any type of contribution - whether it's a new feature request, an idea for improving existing functionality, or even code changes.
For more details and updates on the Blender Add-on, visit the GitHub repository.
We appreciate your support in helping us make our Add-on better!
FAQ
How can I ensure camera animations are included when exporting from Blender as .fbx?
If you're experiencing issues with camera animations not being included in your FBX file, the likely cause is Blender's handling of live animations from Alembic files.
A solution is to bake the camera animation. In Blender, select your camera, press F3 to open the search, then choose 'Bake Action'.
This process will create a keyframe for each frame of your animation, ensuring that the camera animation is preserved when exported as an FBX file.
Does the 3D scan include textures on the mesh?
If you are using our app for scanning rooms or objects, you might notice that the resulting 3D mesh does not include textures.
At present, our app generates a 3D mesh but does not provide textures with the scans.
This is something we are planning to include in a future update.
Why does my landscape shot appear as portrait?
Make sure the Portrait Orientation Lock is disabled on your device while recording. If it is enabled, the shot may appear rotated after import.