DaVinci Resolve
To use Omniscient results in DaVinci Resolve, you need to import and set up the exported files from Omniscient, then combine them. This page will guide you step by step through the process.
This page has been made using DaVinci Resolve 19; the process might slightly change with other versions.
Import your shot
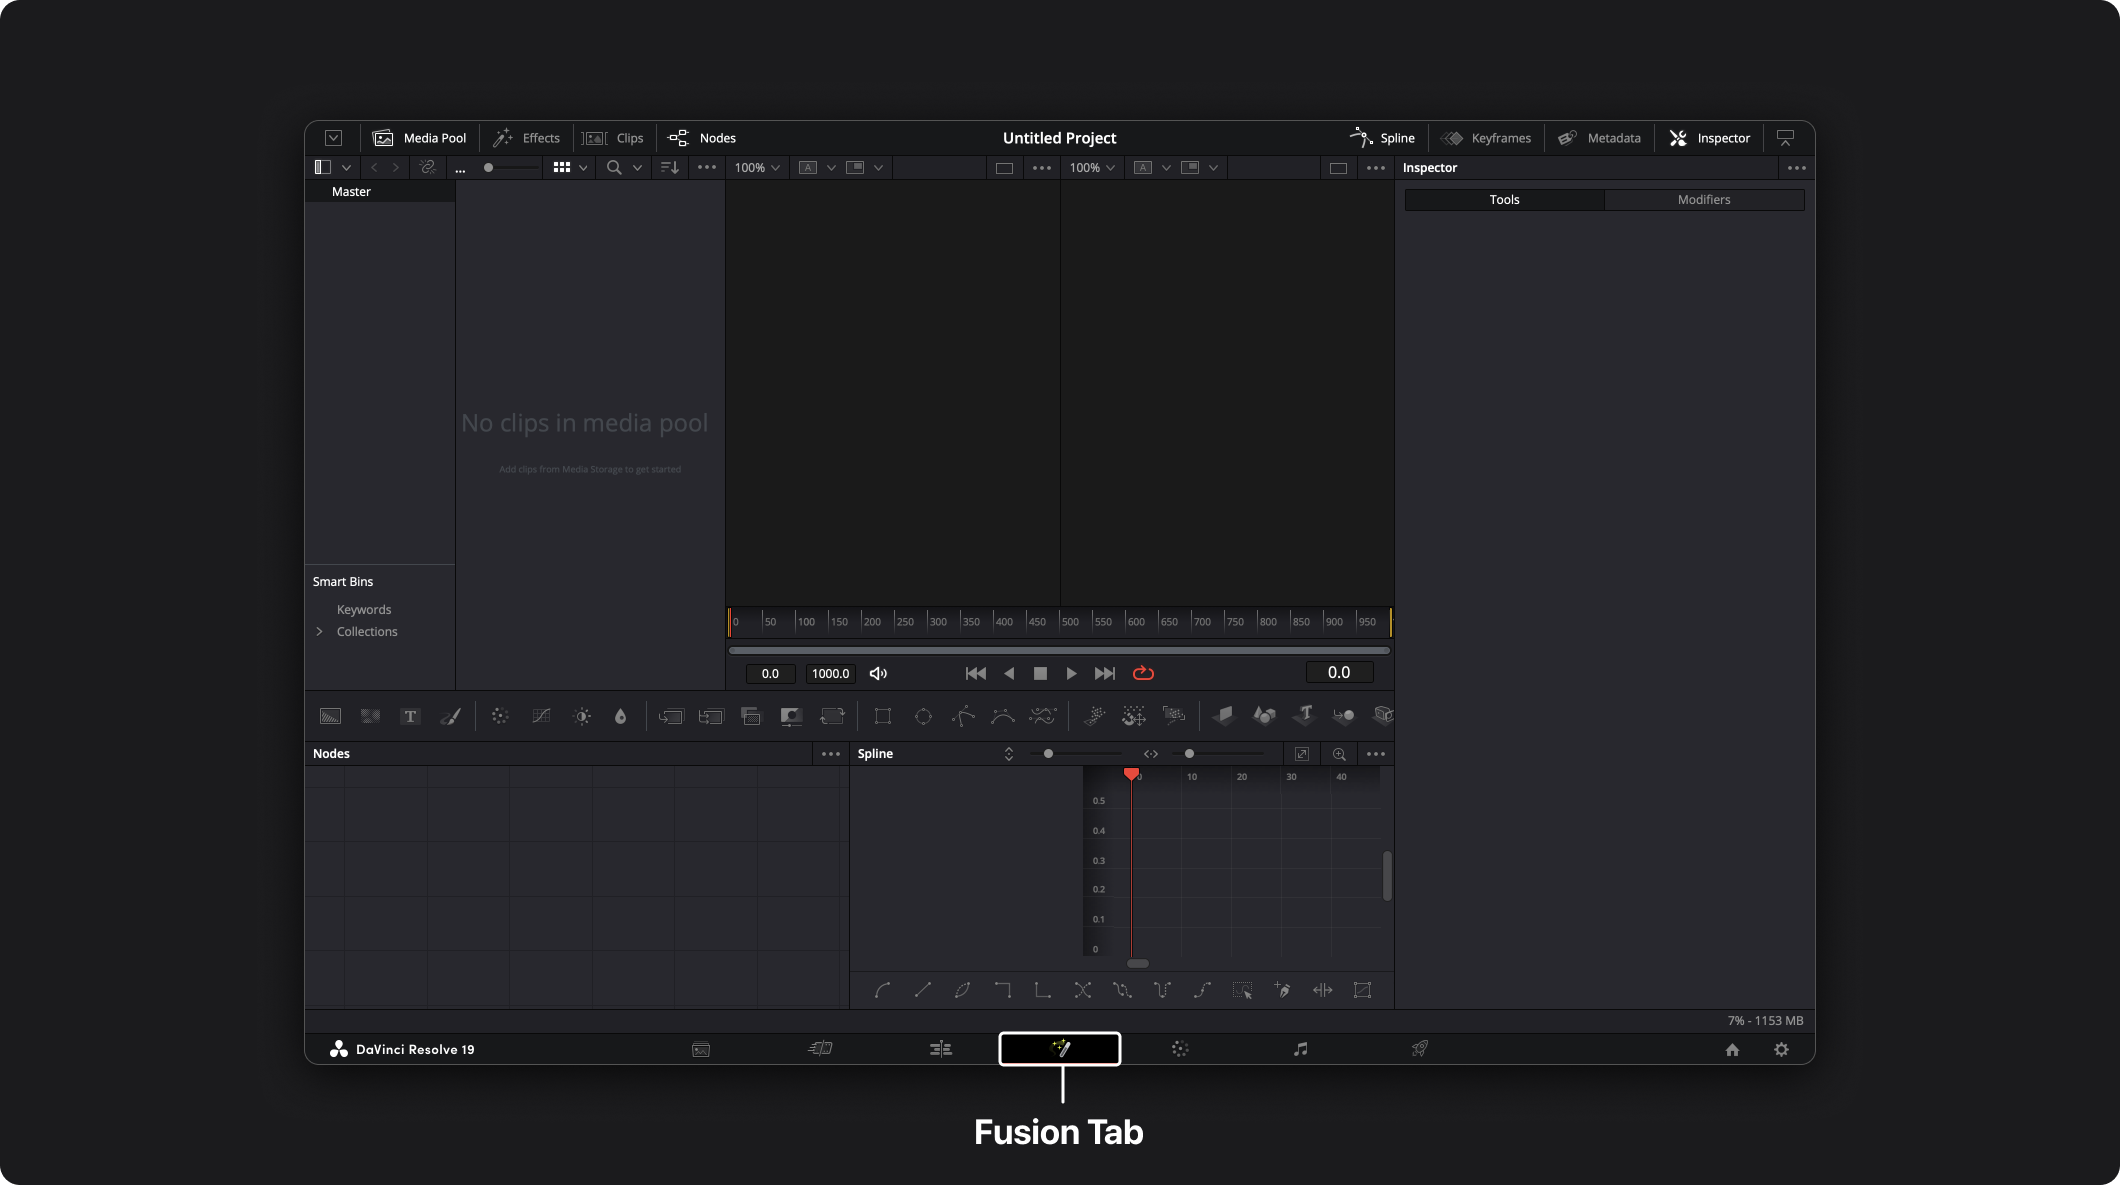
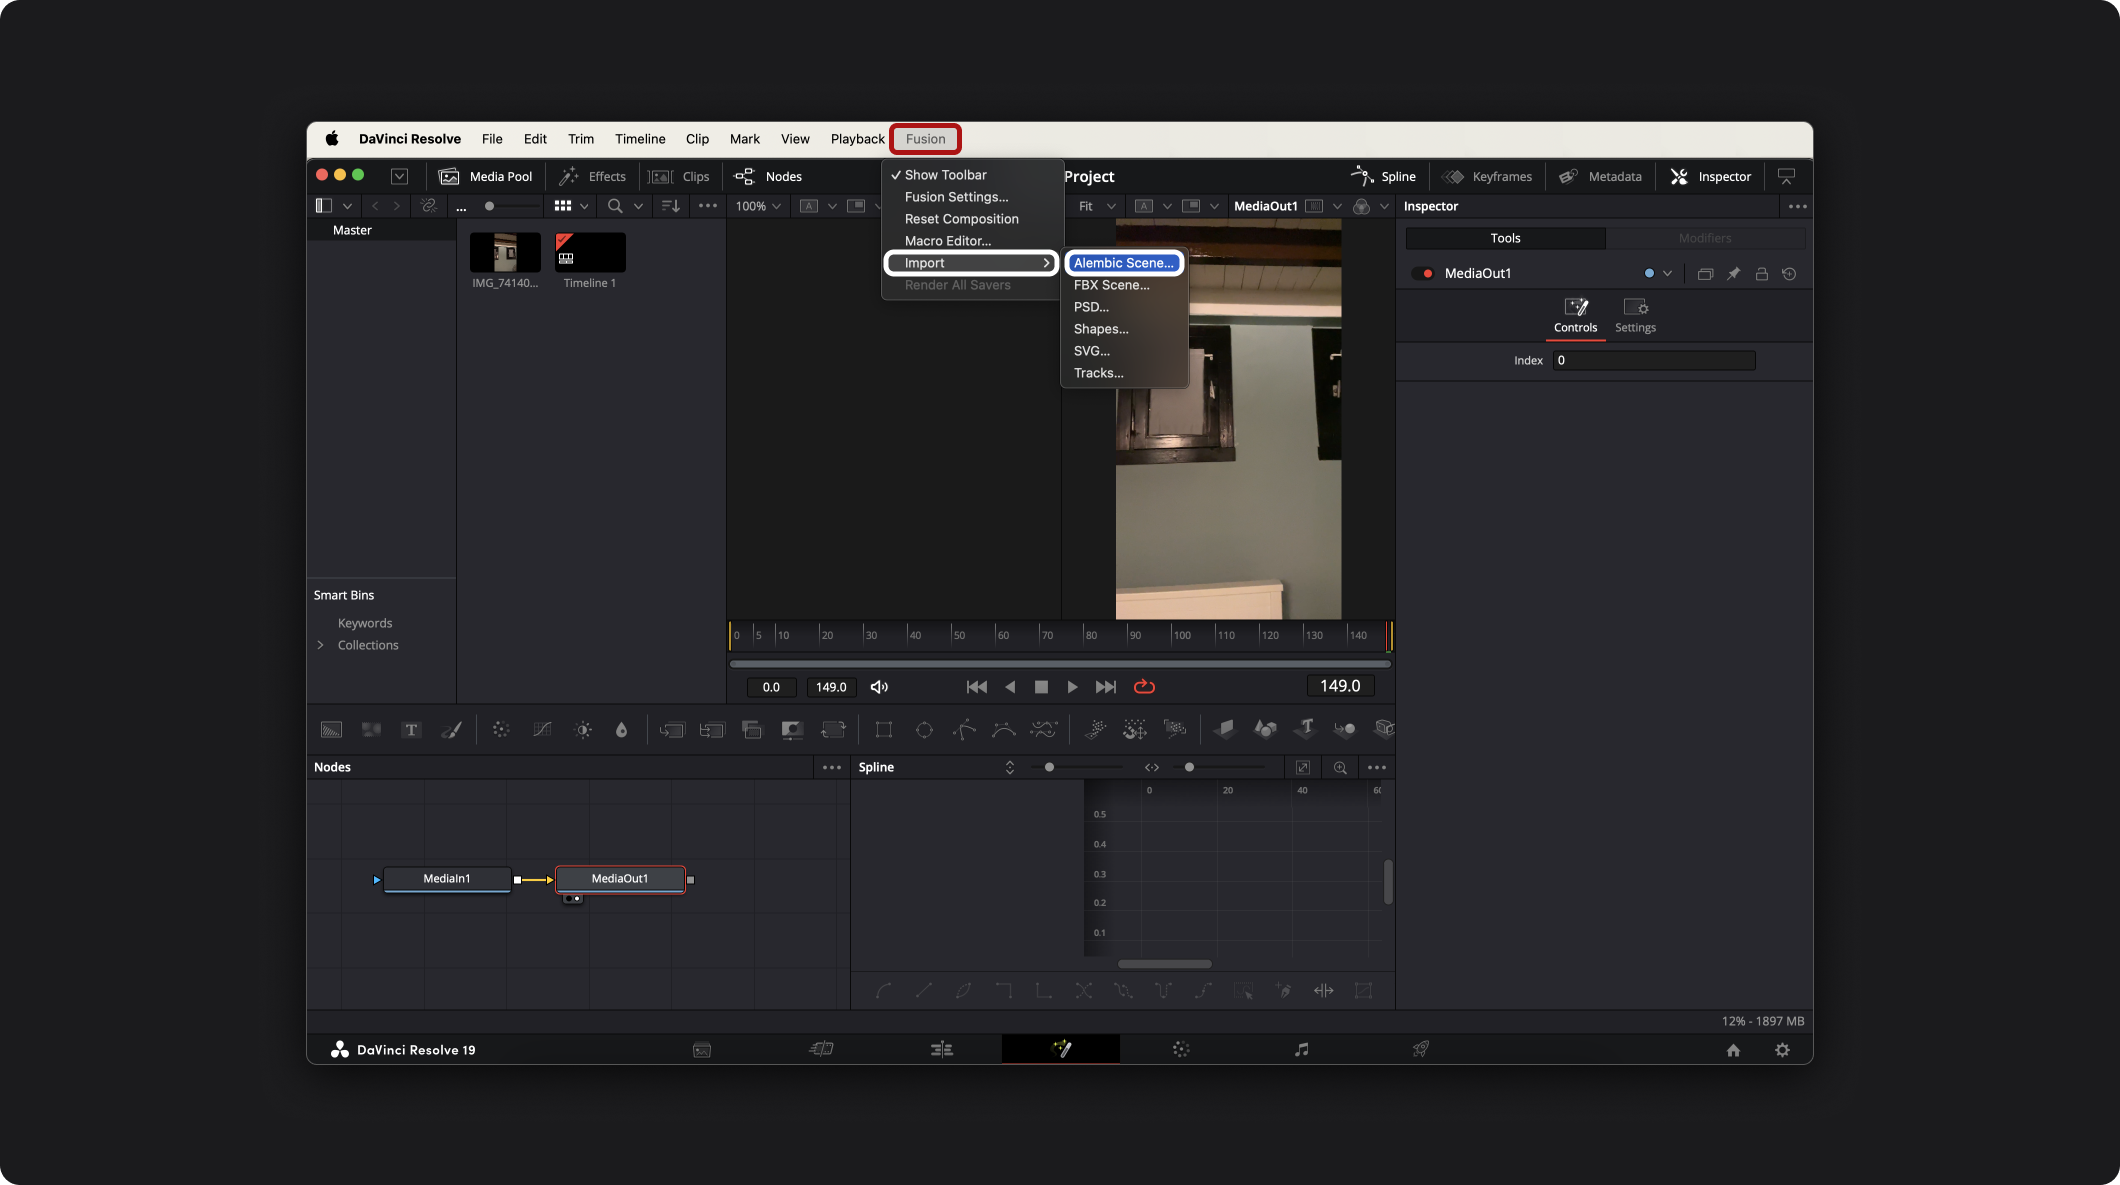
First things first, create a new project and open the Fusion tab:
Video
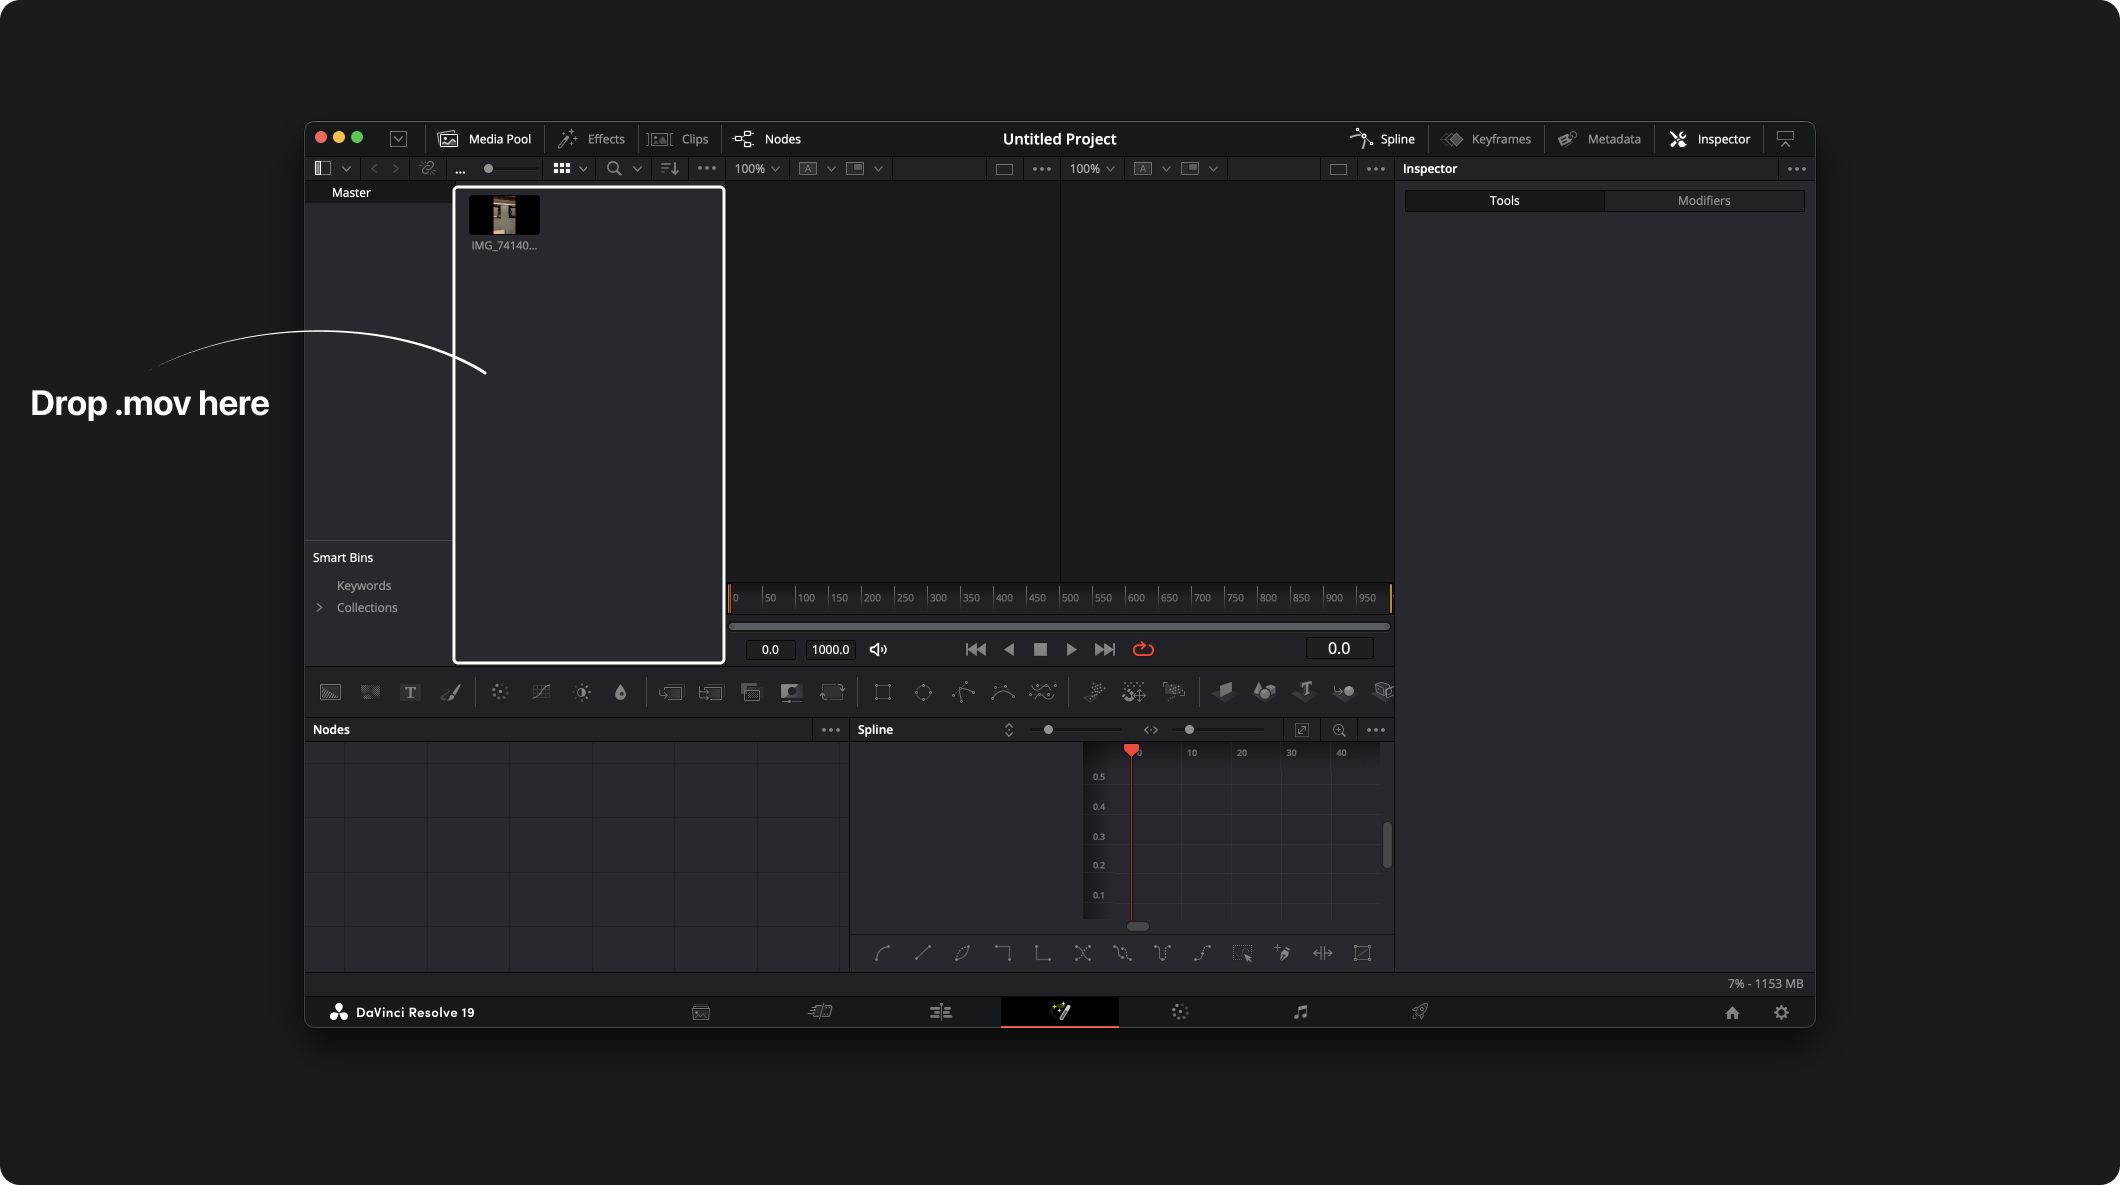
Add the video by dragging and dropping the .mov file from your files into the Master window. If the video file fps is different from the project, a pop-up will appear. Accept it.
Drag and drop the video file from the Master window to the Nodes window:
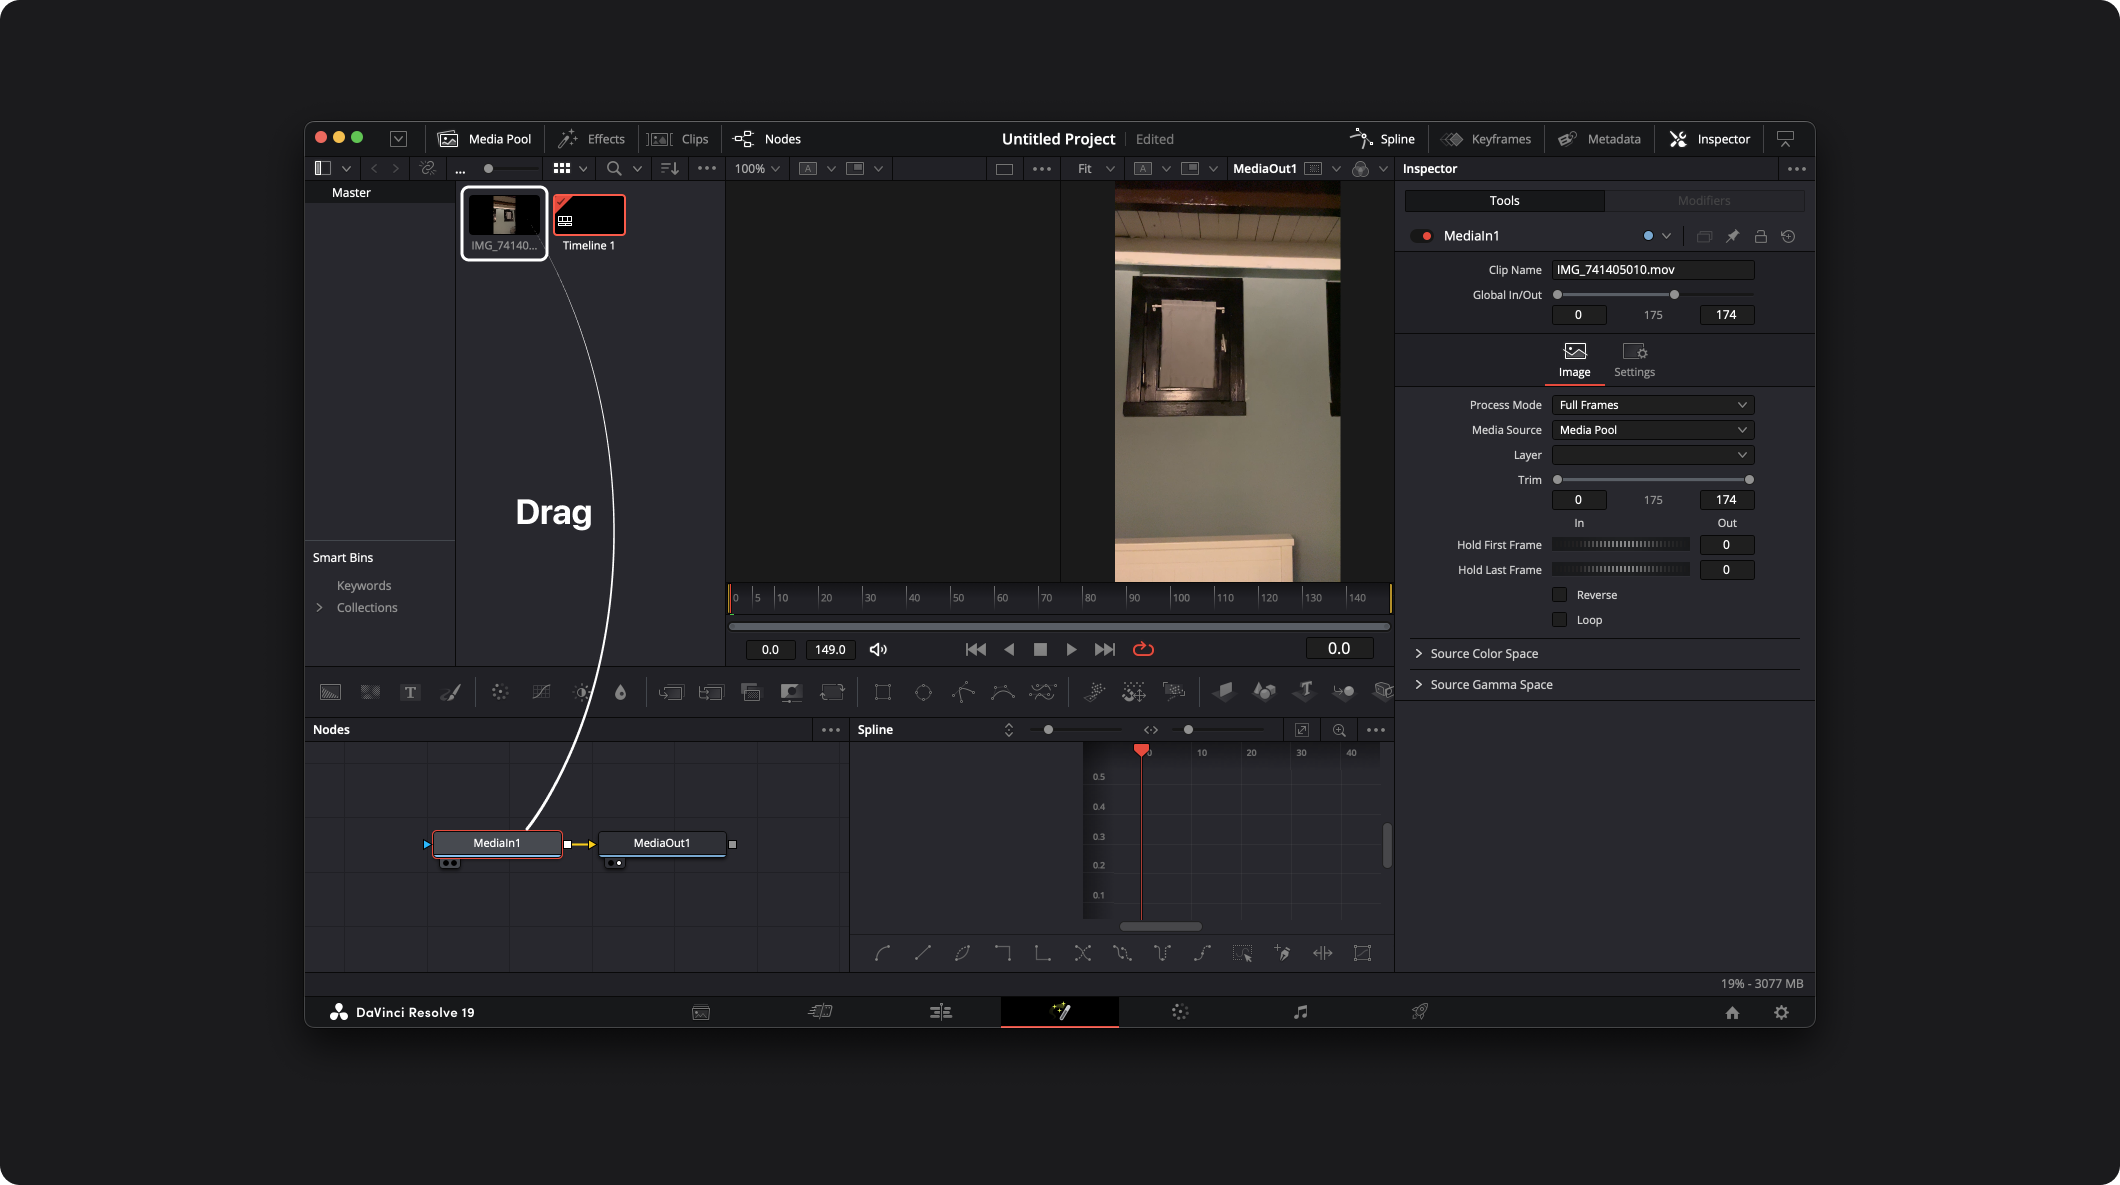 It created MediaIn1 which is the video and MediaOut1 which allows the preview of the video.
Camera
Import the camera using the .abc file. Go to Fusion→Import→Alembic Scene
- Set the Alembic Importer like this:
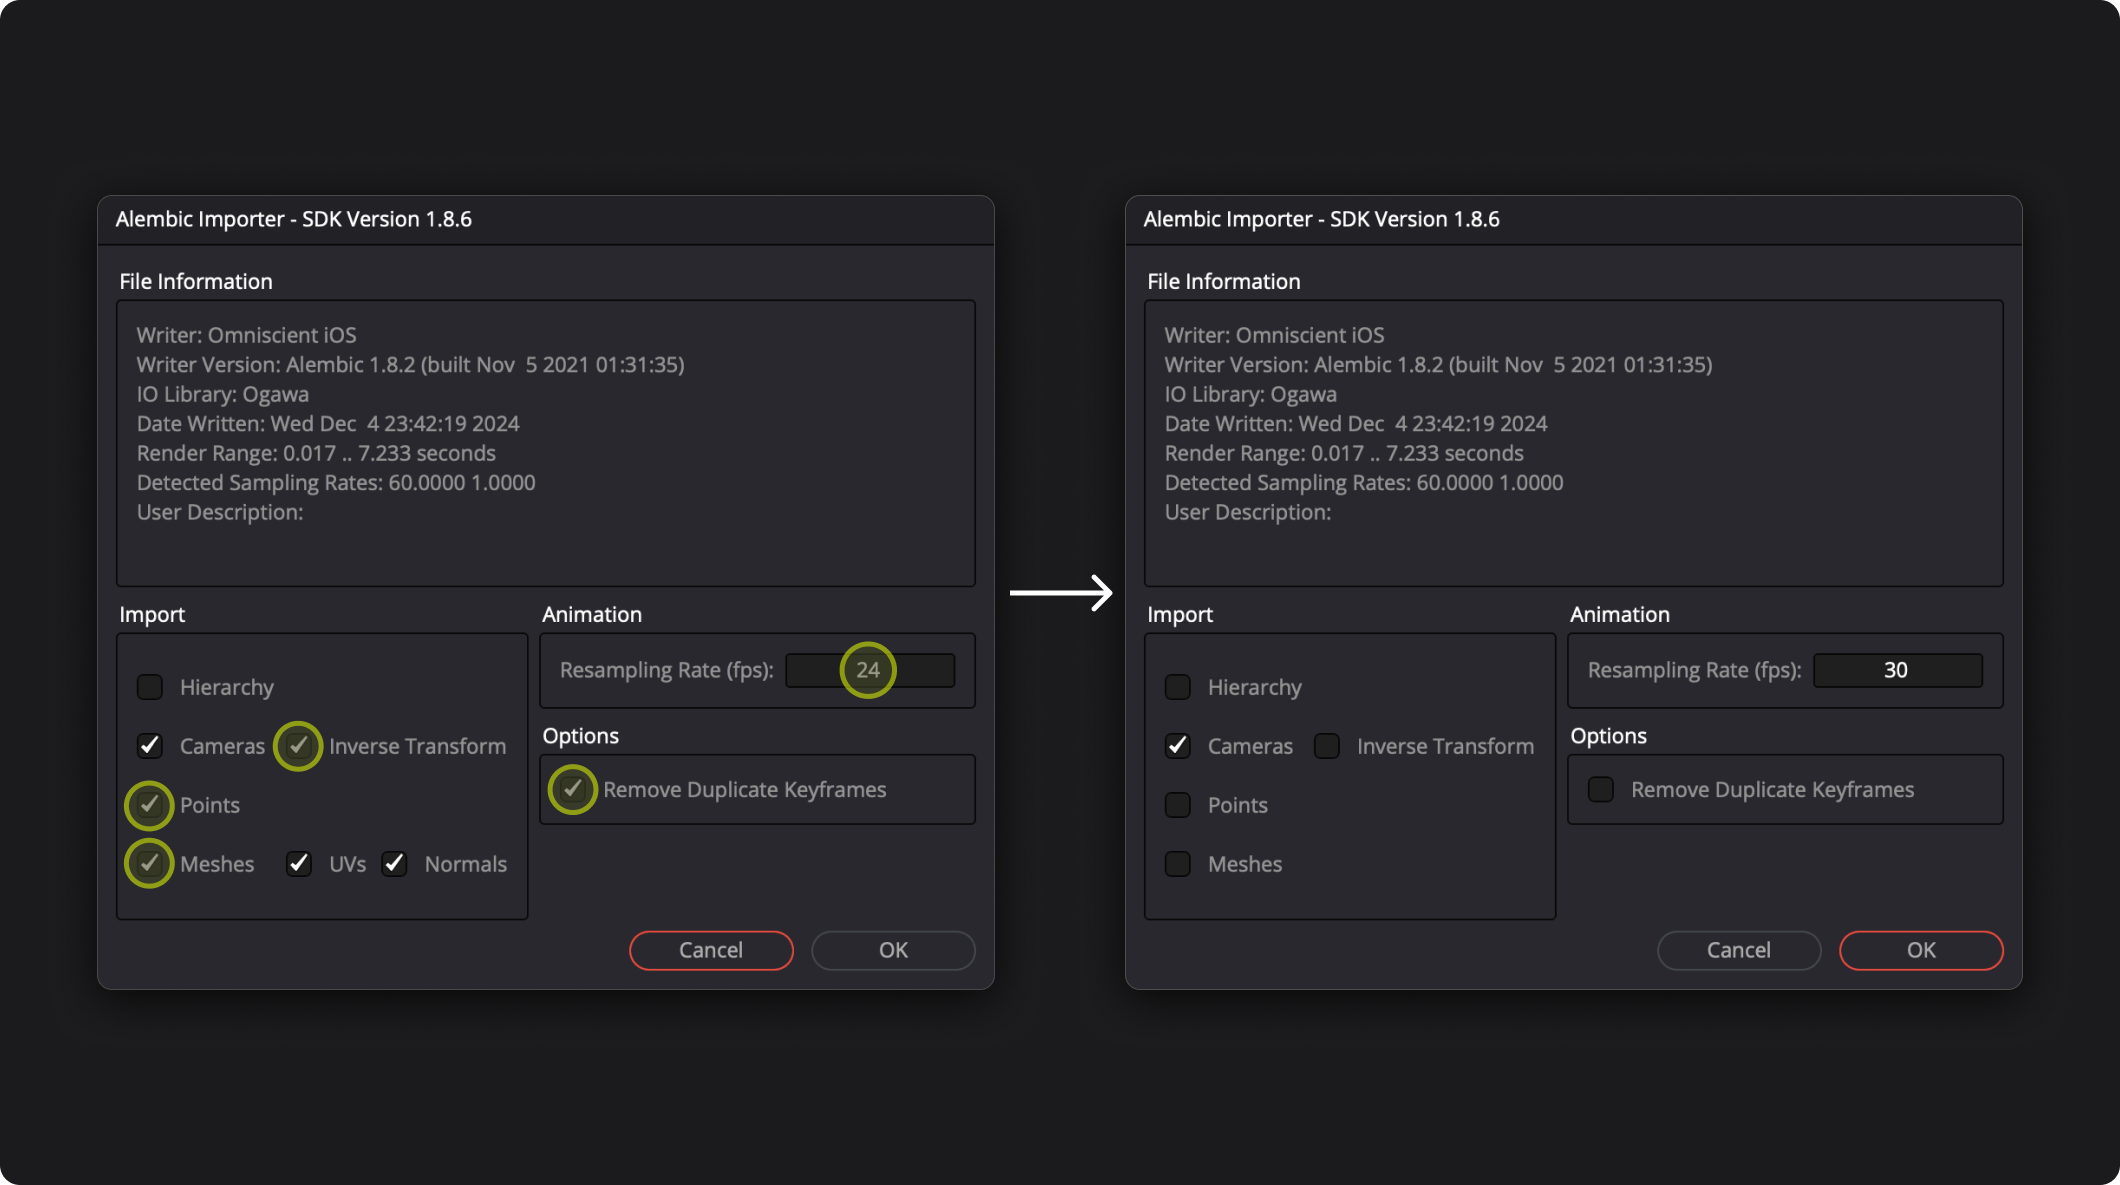
- Deselect all the import options to only keep the Camera.
- Disable the options that remove duplicate keyframes.
- Change the Animation Resampling Rate (fps) to the fps of the video, in our case 30.
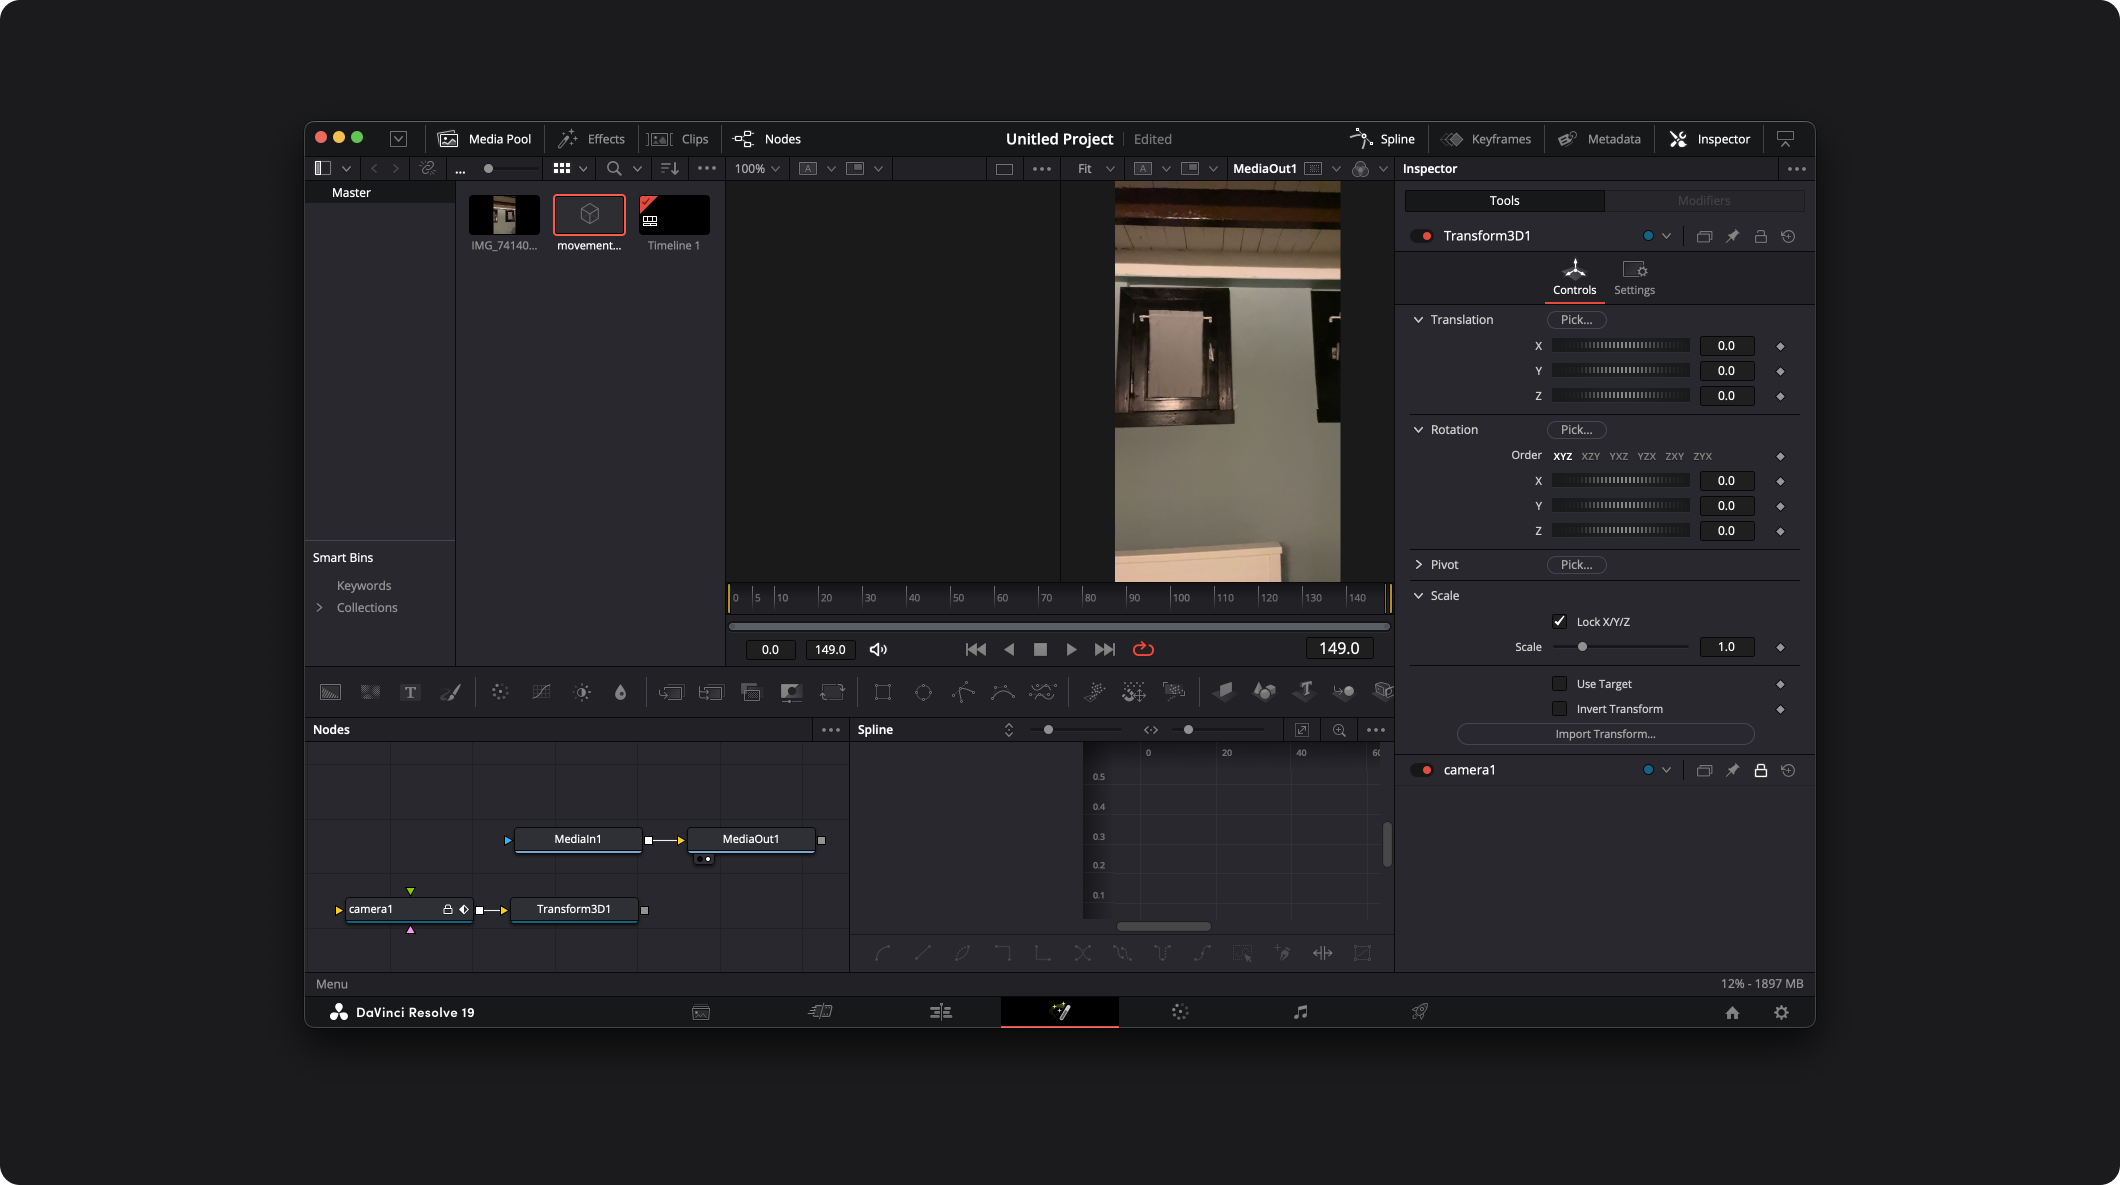
Press OK, then you get this:
Scan
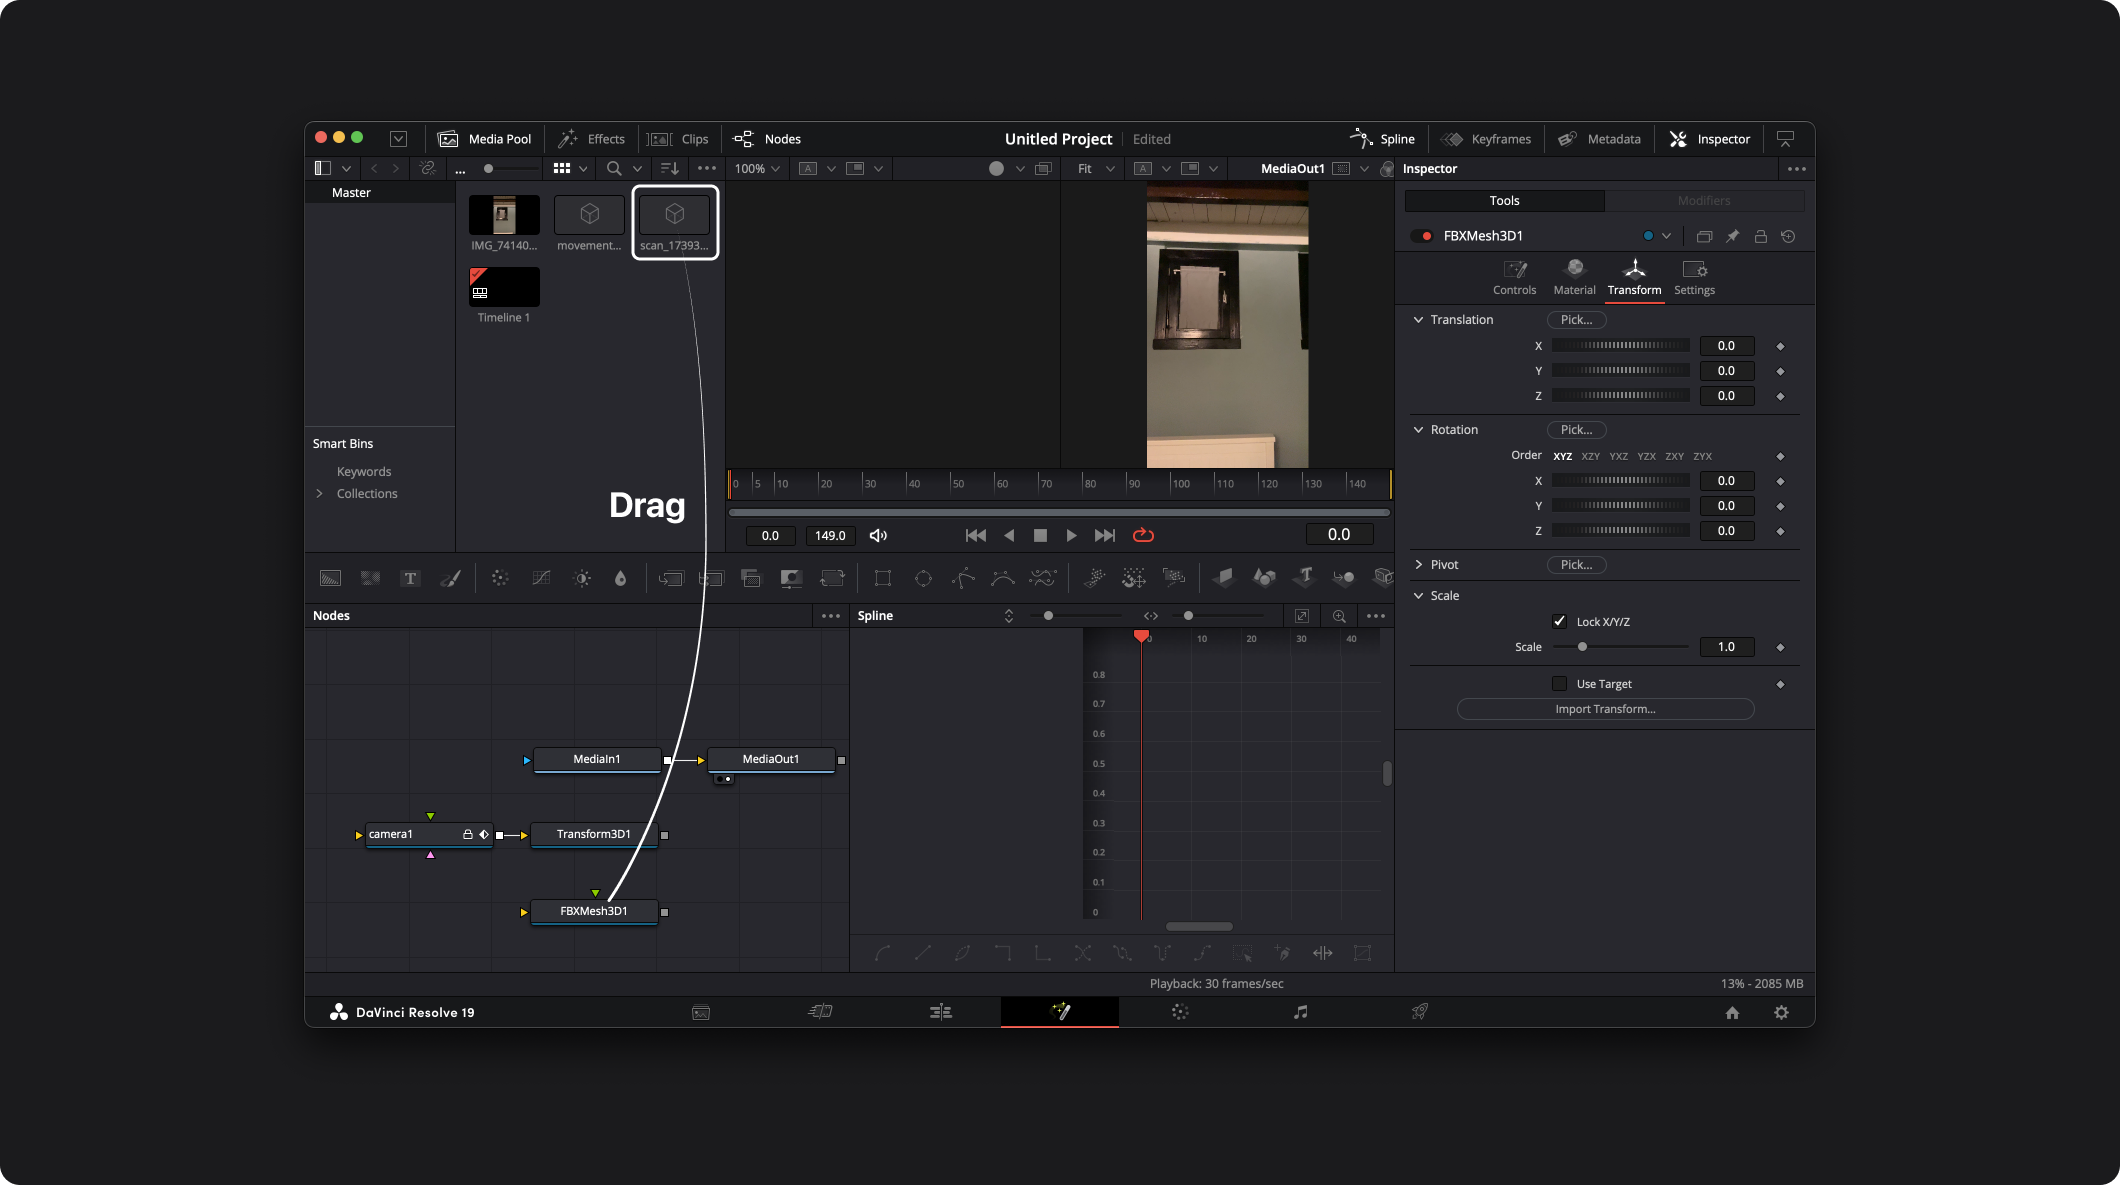
Add the scan to DaVinci Resolve by dragging and dropping the .obj file from your files into the Master window.
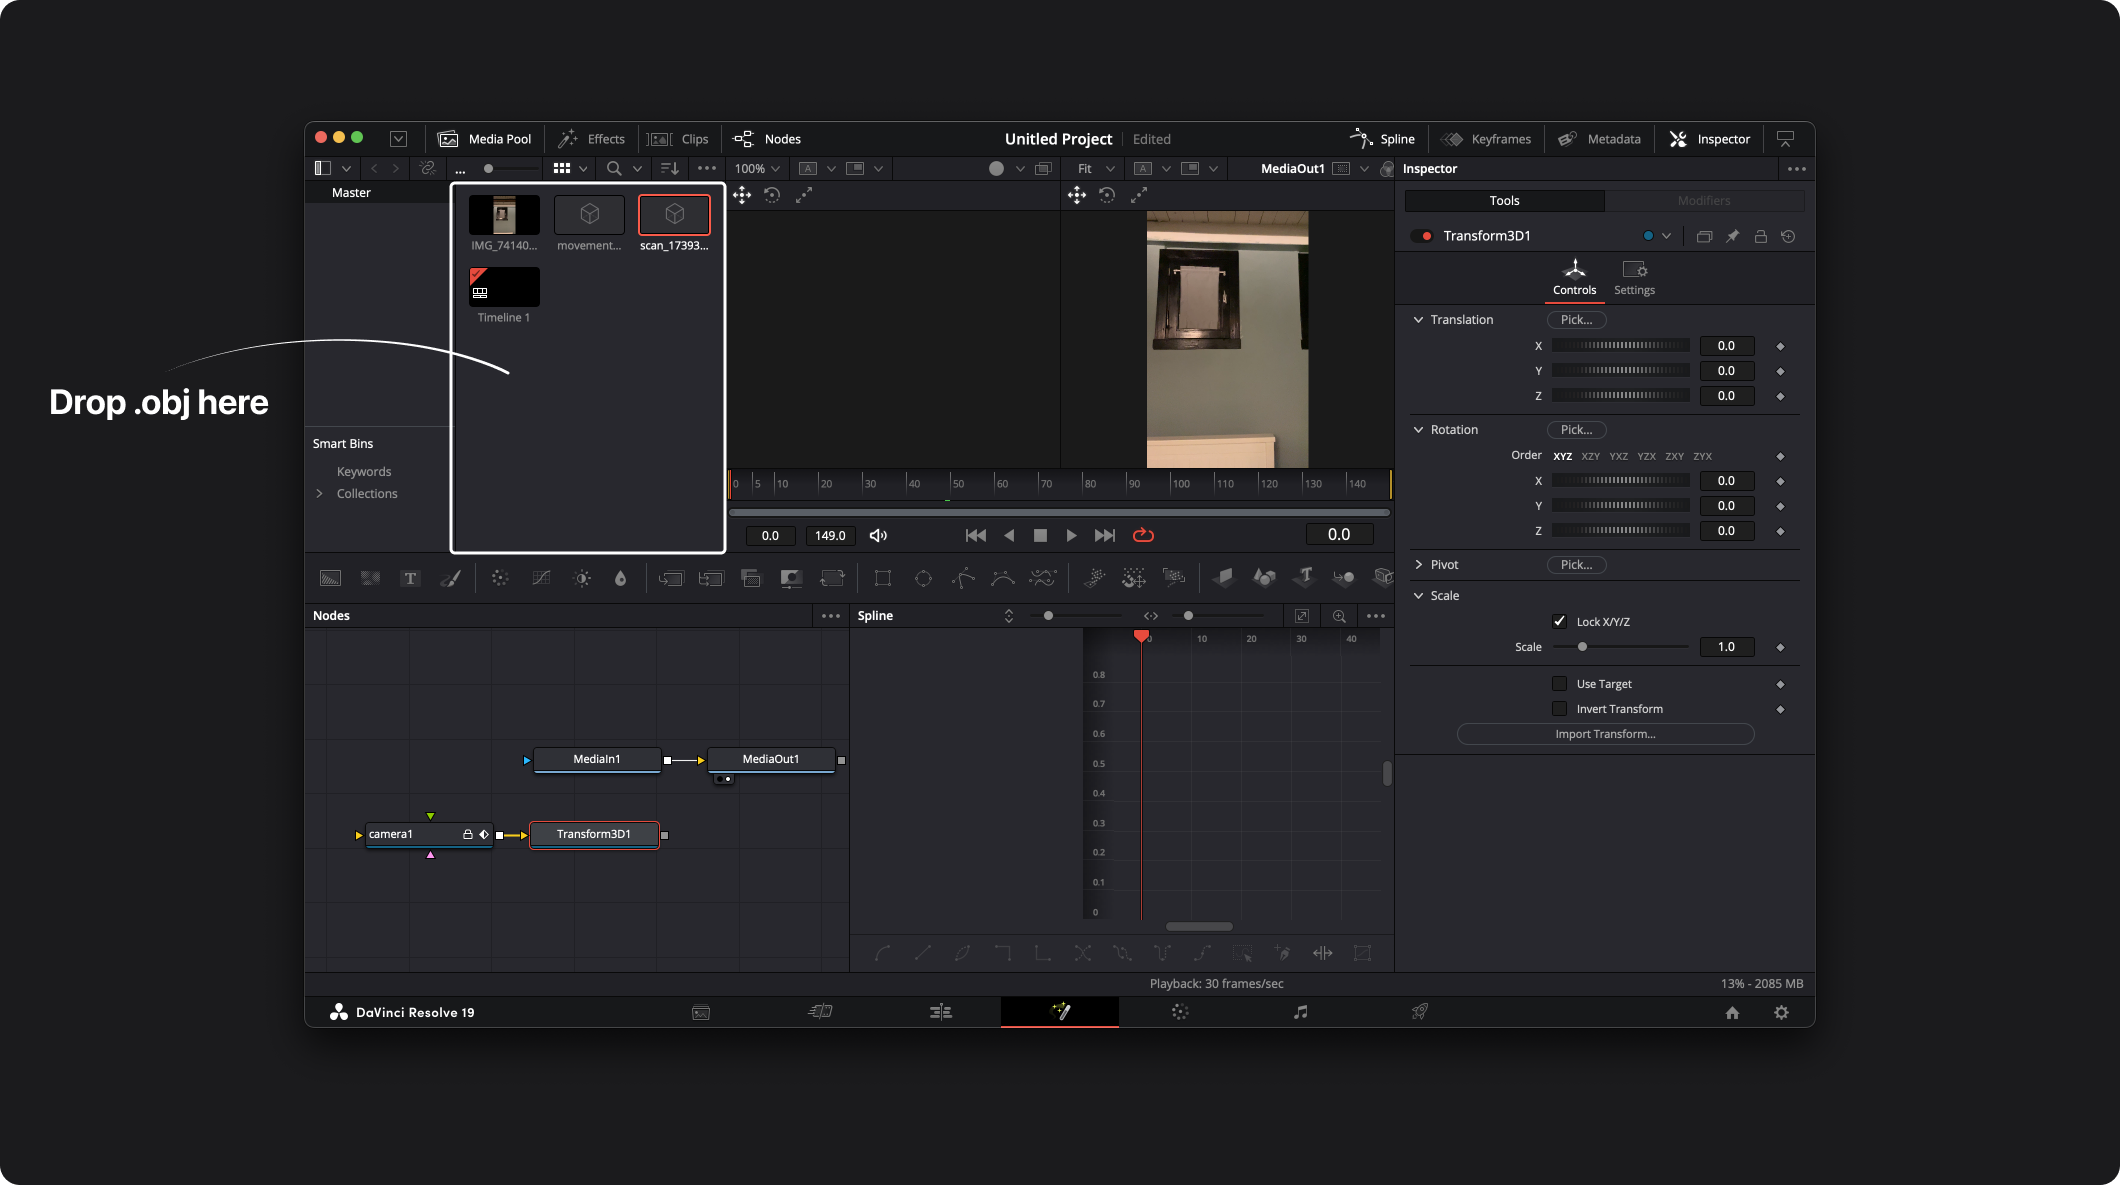
Drag and drop the scan file from the Master window to the Nodes window:
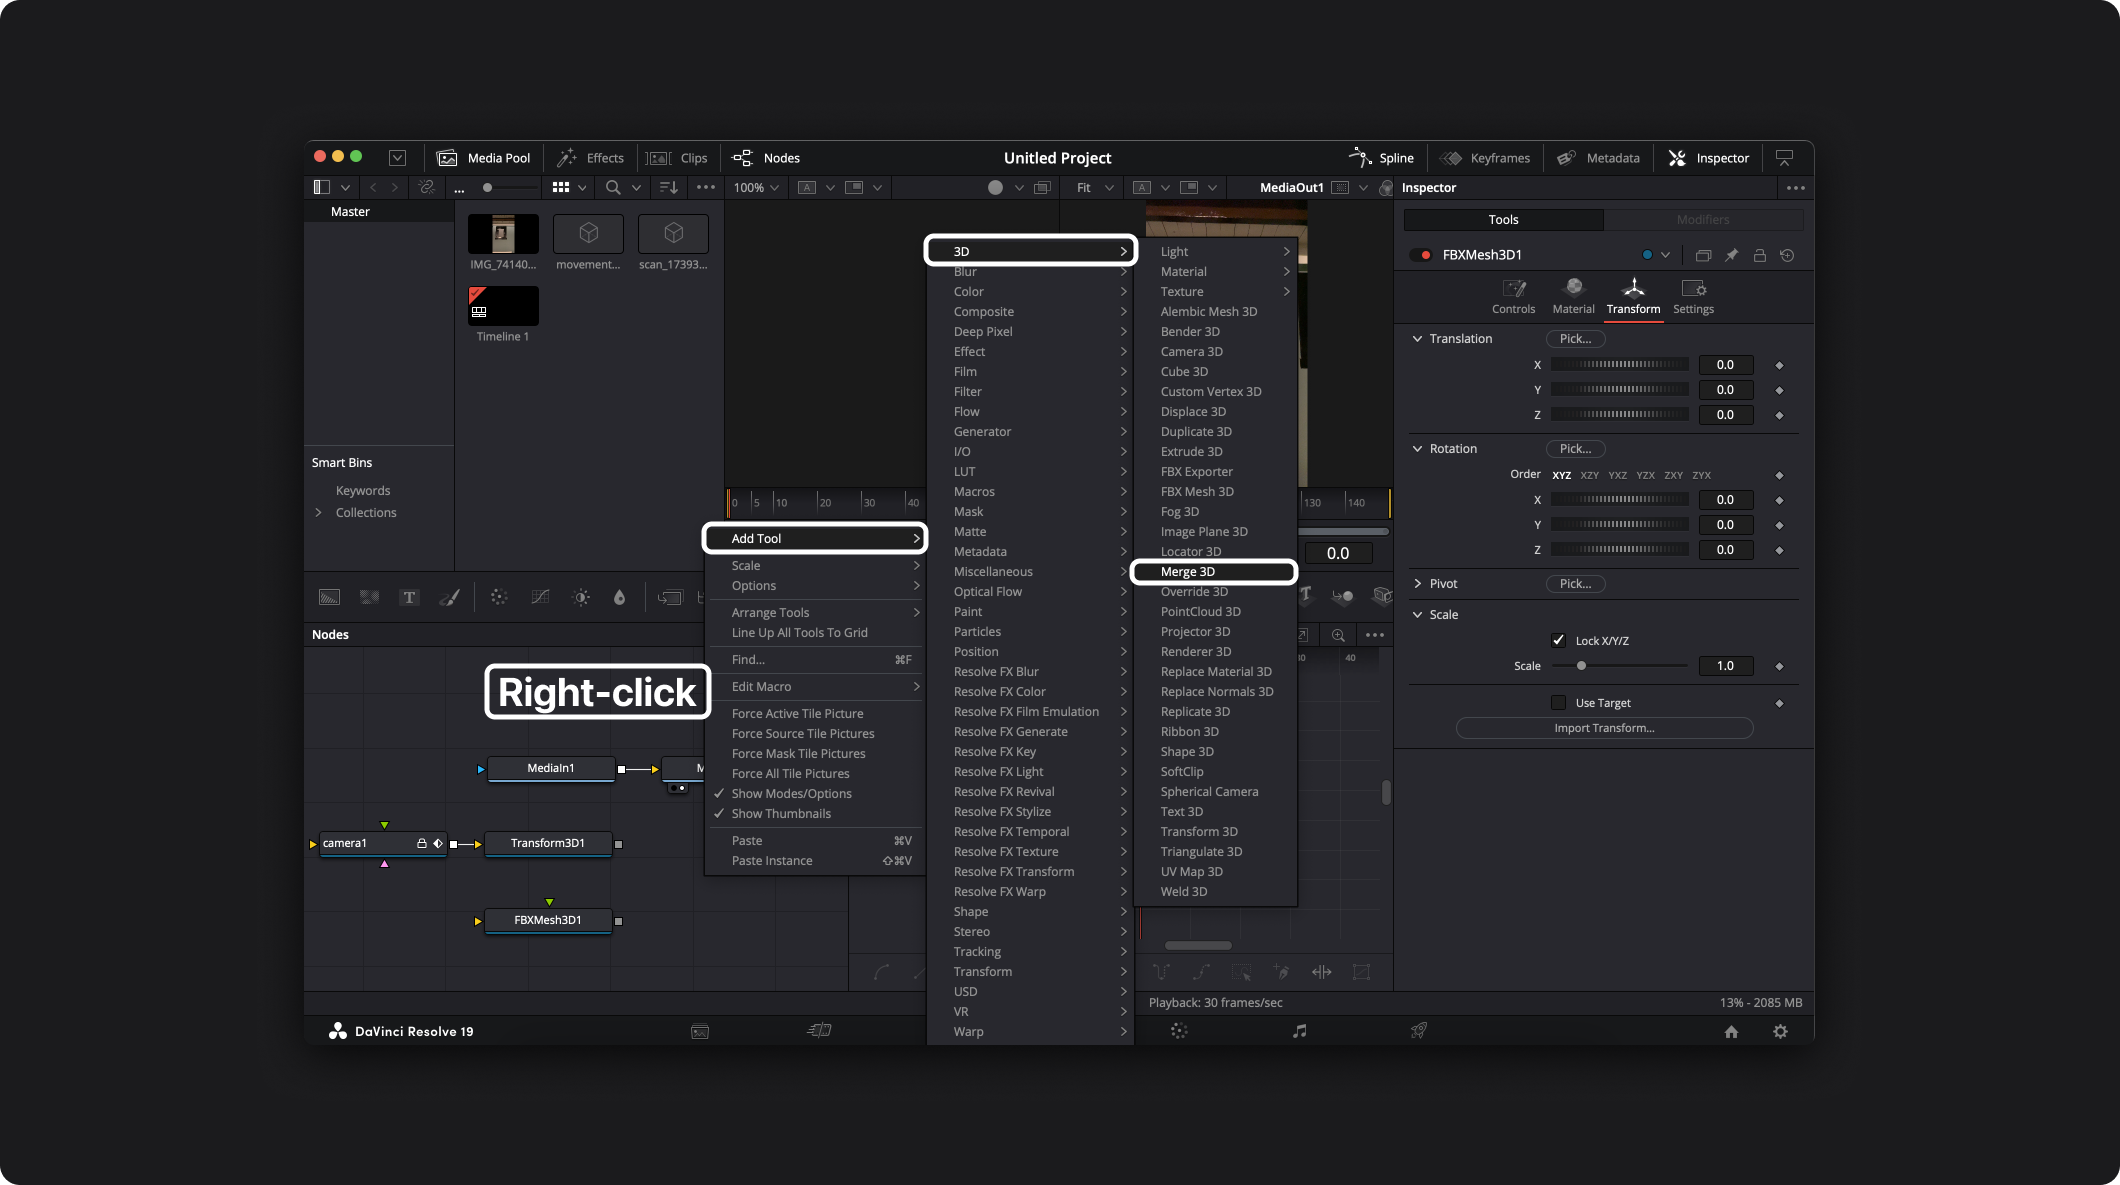
Combine Camera with Scan
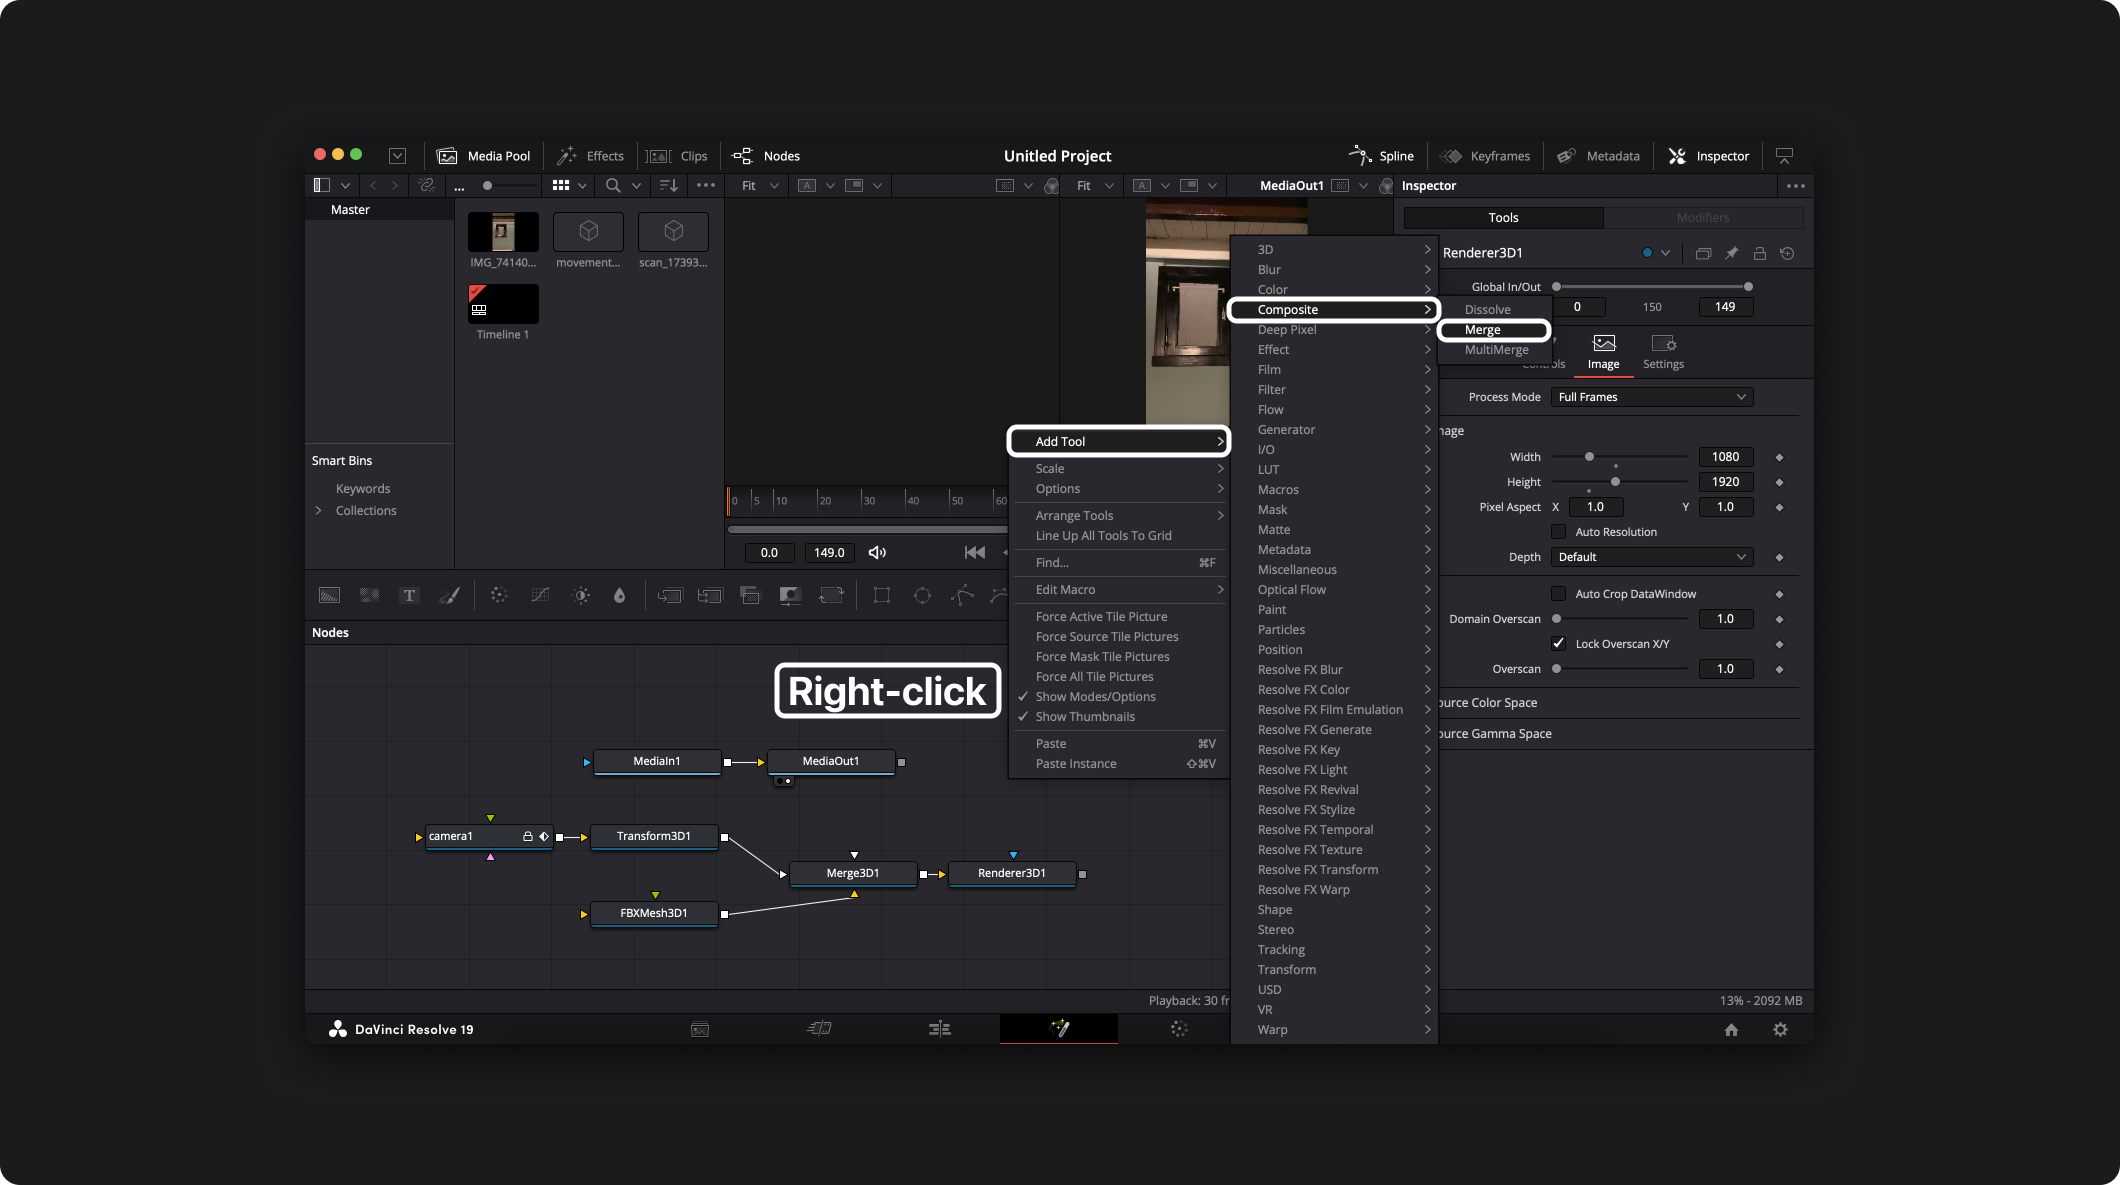
Add a Merge node, right-click in the Nodes window, then Add Tool → 3D → Merge 3D:
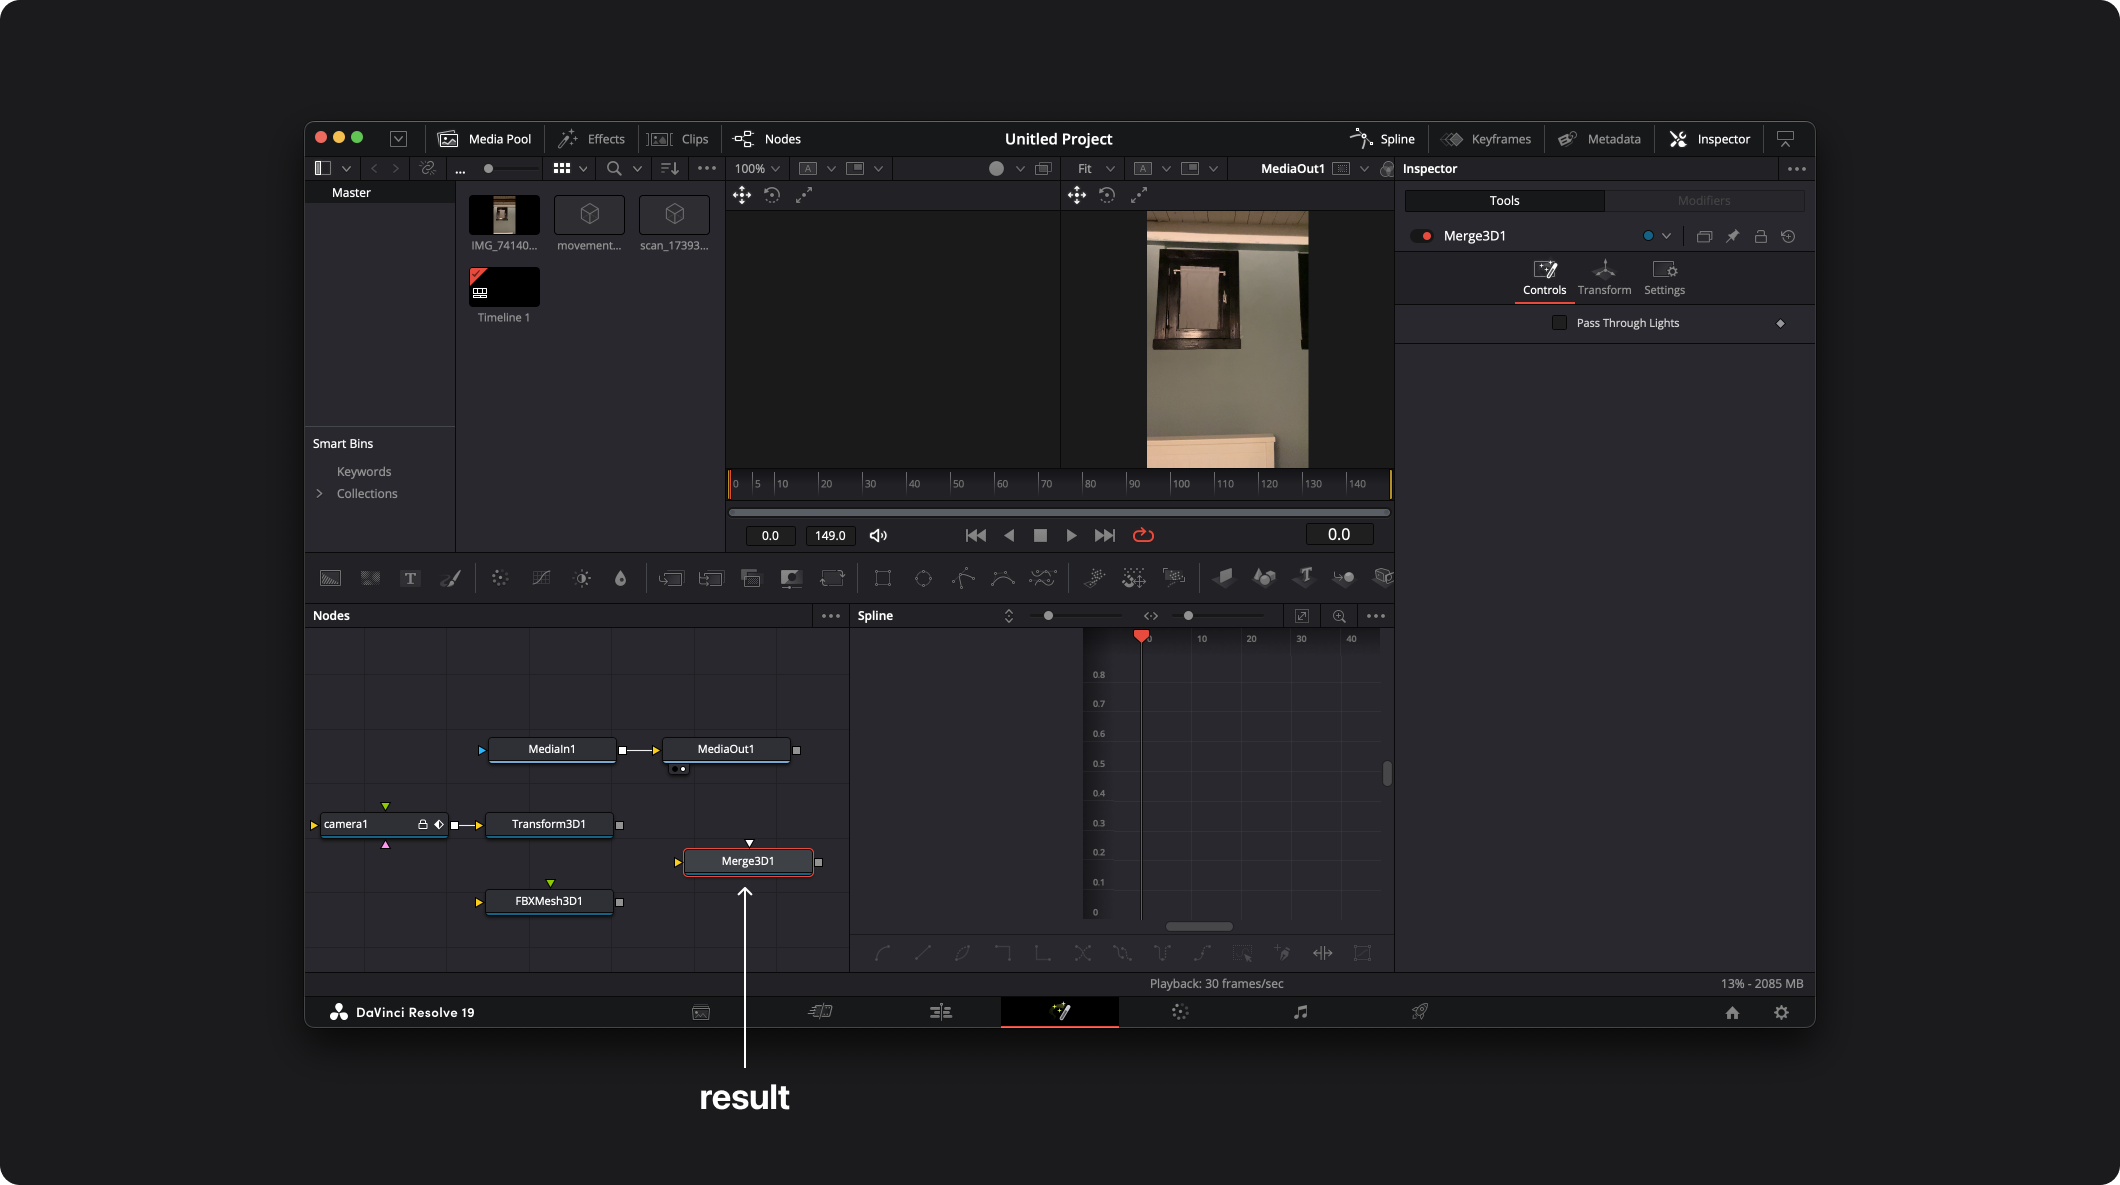
Connect Transform3D1 and FBXMesh3D1 to Merge3D1:
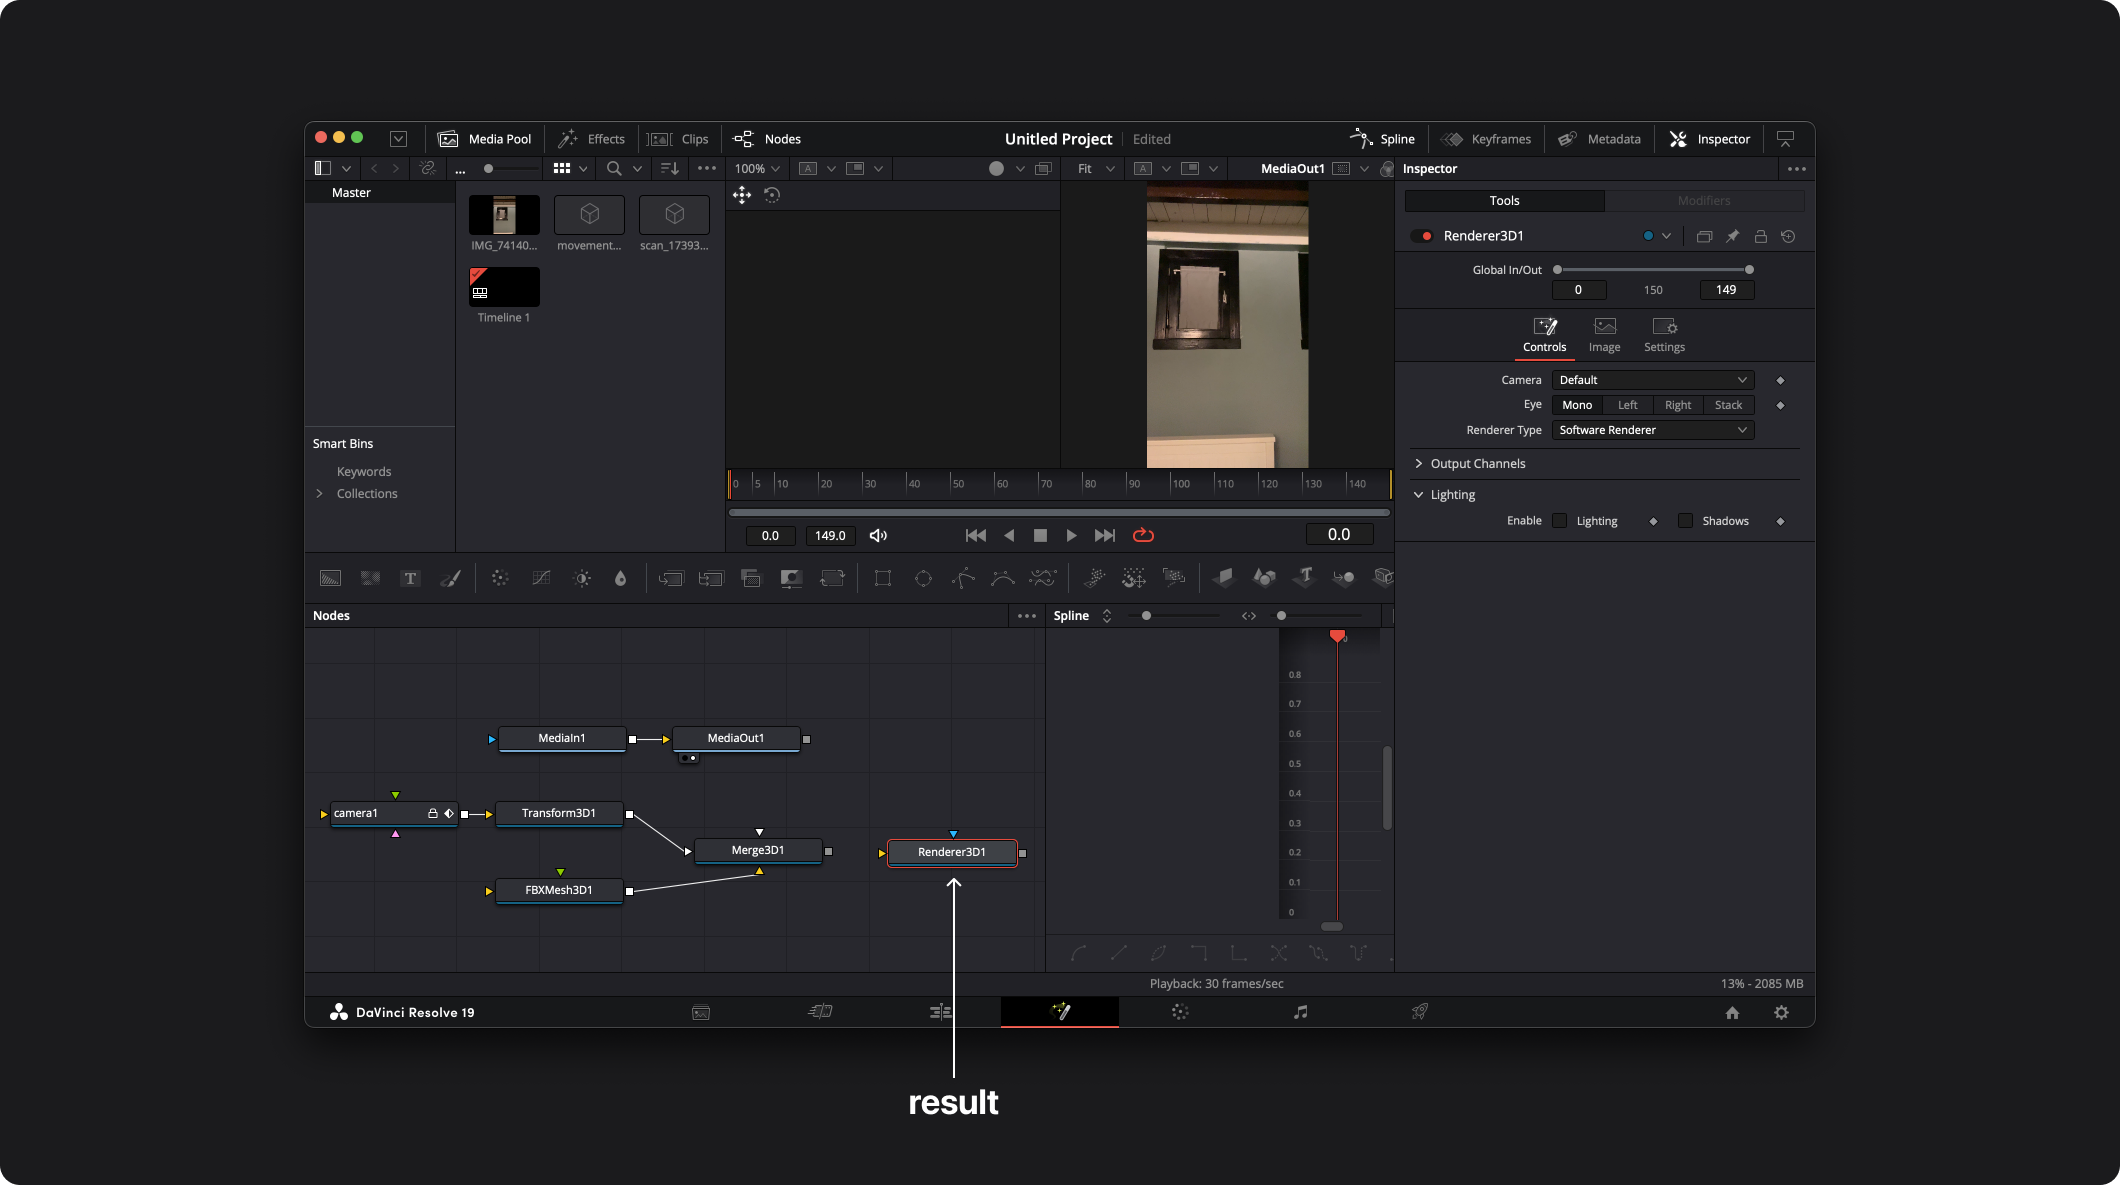
 Now that the scan and the camera are combined in 3D, we can generate the 2D image by using a renderer.
Right-click in the Nodes window, then Add Tool → 3D → Renderer 3D:
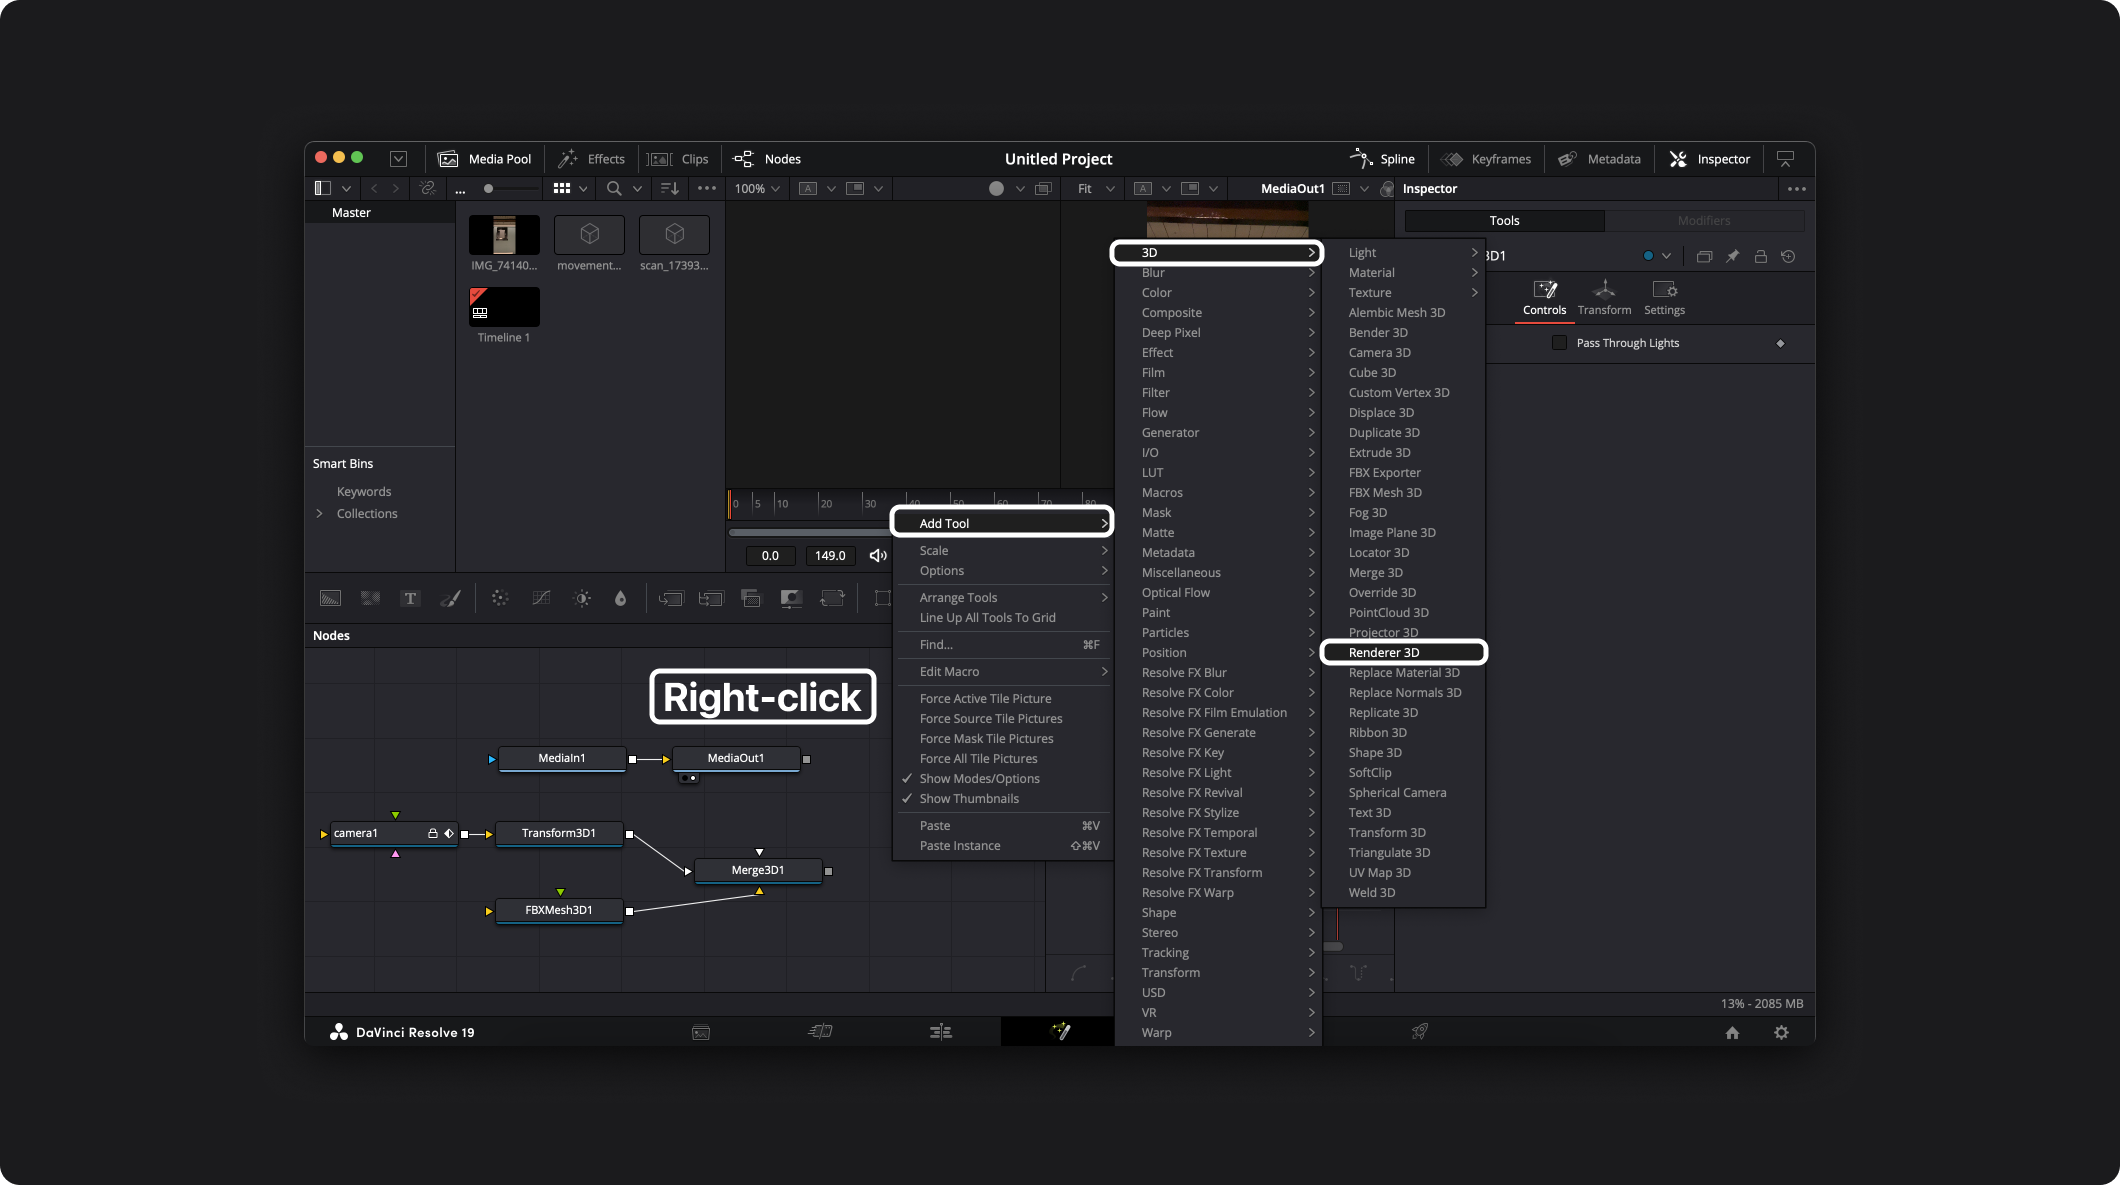
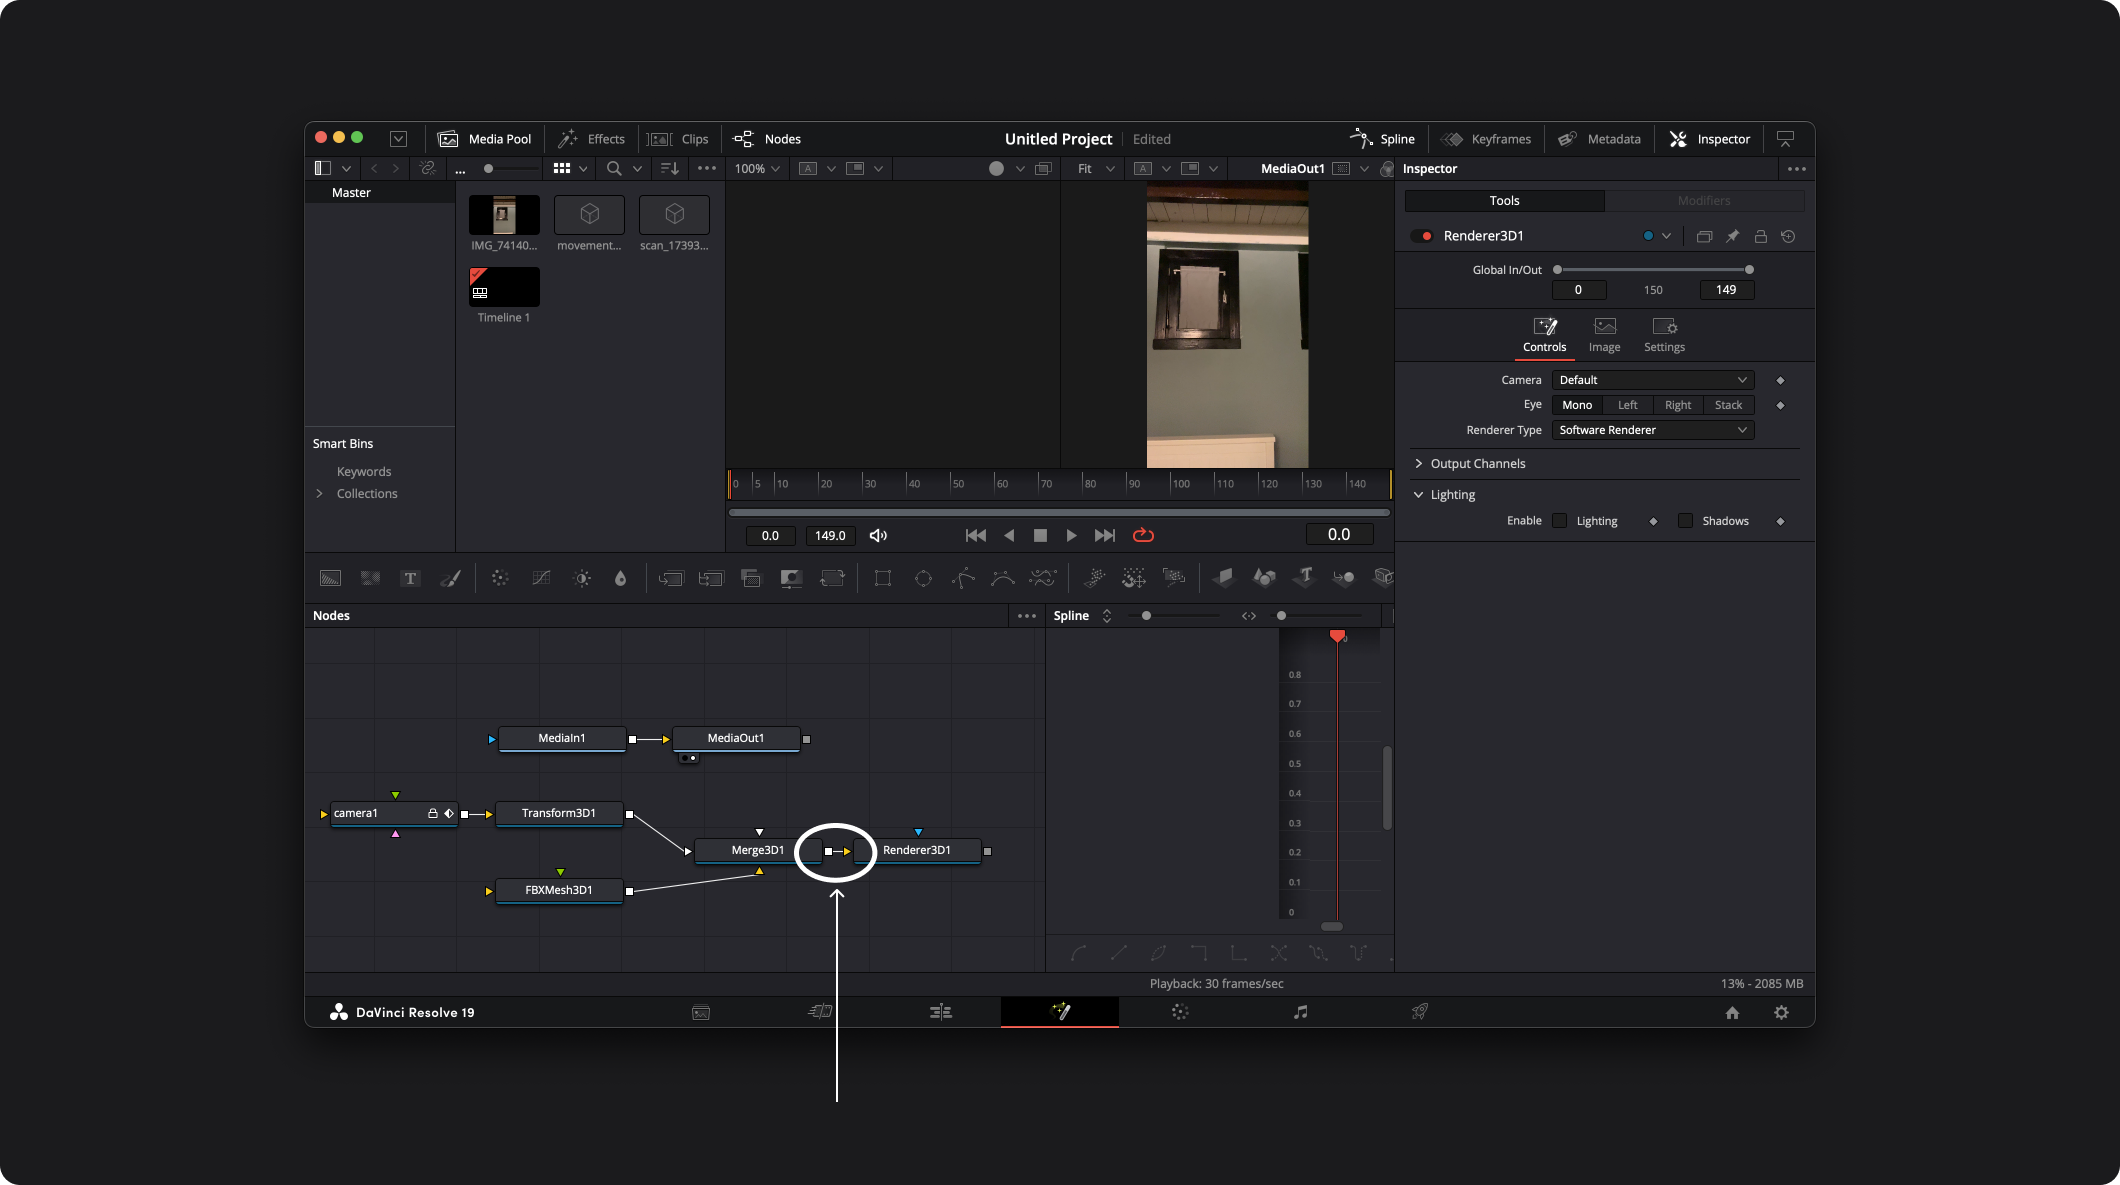
Connect Merge3D1 to Renderer3D1:
Adjust the resolution of the Renderer3D1 to match the resolution of the video. In the Renderer3D1 Inspector window, open the Image tab
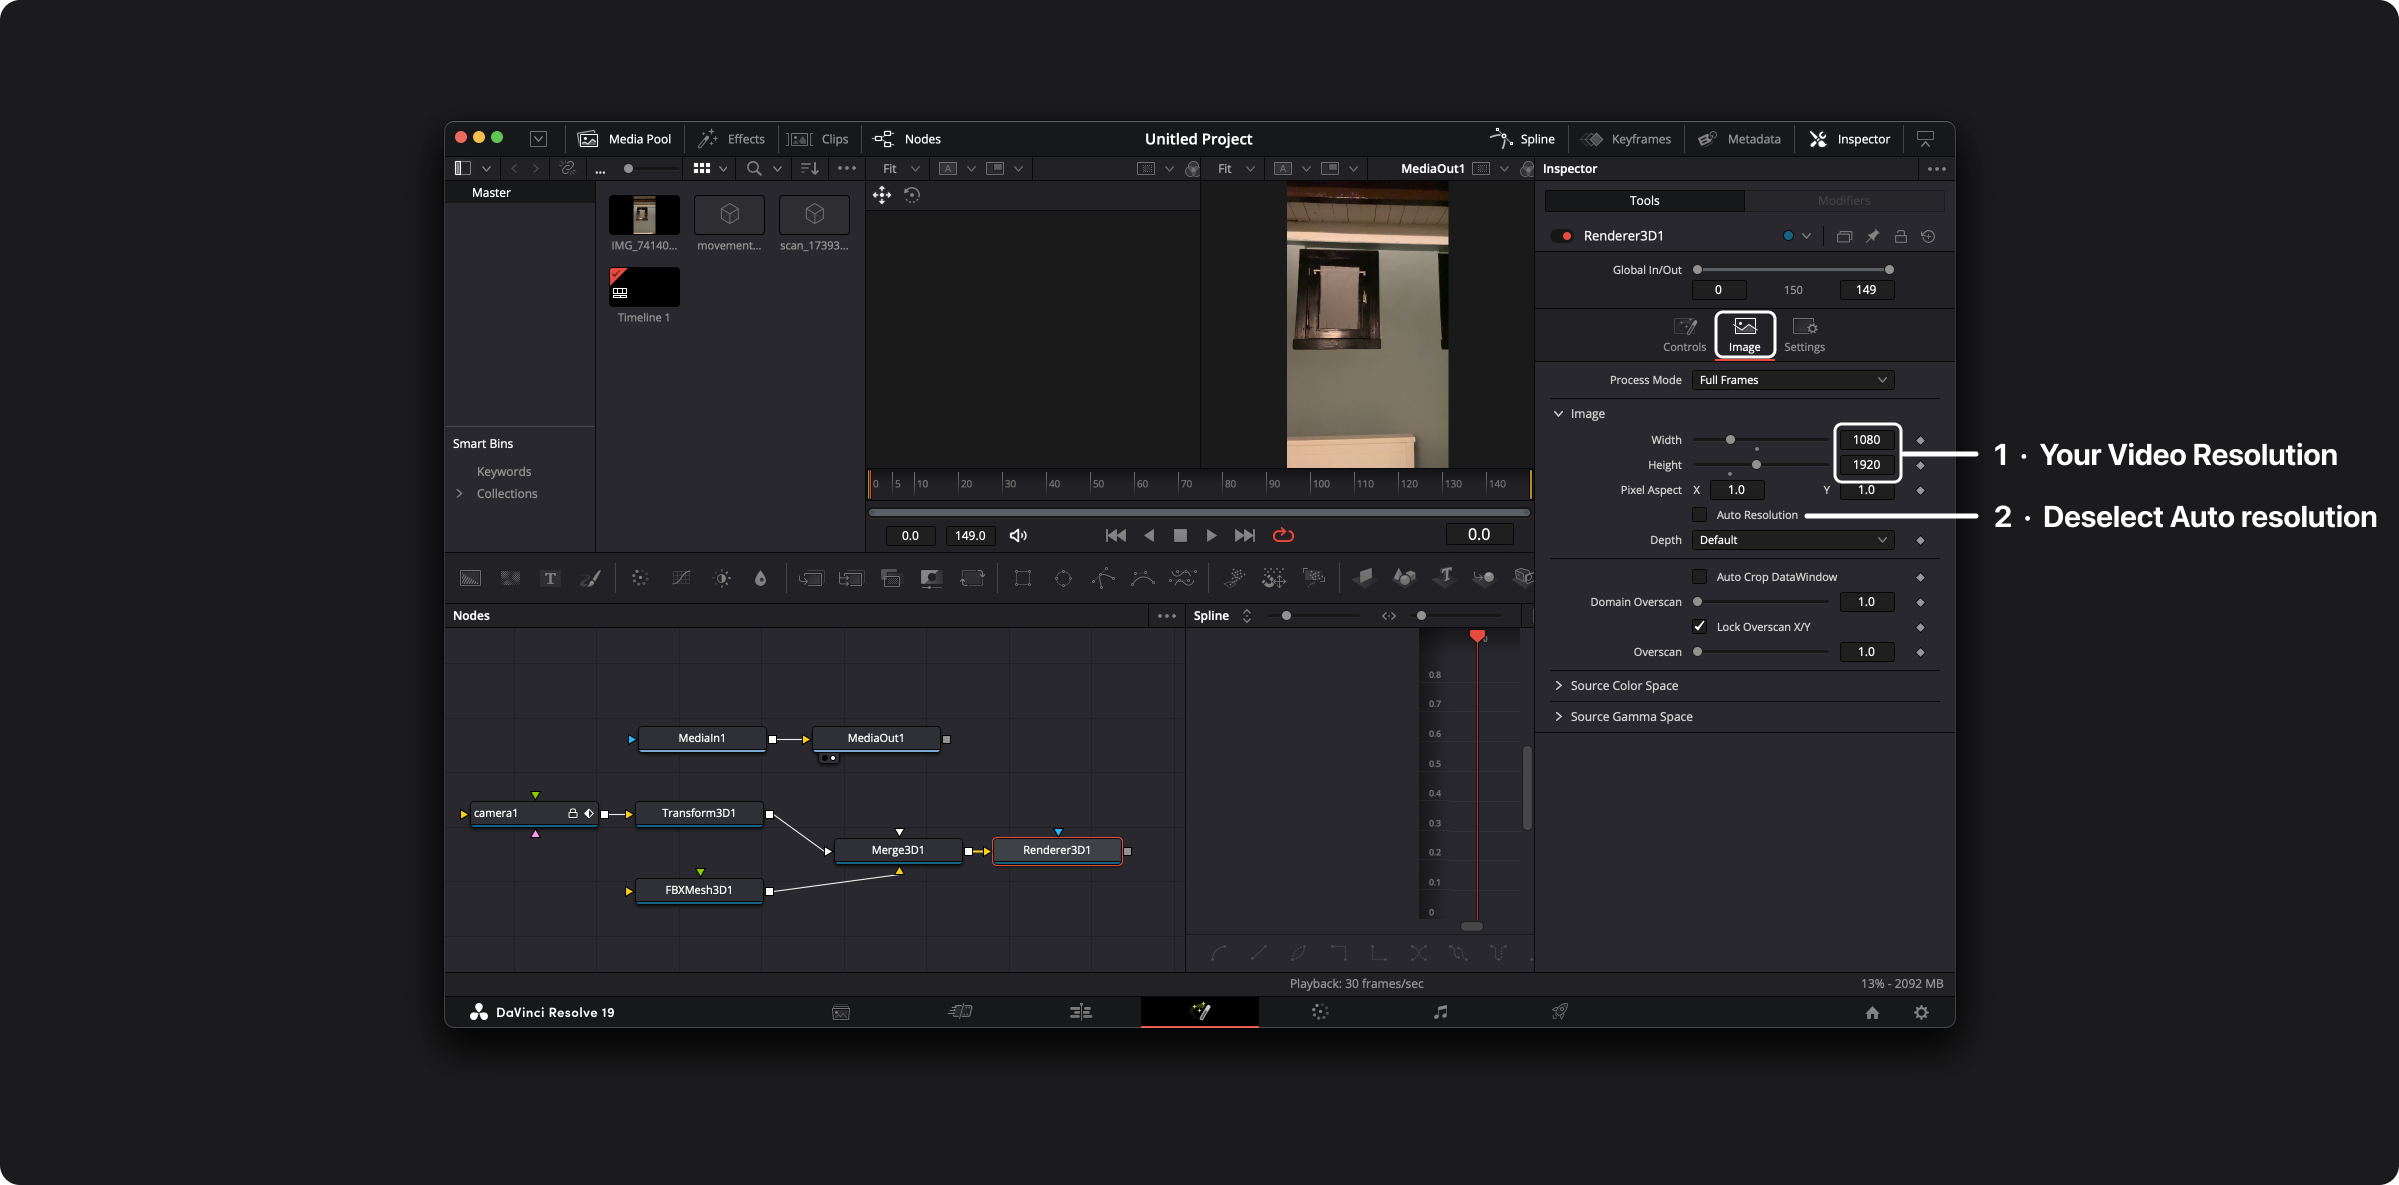
We turned off Auto Resolution and manually set the video resolution to match our actual recording — using 1080 × 1920 in this example.
Combine Camera/Scan with Video
Now that we have the 3D render and the video (2D), we can obtain the final result by combining the 3D with the 2D. To do so, combine them using a merge node.
Right-click in the Nodes window, then Add Tool → Composite → Merge:
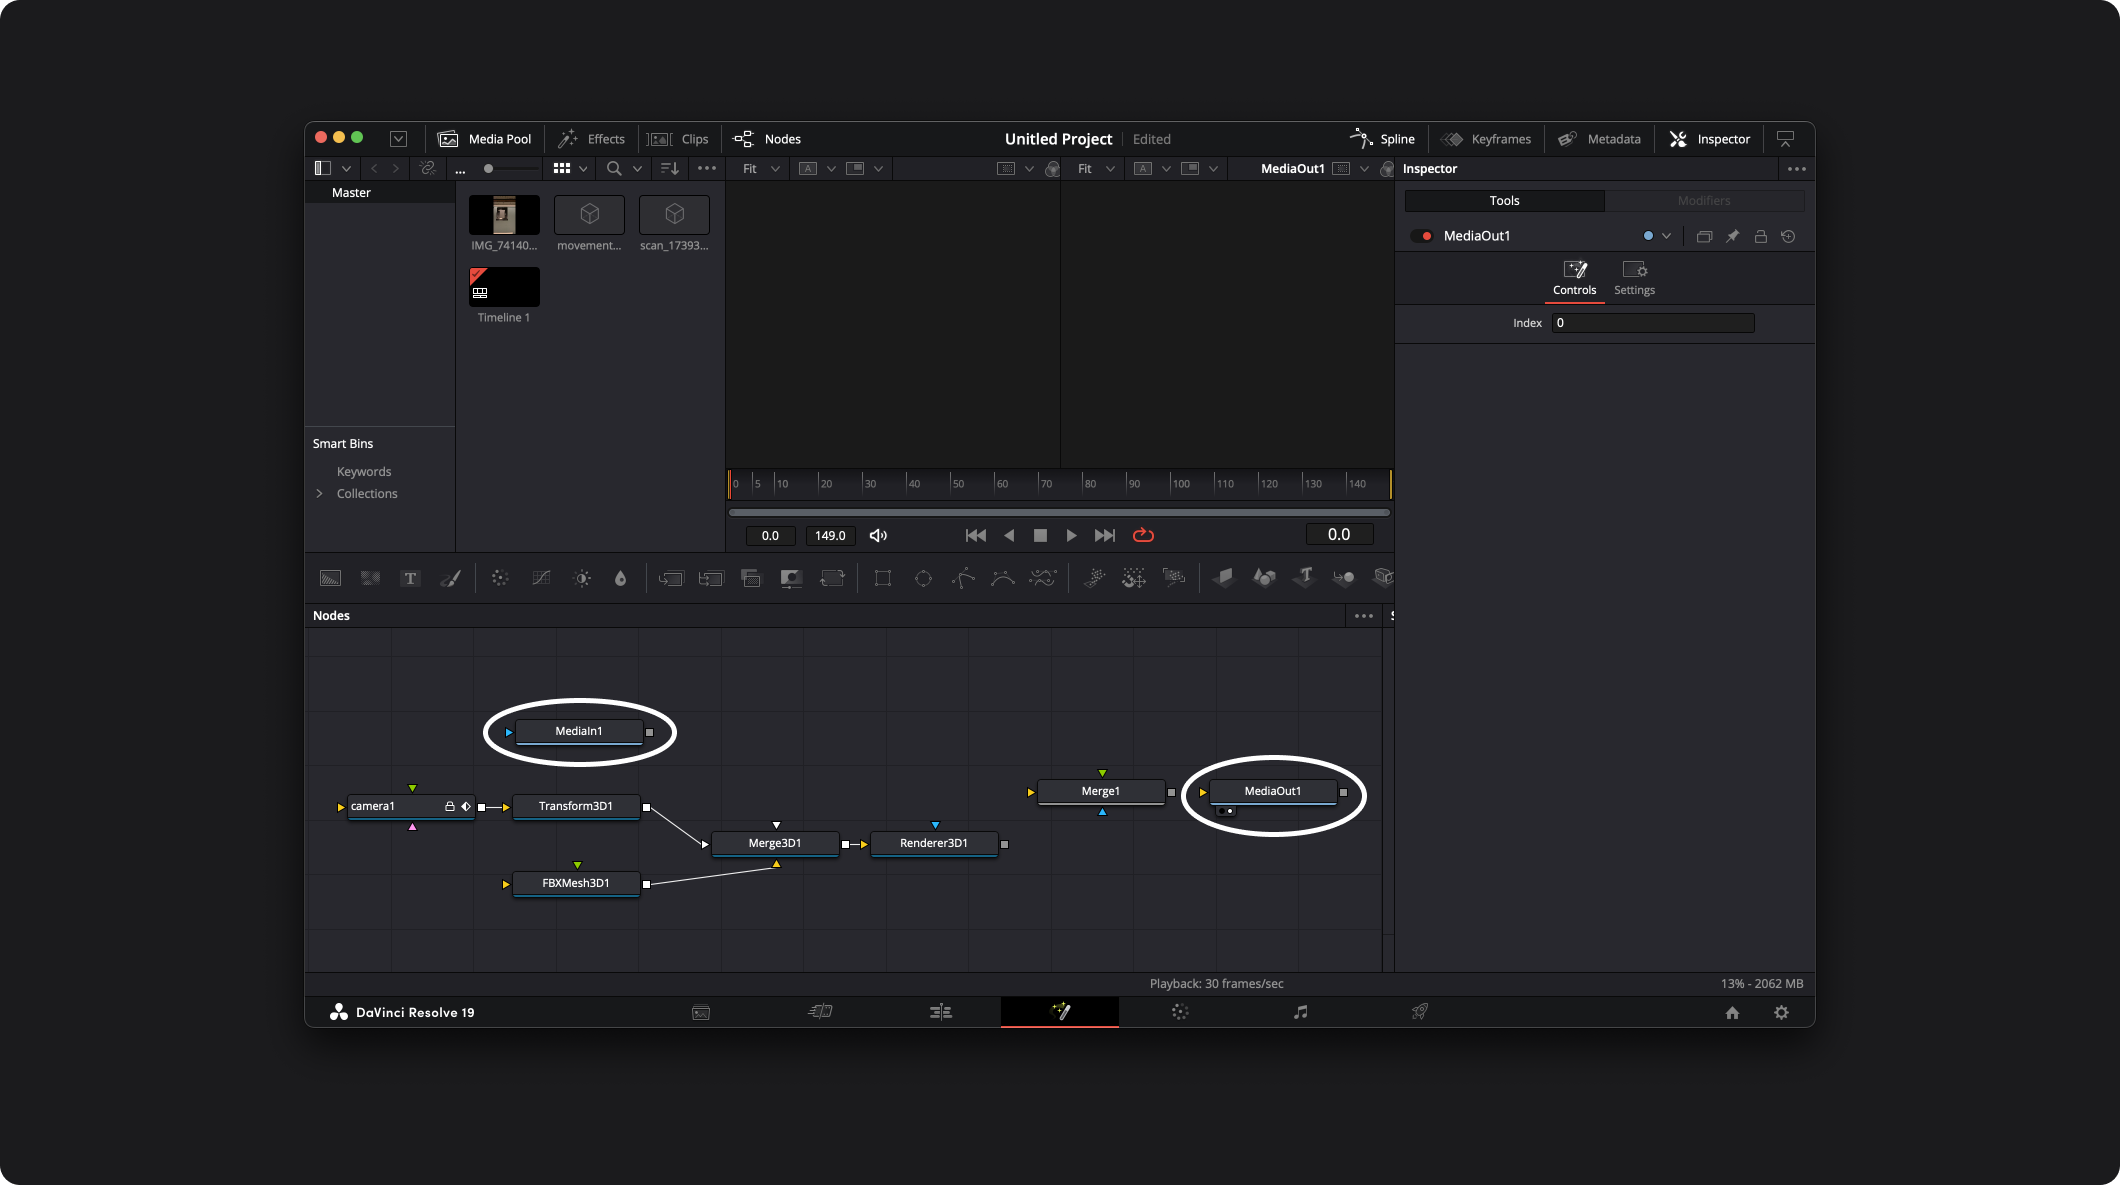
Disconnect MediaIn1 (the video) from MediaOut1 and place MediaOut1 to the right of Merge1
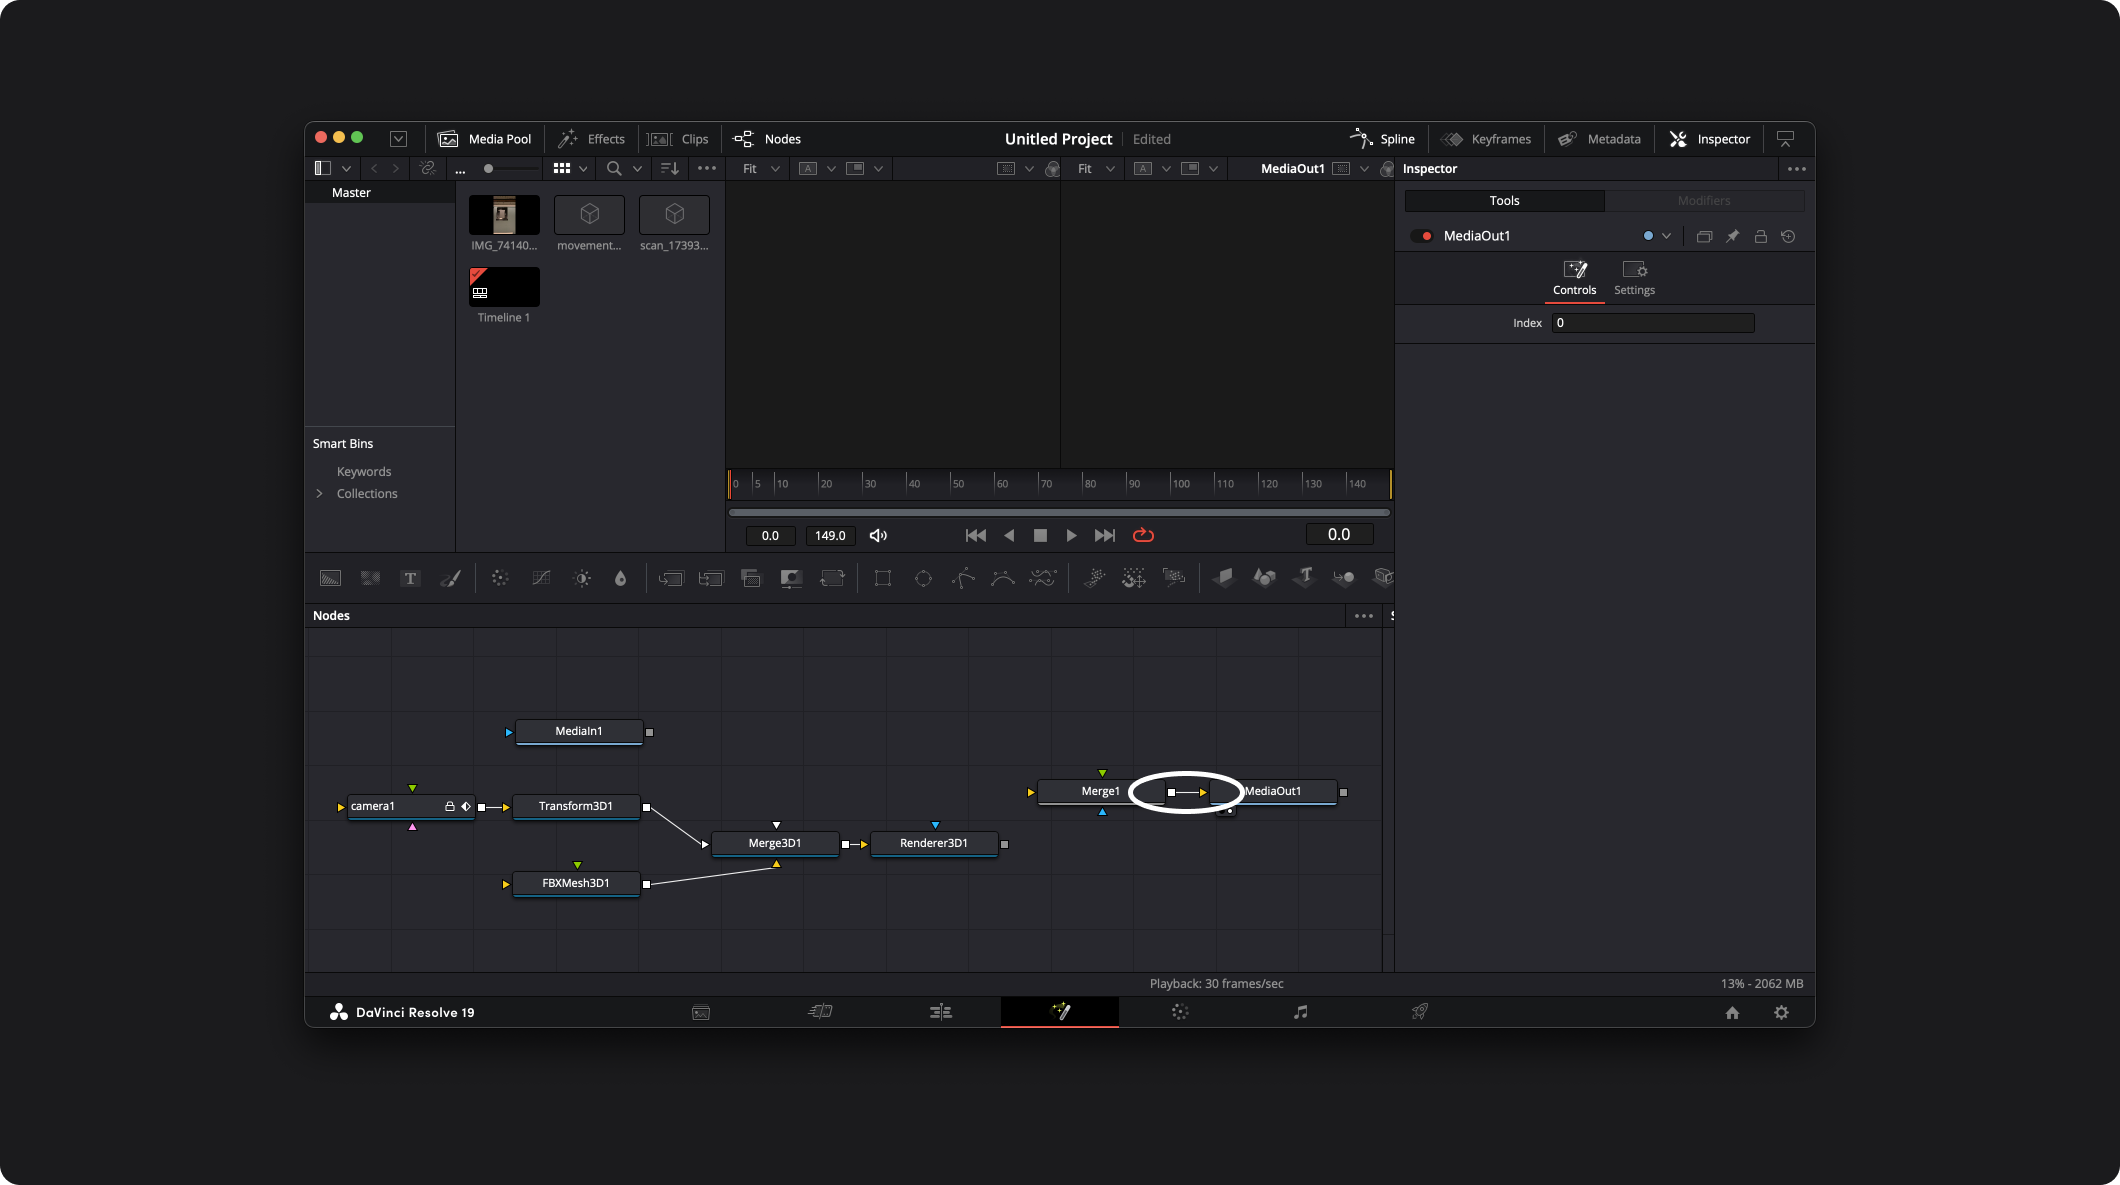
Connect the output (gray box) of Merge1 to the input (yellow triangle) of MediaOut1.
Now we are going to do the merge, add the Renderer3D1 output (gray box) to the Merge1 foreground input (green triangle). We want the scan to be on top of the video.

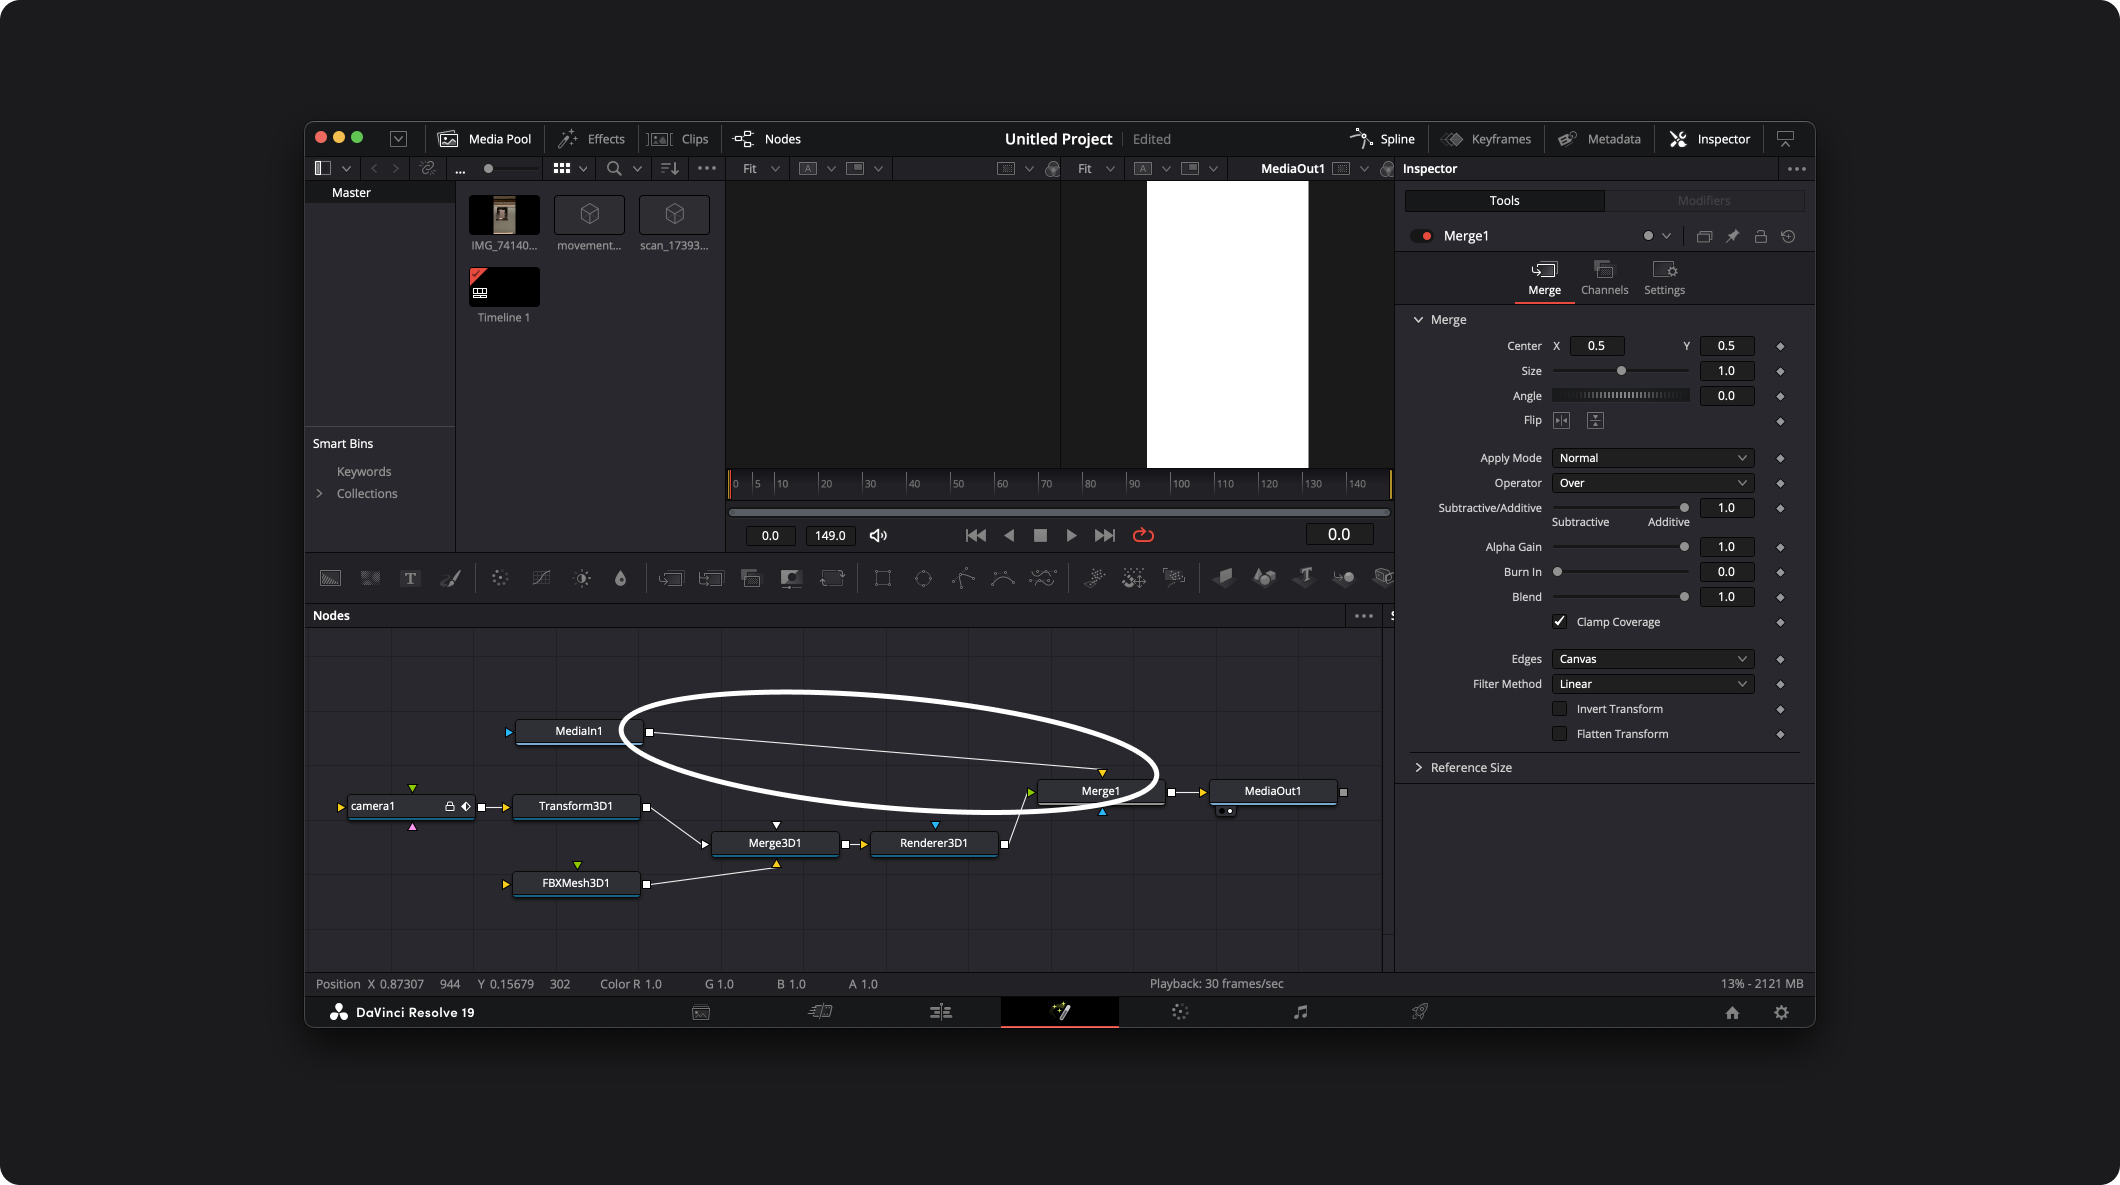
Connect the MediaIn1 output (gray box) to the Merge1 background input (yellow triangle). We want the video to be behind the scan.
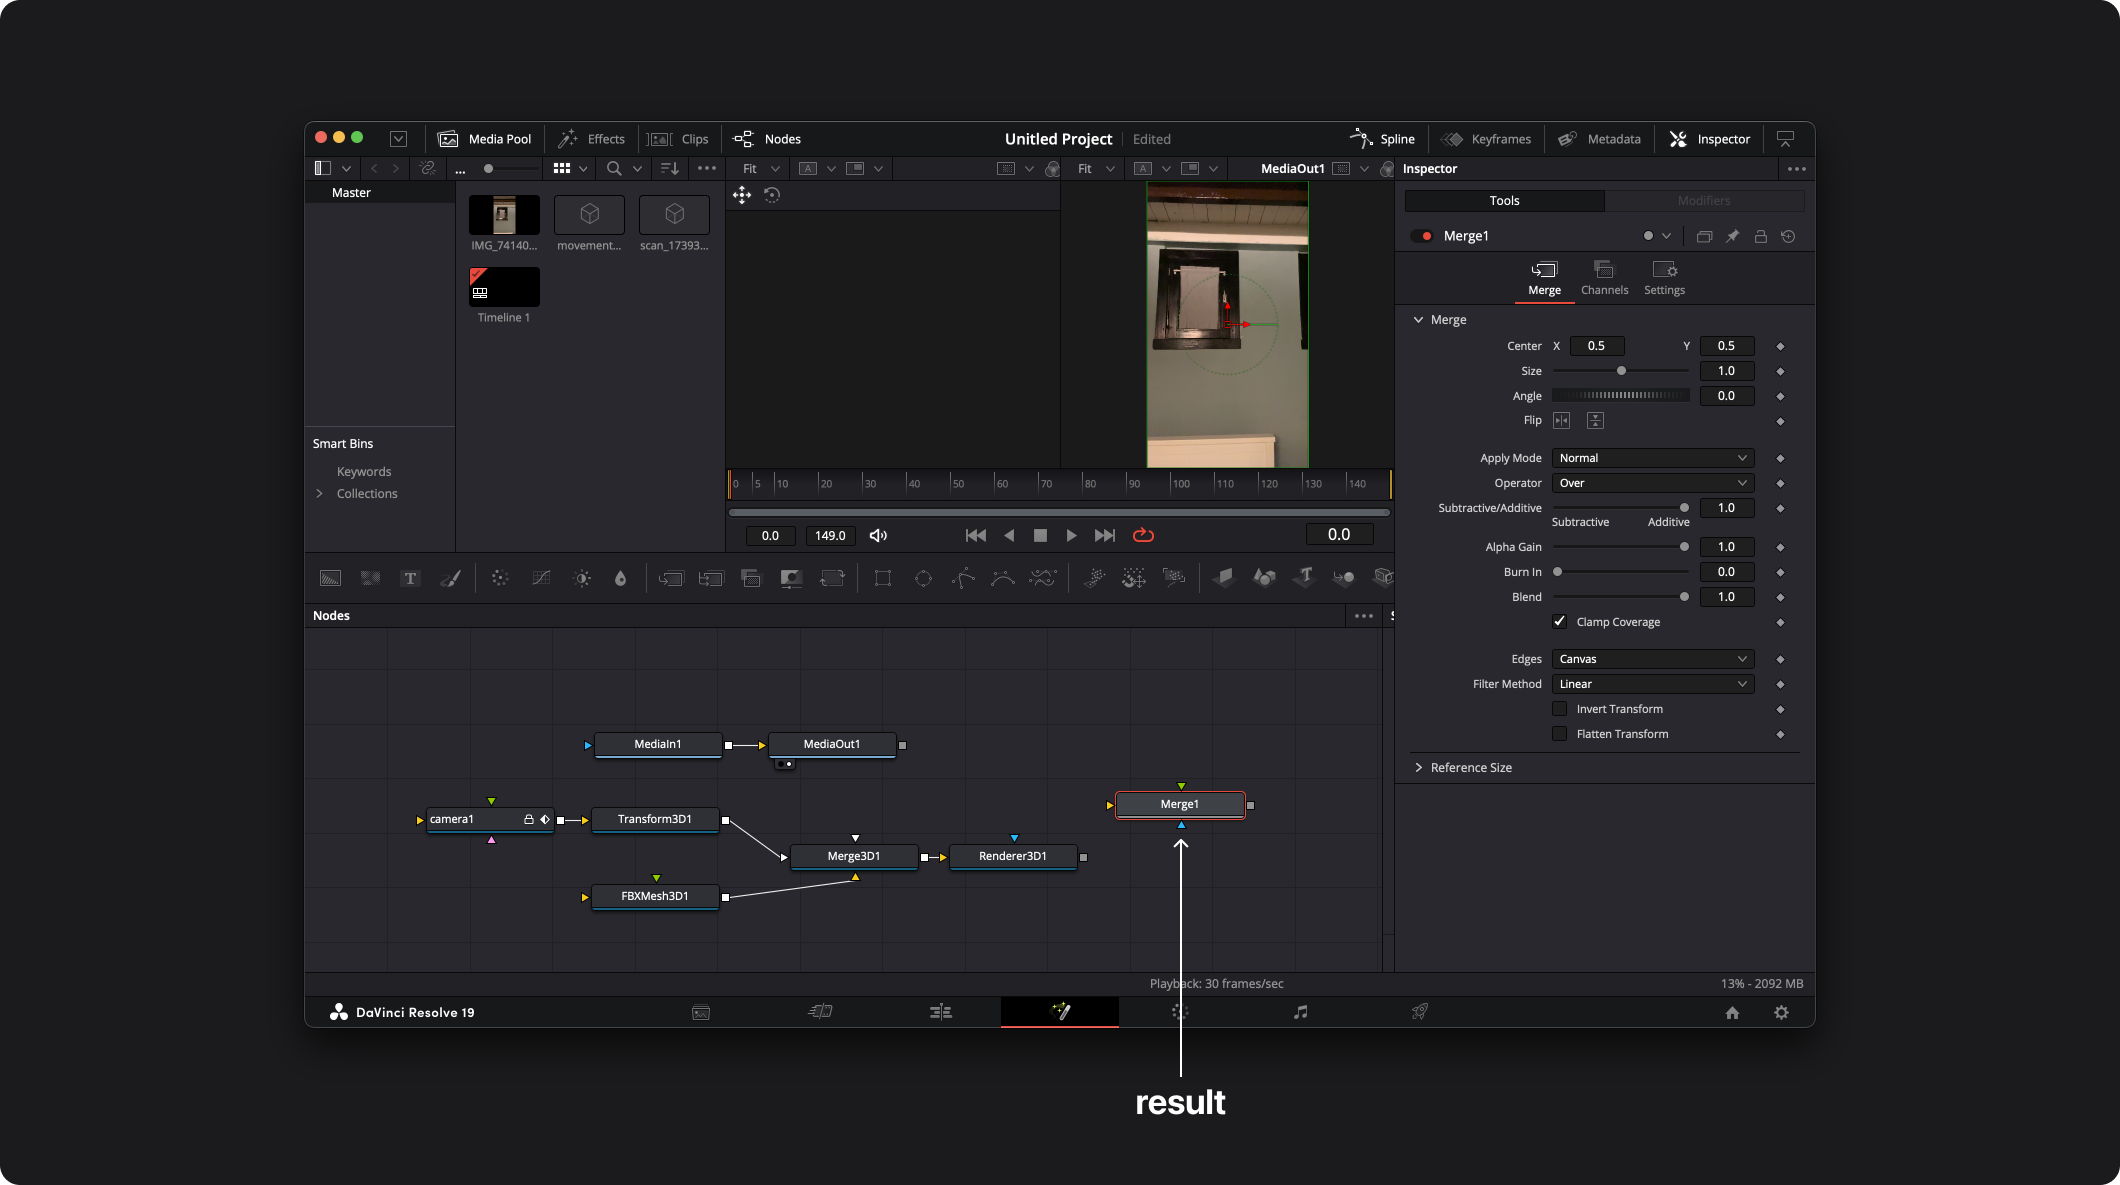
Here it is — we've got our final result!
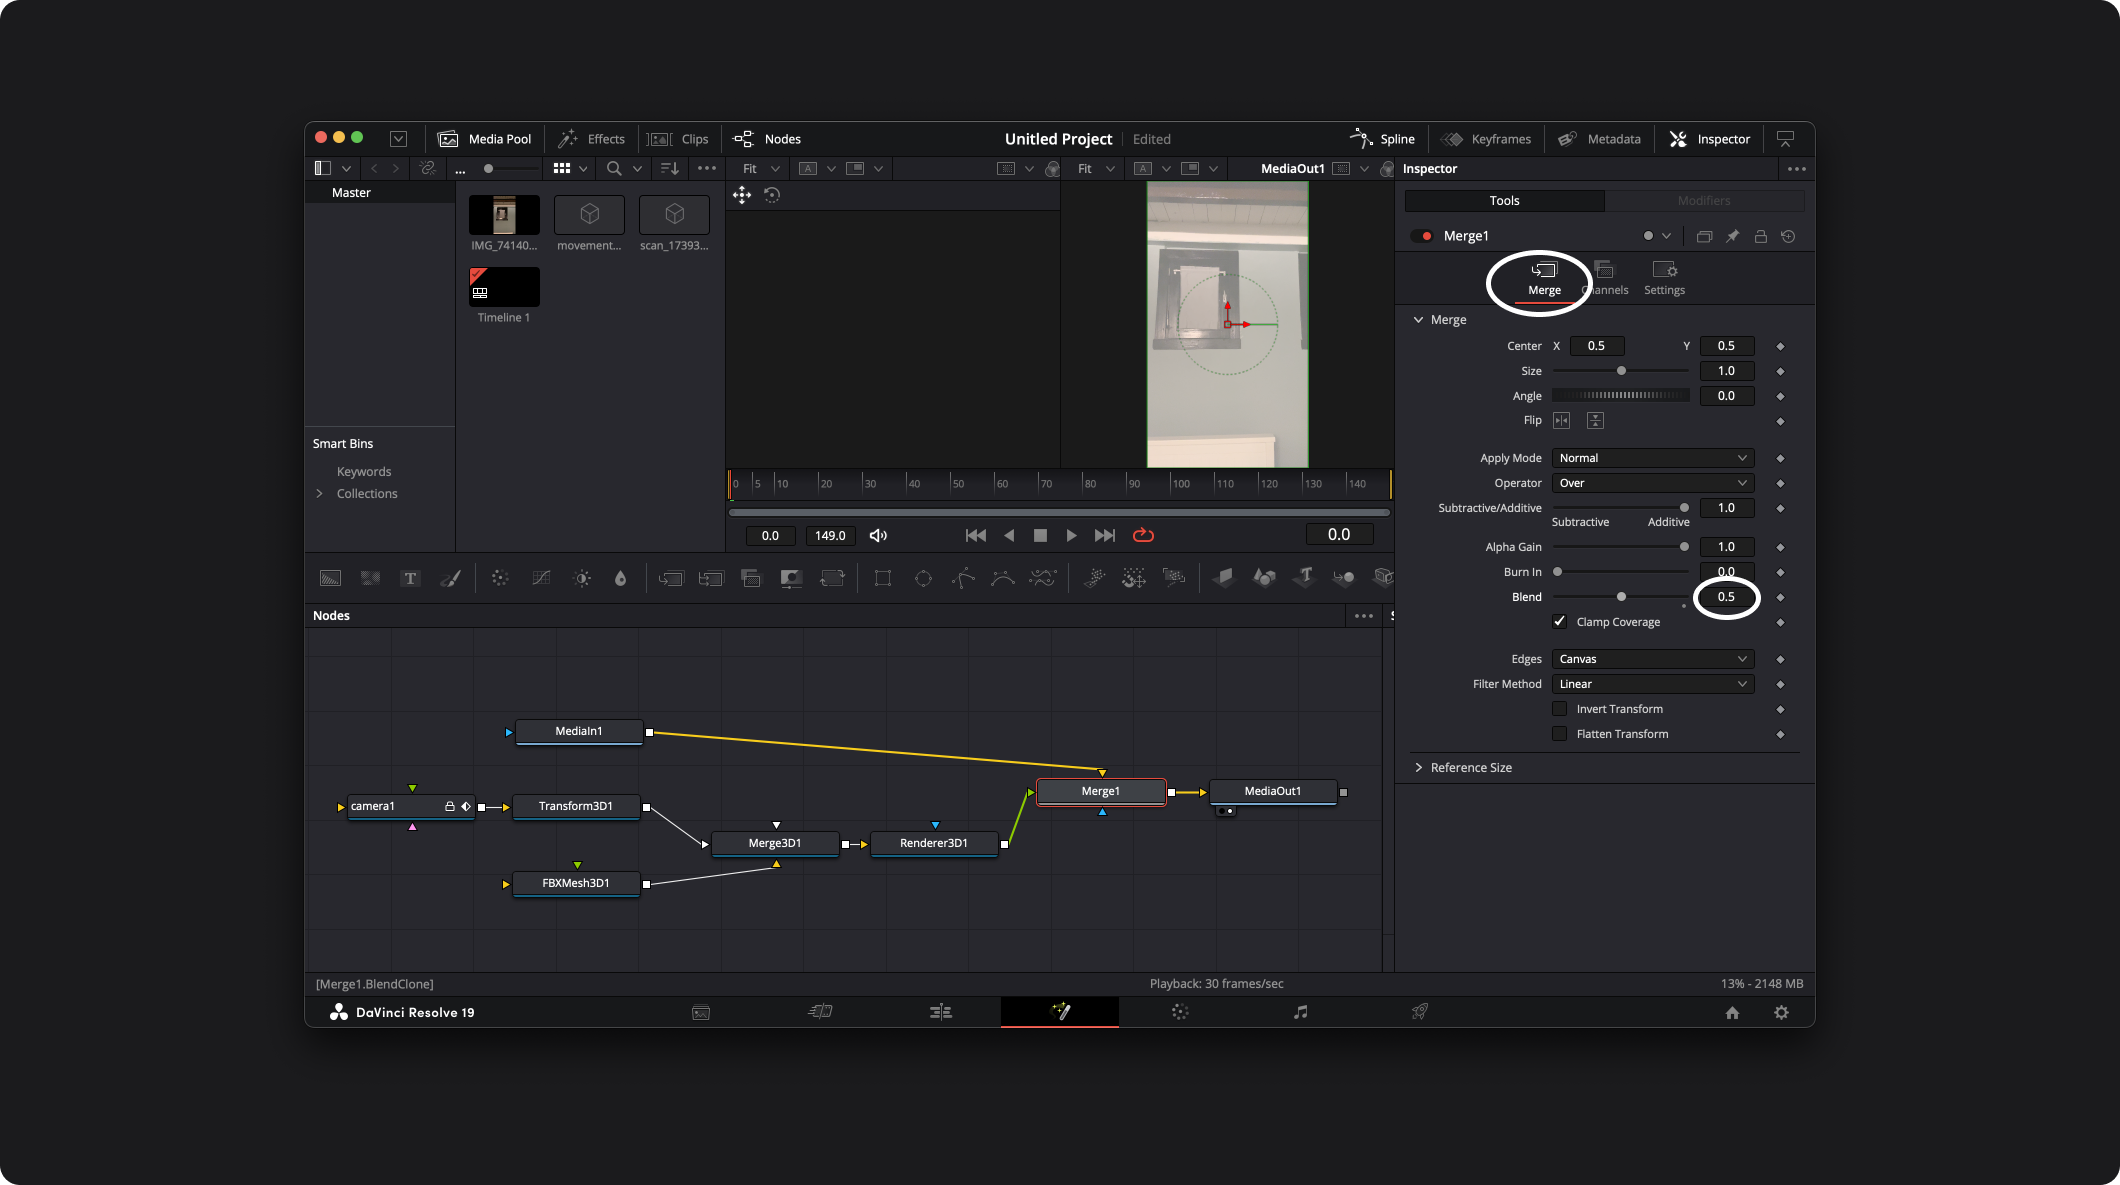
Optional: Adjust the visuals
The scan probably hides too much of the video to get a sense of the tracking. In the Merge1 Inspector, go to the Merge tab. Then you can adjust the Blend setting, for example to 0.5: