Blender
Blender is Omniscient's most comprehensive integration. With the Omniscient Blender add-on, you can control Blender and its camera live from Omniscient, as well as quickly import shots created in Omniscient. Install the add-on to use these features:
Download the add-on
...or download and Install from Disk
Version 3.0.23 for Blender 4.2+
Blender asks you to confirm the installation, then enables the add-on. To reach it, press N in the 3D viewport and open the Omniscient tab in the sidebar.
Overview
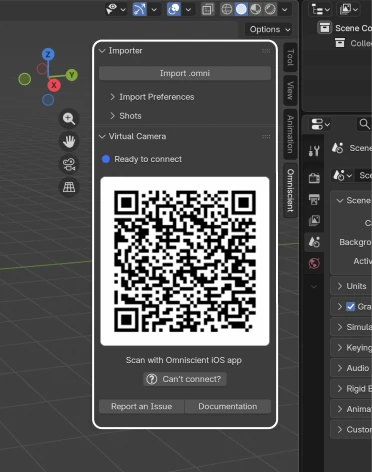
The add-on lives in the Blender sidebar, under the Omniscient tab. It holds two panels, one for each workflow:
- Importer: brings a shot you recorded in Omniscient into Blender from an
.omnifile, with the camera, the scan, the footage and the compositing already set up. - Virtual Camera: connects Blender to Omniscient on an iPhone or iPad, streams the viewport to the device, and lets you drive the Blender camera by moving the device around.
Importer panel

An Omniscient file (.omni) carries the tracked camera, the 3D scan and the source video of a single shot. There are three ways to bring one into Blender:
-
Drag and drop (recommended):
- Drag the
.omnifile into the 3D viewport.
- Drag the
-
The top menu:
- Go to File → Import → Omniscient (.omni).
-
The Importer panel:
- Click Import .omni at the top of the panel.
What gets imported
Each import creates a collection named after the shot. Inside it you get:
- The tracked camera, made the active scene camera, with the source video set as its background image.
- The 3D scan, shaded smooth and carrying a camera projection material.
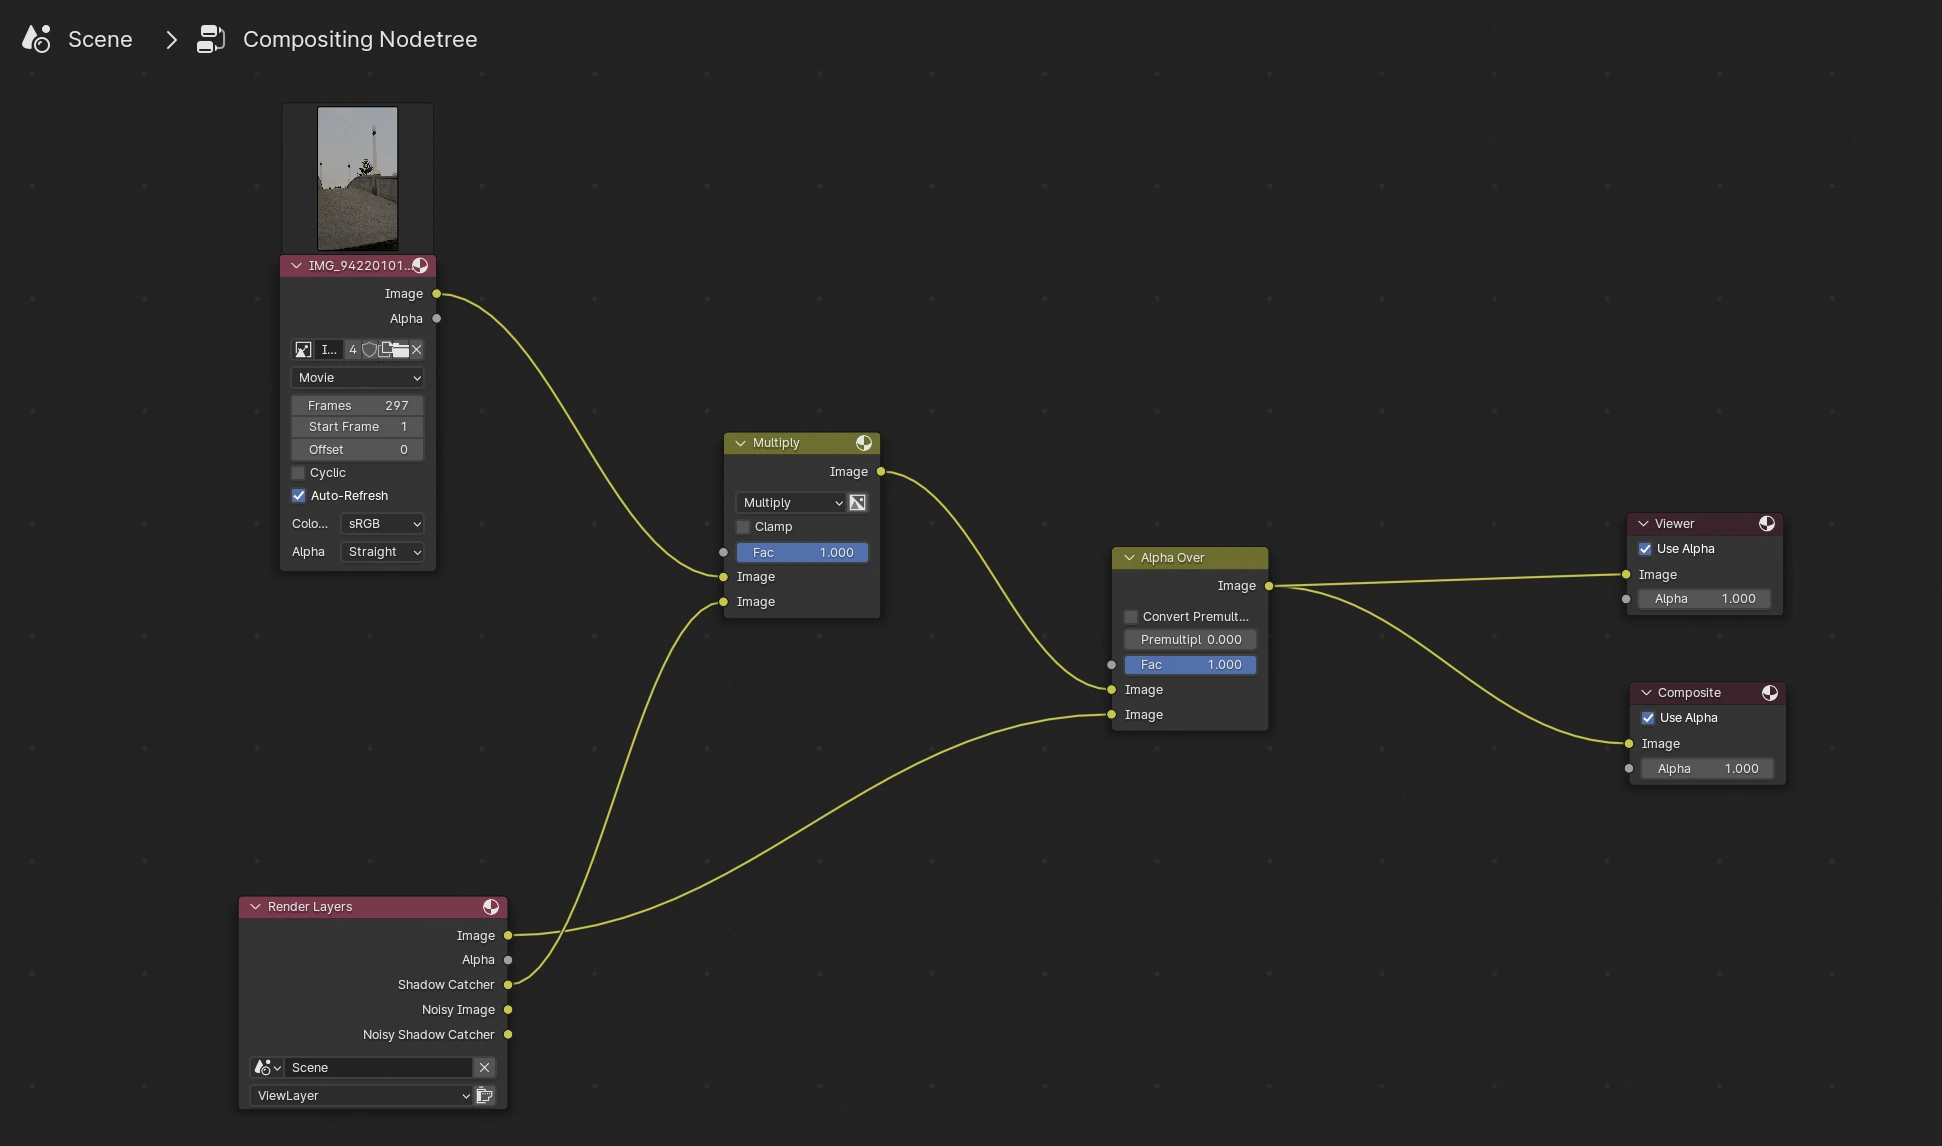
- A compositing graph that layers your render back over the original footage.
The import also matches the render resolution to the video, sets the frame range to the length of the shot, and applies the render engine, motion blur and depth of field from your import preferences.
Import preferences
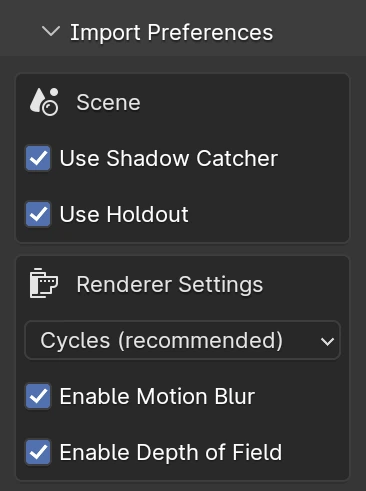
- Scene:
- Use Shadow Catcher: the scan catches the shadows your CG objects cast, without appearing in the render itself. Cycles only, so the option is hidden when another engine is selected.
- Use Holdout: the scan punches a hole through the render wherever it sits, so the footage below shows through and the scan hides whatever is behind it. Turning on Shadow Catcher turns this off.
- Renderer Settings:
- Render Engine: the engine the scene switches to on import. Cycles is recommended, and Shadow Catcher is only available there.
- Enable Motion Blur: turns on motion blur in the render settings.
- Enable Depth of Field: turns on depth of field on the imported camera. Focus distance and aperture are keyframed from the values your device recorded.
- Camera Settings:
- Bake Camera Keyframes: bakes the camera animation to one keyframe per frame at import, rather than leaving it driven by the Alembic cache. Turn this on if you plan to export the camera to another application.
The import settings only affect the import process and will not impact shots that are already imported.
Shots

- Shot list: every shot imported into the scene. Selecting one makes its camera the scene camera and restores the settings saved with it.
- Projection: the camera projection settings for the selected shot, including holding the projection on a chosen frame instead of following the timeline. To see the projection in the viewport, set your viewport shading to Material Preview.
The add-on automatically creates a camera projection shader to project the video onto the mesh, enhancing bounces, reflections, and refractions.
Multiple shots can project onto the mesh if they were done using the same scan.
Compositing
When a shot is imported using the add-on, a compositing graph is automatically set up.
It merges your 3D models over the original video and, if enabled, applies the shadow catcher.
Virtual Camera panel
The Virtual Camera panel connects Blender to Omniscient running on an iPhone or iPad over your local network. Blender shows a QR code, you scan it in the app, and the device becomes both a live viewport and a camera controller: move the device and the Blender camera follows, and you can record takes straight onto the timeline.
For setup and usage, see the Blender Virtual Camera guide.
FAQ
How can I ensure camera animations are included when exporting from Blender as .fbx?
If camera animations are not included in your FBX file, the likely cause is Blender's handling of live animations from Alembic files. The camera is driven by the Alembic cache rather than by keyframes, and the FBX exporter has nothing to write.
The fix is to bake the animation, which creates a keyframe for every frame and preserves the motion through the export.
Turn on Bake Camera Keyframes in the import preferences to have the add-on do this for you at import. For a shot already in the scene, select the camera, press F3 to open the search, then choose Bake Action.
Does the 3D scan include textures on the mesh?
If you are using our app for scanning rooms or objects, you might notice that the resulting 3D mesh does not include textures.
At present, our app generates a 3D mesh but does not provide textures with the scans.
This is something we are planning to include in a future update.
Why does my landscape shot appear as portrait?
Disable the Portrait Orientation Lock on your device before recording. If it is enabled, the shot may appear rotated after import.
See it in a project
Watch the whole workflow end to end, from scanning a location on an iPhone to the finished Blender render: Blender camera tracking with an iPhone.